Logging and screenshots
In this tutorial, we will learn how to identify the causes of failing tests by adding additional logs and screenshots.
Let's recall an example that was already used in one of the previous lessons. Opening the tutorial app
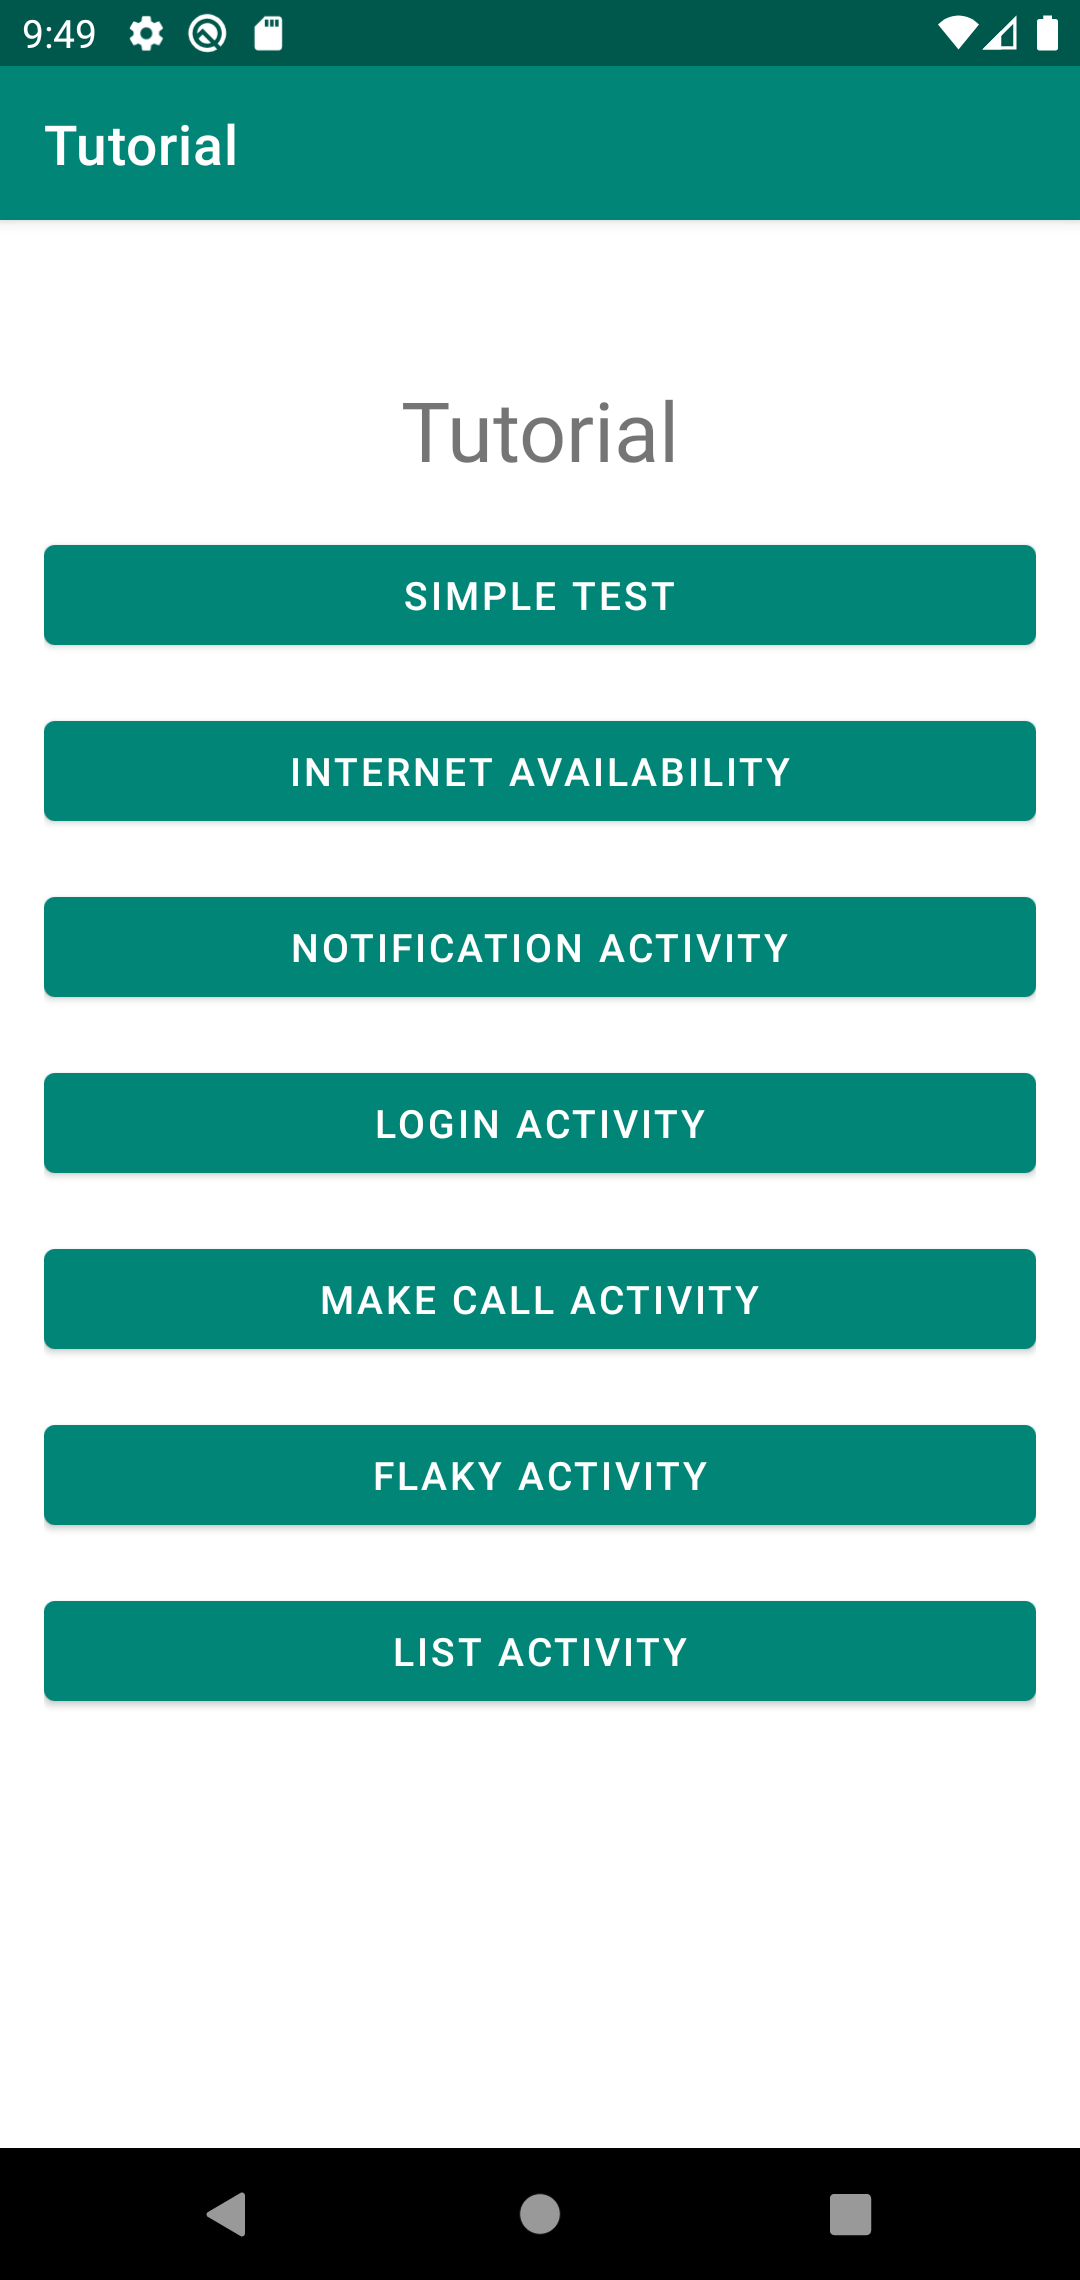
and click on the Login Activity button

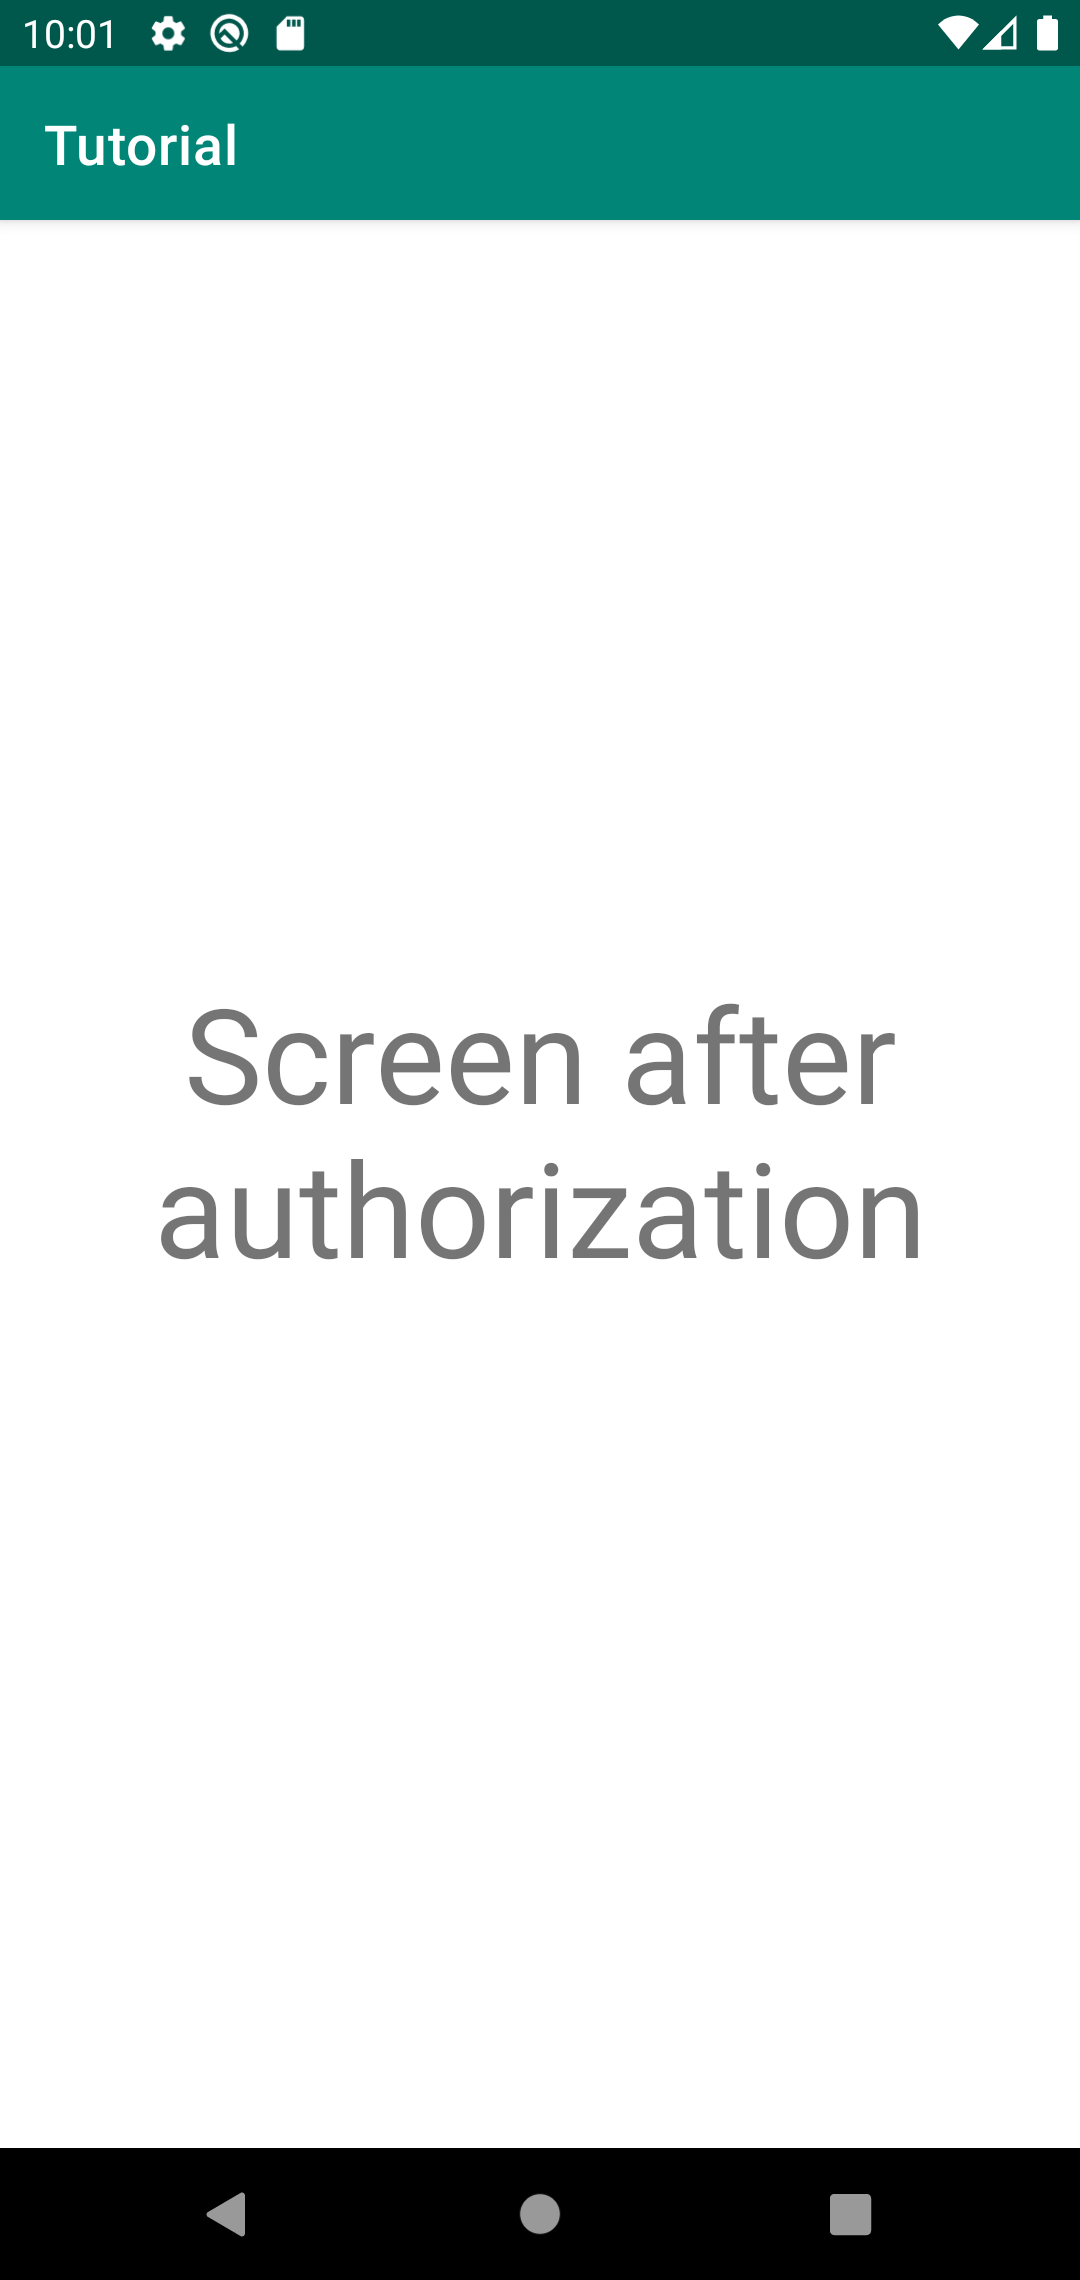
On this screen, you can enter your login and password, and if they are correct, the screen after authorization will open. In this case, the following are considered correct: a login with a length of three characters, a password - from six.
External system for test data
We have already written tests for this screen, they are in the class LoginActivityTest
package com.kaspersky.kaspresso.tutorial

import androidx.test.ext.junit.rules.activityScenarioRule
import com.kaspersky.kaspresso.testcases.api.testcase.TestCase
import com.kaspersky.kaspresso.tutorial.afterlogin.AfterLoginActivity
import com.kaspersky.kaspresso.tutorial.login.LoginActivity
import org.junit.Rule
import org.junit.Test

class LoginActivityTest : TestCase() {

    @get:Rule
    val activityRule = activityScenarioRule<MainActivity>()

    @Test
    fun loginSuccessfulIfUsernameAndPasswordCorrect() {
        run {
            step("Try to login with correct username and password") {
                scenario(
                    LoginScenario(
                        username = "123456",
                        password = "123456"
                    )
                )
            }
            step("Check current screen") {
                device.activities.isCurrent(AfterLoginActivity::class.java)
            }
        }
    }

    @Test
    fun loginUnsuccessfulIfUsernameIncorrect() {
        run {
            step("Try to login with incorrect username") {
                scenario(
                    LoginScenario(
                        username = "12",
                        password = "123456"
                    )
                )
            }
            step("Check current screen") {
                device.activities.isCurrent(LoginActivity::class.java)
            }
        }
    }

    @Test
    fun loginUnsuccessfulIfPasswordIncorrect() {
        run {
            step("Try to login with incorrect password") {
                scenario(
                    LoginScenario(
                        username = "123456",
                        password = "12345",
                    )
                )
            }
            step("Check current screen") {
                device.activities.isCurrent(LoginActivity::class.java)
            }
        }
    }
}
In this test, we ourselves create a username and password with which we will log in. But there are times when we get the data for the test from some external system. For example, a project may have some kind of service that generates a login and password for logging in, returns it to us, and we use them for testing.
Let's simulate this situation. Let's create a class that returns login data - login and password.
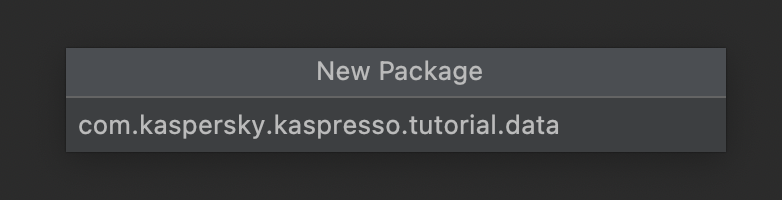
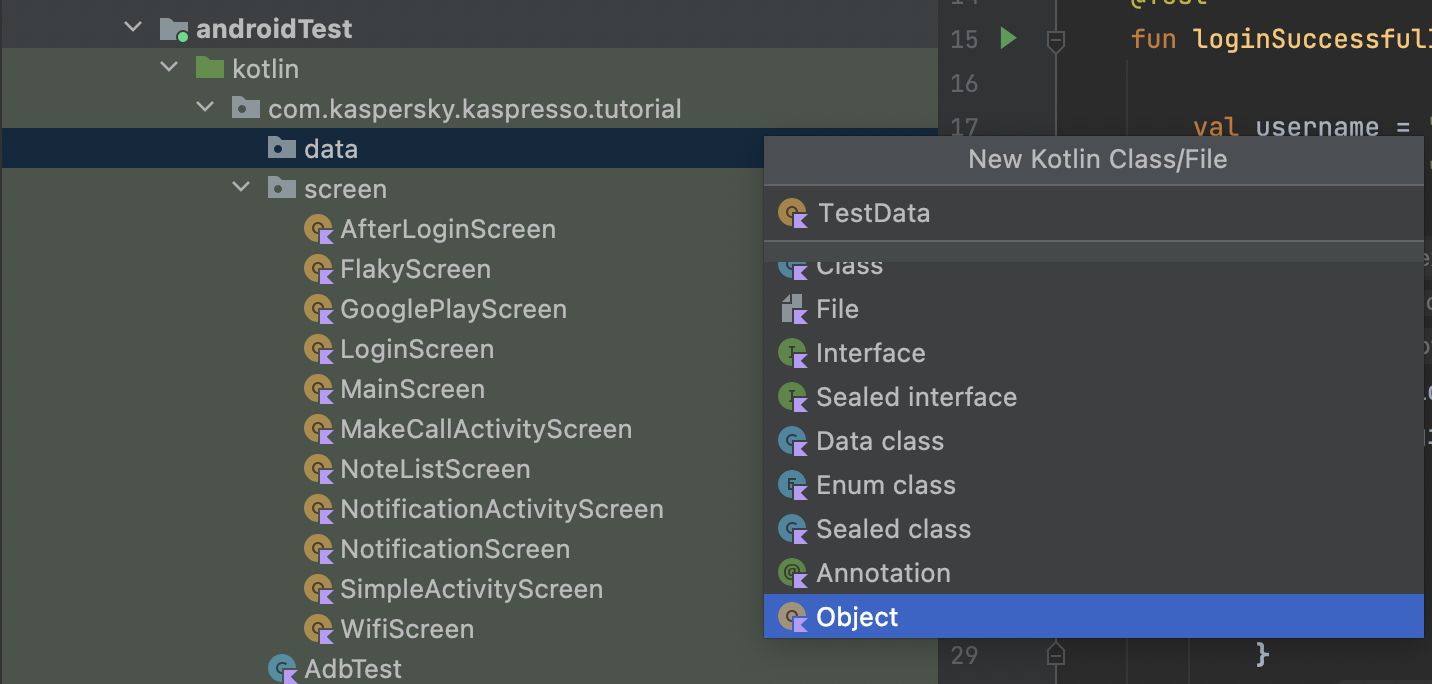
Let's create another package data in the com.kaspersky.kaspresso.tutorial package
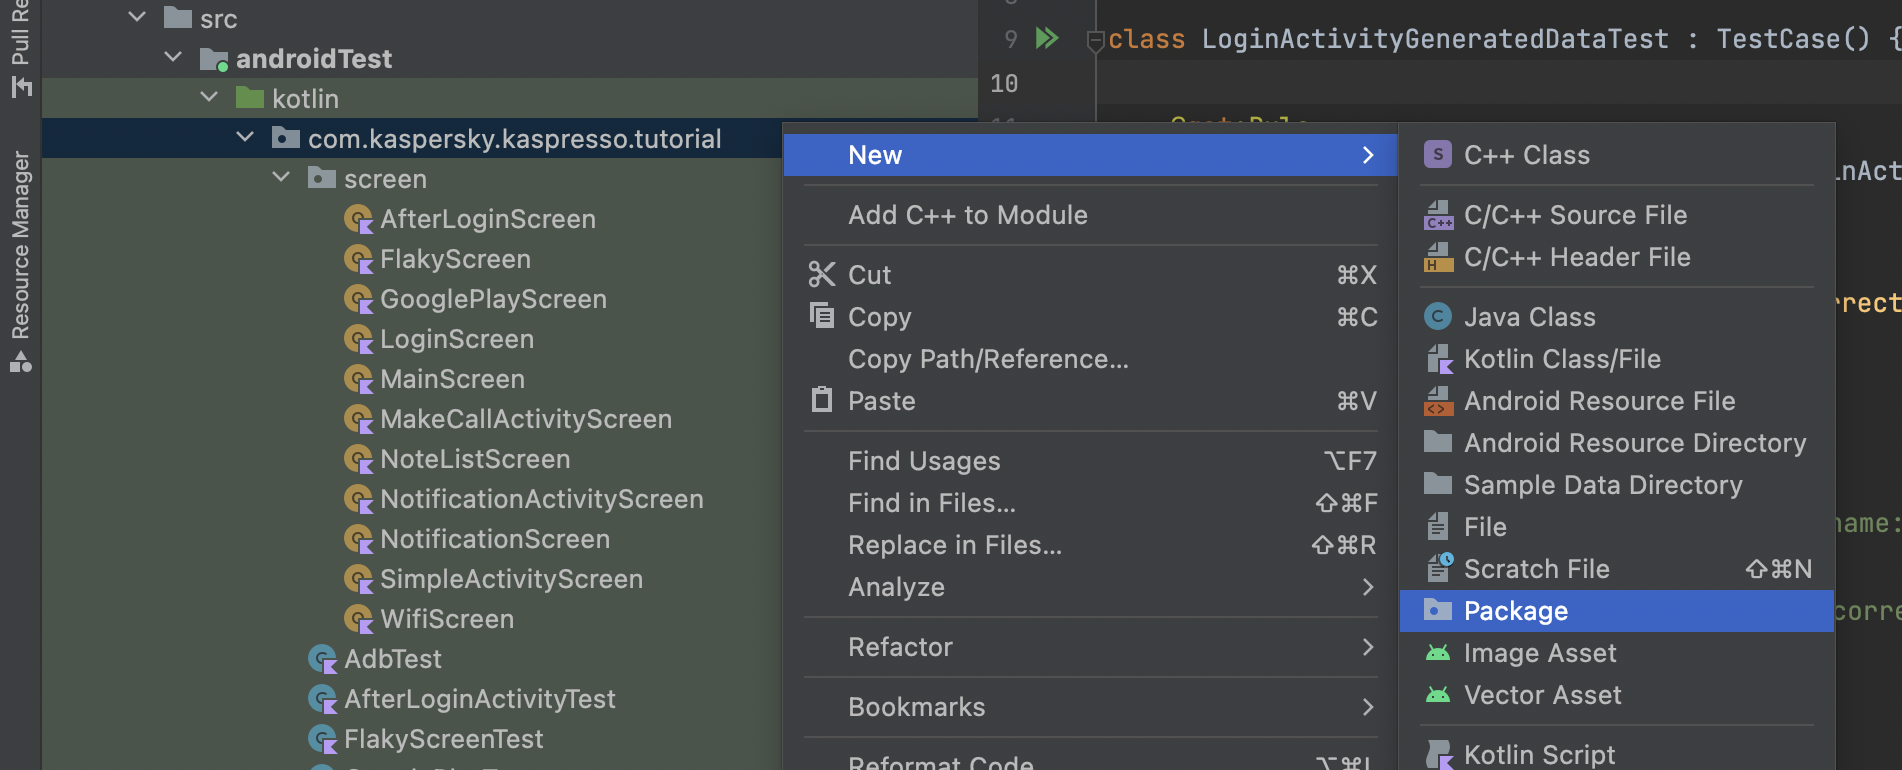
In the created package, add the TestData class, select the type Object
As we said earlier, here we will only simulate the situation when we receive data for the test from an external system. In the created class, we will have two methods: one of them returns the login, the other returns the password. In real projects, we would request this data from the server, and we would not have been able to change the internal implementation of the possibility. That is, now we ourselves will indicate which login and password the system will return, but we imagine that this is a “black box” for us, and we do not know what values will be received.
We add two methods in this class and let them return the correct login and password:
package com.kaspersky.kaspresso.tutorial.data

object TestData {

    fun generateUsername(): String = "Admin"

    fun generatePassword(): String = "123456"
}
TestData class. Let's call the test class LoginActivityGeneratedDataTest. We can copy the successful login test from the LoginActivityTest class
package com.kaspersky.kaspresso.tutorial

import androidx.test.ext.junit.rules.activityScenarioRule
import com.kaspersky.kaspresso.testcases.api.testcase.TestCase
import com.kaspersky.kaspresso.tutorial.afterlogin.AfterLoginActivity
import org.junit.Rule
import org.junit.Test

class LoginActivityGeneratedDataTest : TestCase() {

    @get:Rule
    val activityRule = activityScenarioRule<MainActivity>()

    @Test
    fun loginSuccessfulIfUsernameAndPasswordCorrect() {
        run {
            step("Try to login with correct username and password") {
                scenario(
                    LoginScenario(
                        username = "123456",
                        password = "123456"
                    )
                )
            }
            step("Check current screen") {
                device.activities.isCurrent(AfterLoginActivity::class.java)
            }
        }
    }
}
Here we use a hardcoded username and password, let's get them from the TestData class
package com.kaspersky.kaspresso.tutorial

import androidx.test.ext.junit.rules.activityScenarioRule
import com.kaspersky.kaspresso.testcases.api.testcase.TestCase
import com.kaspersky.kaspresso.tutorial.afterlogin.AfterLoginActivity
import com.kaspersky.kaspresso.tutorial.data.TestData
import org.junit.Rule
import org.junit.Test

class LoginActivityGeneratedDataTest : TestCase() {

    @get:Rule
    val activityRule = activityScenarioRule<MainActivity>()

    @Test
    fun loginSuccessfulIfUsernameAndPasswordCorrect() {
        run {
            val username = TestData.generateUsername()
            val password = TestData.generatePassword()
            step("Try to login with correct username and password") {
                scenario(
                    LoginScenario(
                        username = username,
                        password = password
                    )
                )
            }
            step("Check current screen") {
                device.activities.isCurrent(AfterLoginActivity::class.java)
            }
        }
    }
}
Analysis of failed tests
We checked that if the system returns correct data, then the test passes. Let's change the TestData class so that it returns incorrect values
package com.kaspersky.kaspresso.tutorial.data

object TestData {

    fun generateUsername(): String = "Adm"

    fun generatePassword(): String = "123"
}
We have already said that in real projects we cannot influence the external system, and sometimes it can return incorrect data, which will cause the test to fail. If the test fails, then you need to analyze and determine what the problem was: in the tests, in a malfunctioning application, or in an external system. Let's try to determine this from the logs. Open Logcat and filter the log by tag KASPRESSO
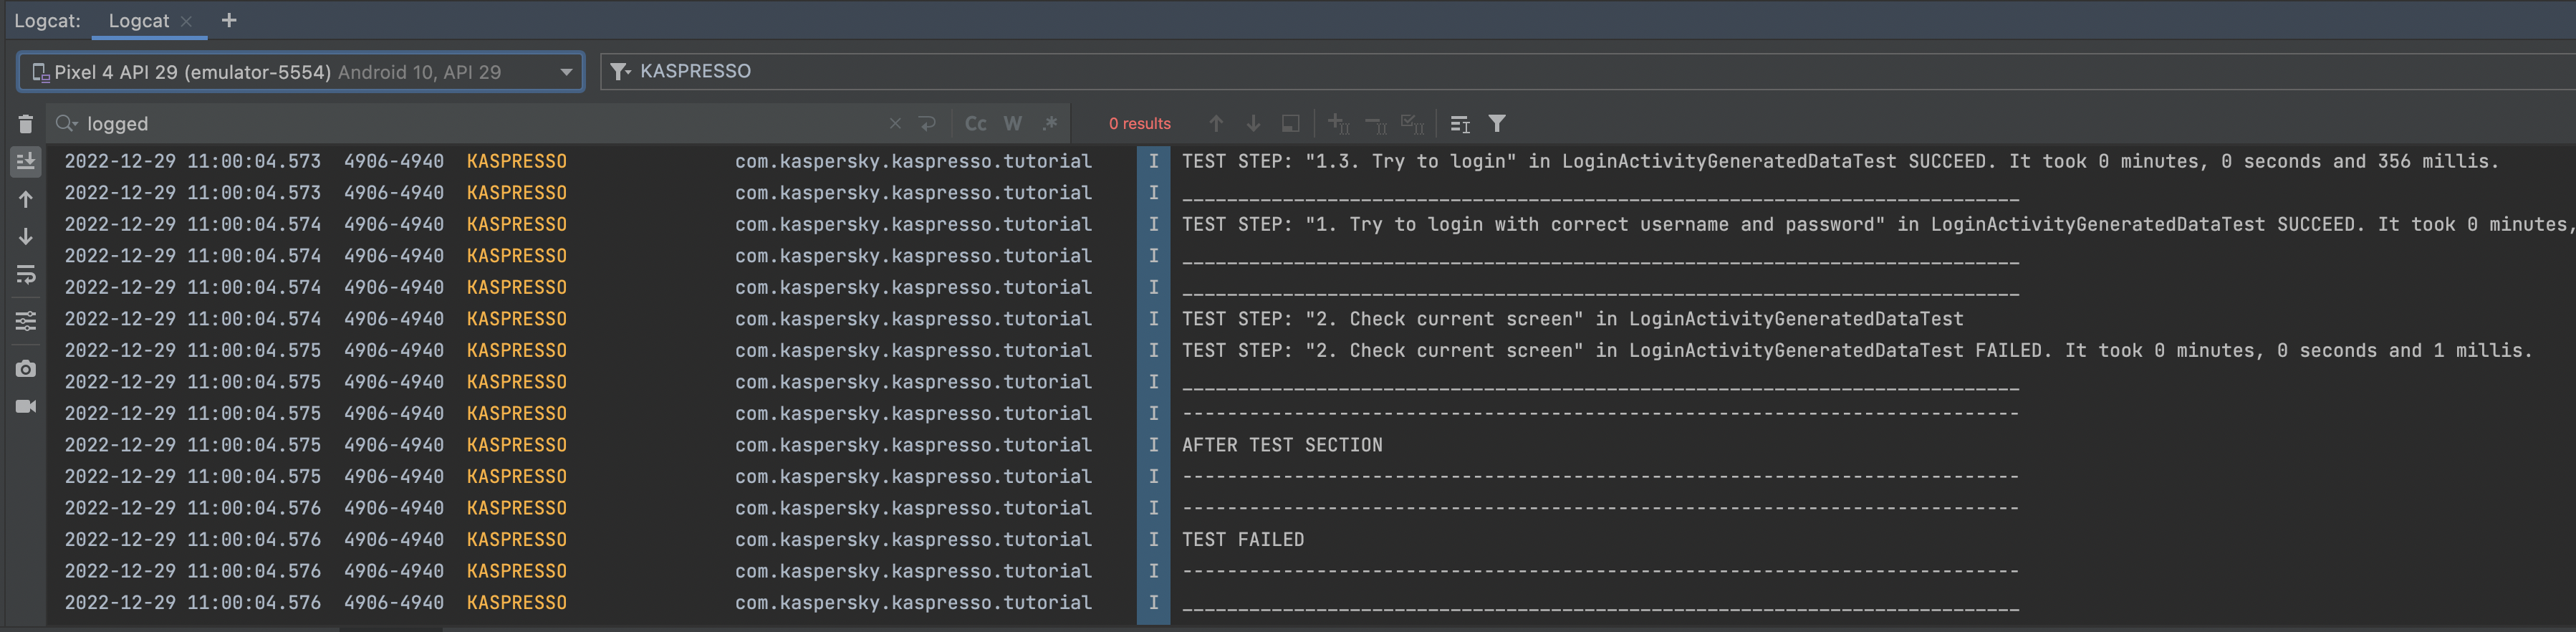
What do we see from here? The attempt to log in was successful, but the check that the correct screen was opened after a successful login failed.
At the same time, it is completely unclear from here why the problem arose. We do not see what data was used to log in, whether they are really correct, and it is not clear how to solve the problem that has arisen. The result would be more understandable if the logs contained information - which particular login and password were used during testing.
Adding logs
If we need to add some of our information to the logs, we can use the testLogger object, on which we need to call the i method (from the word info), and pass the text to be logged as a parameter.
Our login and password are generated before the step step("Try to login with correct username and password") we can display a message in the log at this point about what data was generated
package com.kaspersky.kaspresso.tutorial

import androidx.test.ext.junit.rules.activityScenarioRule
import com.kaspersky.kaspresso.testcases.api.testcase.TestCase
import com.kaspersky.kaspresso.tutorial.afterlogin.AfterLoginActivity
import com.kaspersky.kaspresso.tutorial.data.TestData
import org.junit.Rule
import org.junit.Test

class LoginActivityGeneratedDataTest : TestCase() {

    @get:Rule
    val activityRule = activityScenarioRule<MainActivity>()

    @Test
    fun loginSuccessfulIfUsernameAndPasswordCorrect() {
        run {
            val username = TestData.generateUsername()
            val password = TestData.generatePassword()

            testLogger.i("Generated data. Username: $username, Password: $password")

            step("Try to login with correct username and password") {
                scenario(
                    LoginScenario(
                        username = username,
                        password = password
                    )
                )
            }
            step("Check current screen") {
                device.activities.isCurrent(AfterLoginActivity::class.java)
            }
        }
    }
}
In this line testLogger.i("Generated data. Username: $username, Password: $password") we call the i method on the testLogger object, passing the string "Generated data. Username: $username, Password: $password") as a parameter, where instead of $username and $password the values will be substituted login and password variables.
Info
You can read more about how to form a string using variables and methods in documentation
Let's run the test again and see the logs:
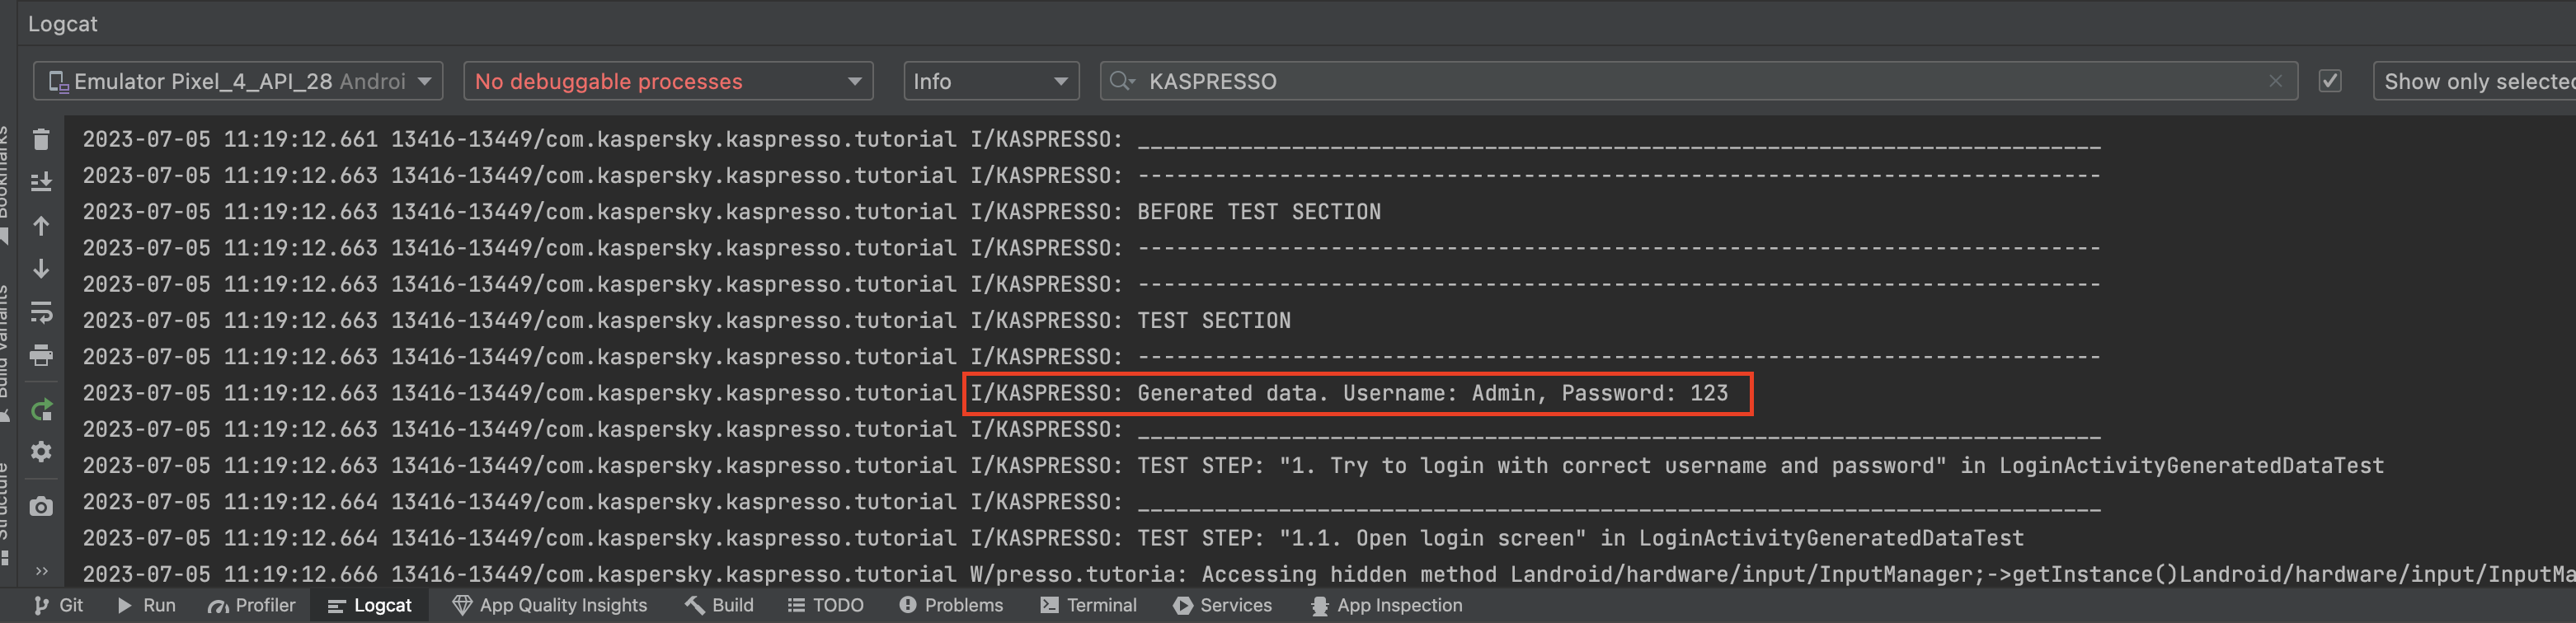
After TEST SECTION you can see our log, which is displayed with the KASPRESSO_TEST tag. This log shows that the generated data is incorrect (the password is too short), which means that the test fails due to an external system, and the problem needs to be solved in it.
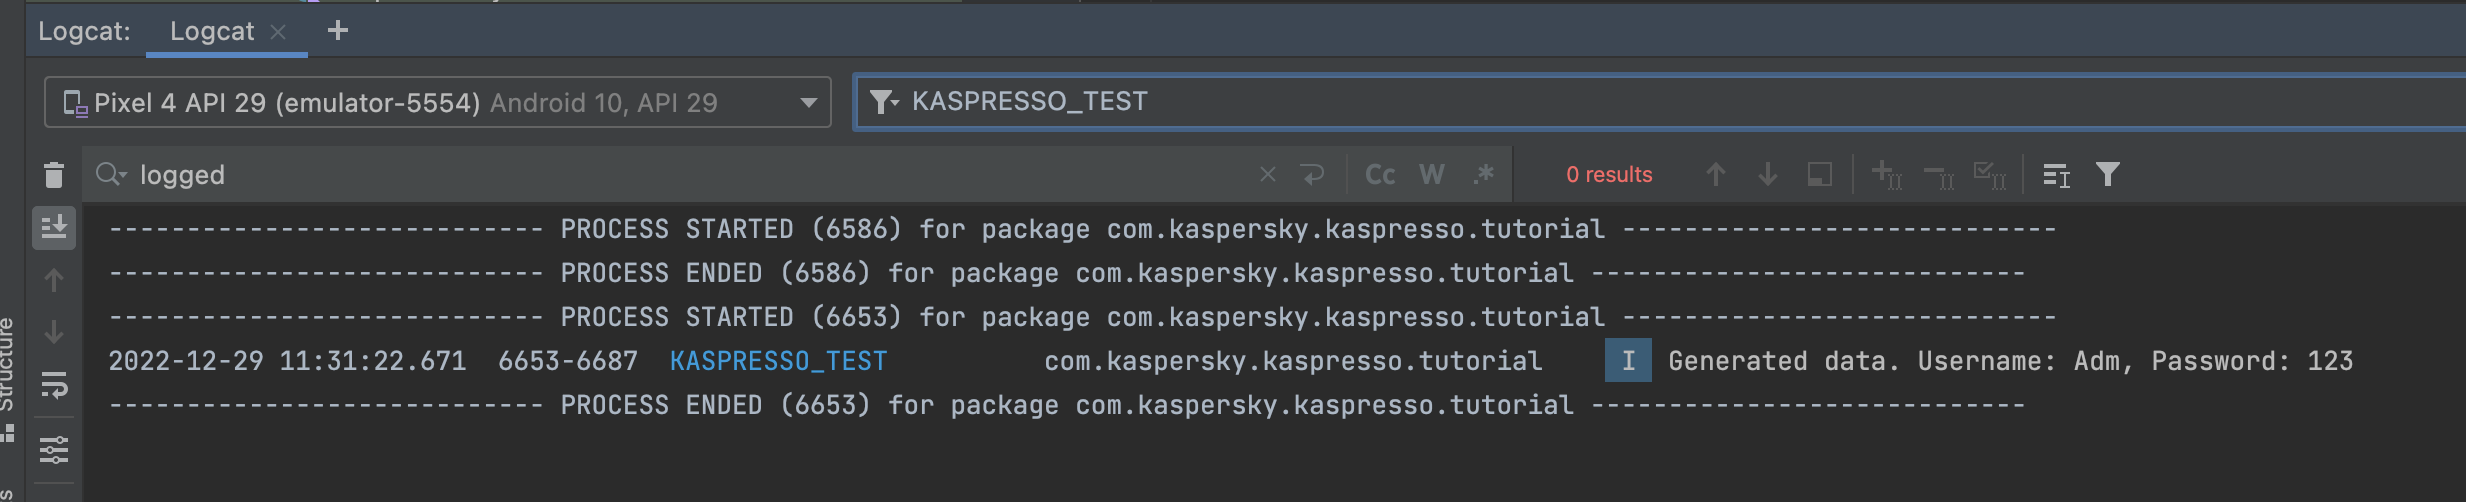
If you don't want to watch the entire log, and you are only interested in messages added by you, you can filter the log by the tag KASPRESSO_TEST
Screenshots
Logs are really very useful when analyzing tests and finding bugs, but there are times when it's much easier to find a problem from screenshots. If during the test a screenshot was saved at each step, and then we could look at them in some folder, then finding errors would be much easier.
In Kaspresso, it is possible to take screenshots at any step during the test, for this it is enough to call the device.screenshots.take("file_name") method. Instead of file_name, you need to specify the name of the screenshot file, by which you can find it. Let's add screenshots to each LoginScenario step so that we can analyze everything that happened on the screen later.
package com.kaspersky.kaspresso.tutorial

import com.kaspersky.kaspresso.testcases.api.scenario.Scenario
import com.kaspersky.kaspresso.testcases.core.testcontext.TestContext
import com.kaspersky.kaspresso.tutorial.screen.LoginScreen
import com.kaspersky.kaspresso.tutorial.screen.MainScreen

class LoginScenario(
    private val username: String,
    private val password: String
) : Scenario() {

    override val steps: TestContext<Unit>.() -> Unit = {
        step("Open login screen") {
            device.screenshots.take("before_open_login_screen")
            MainScreen {
                loginActivityButton {
                    isVisible()
                    isClickable()
                    click()
                }
            }
            device.screenshots.take("after_open_login_screen")
        }
        step("Check elements visibility") {
            device.screenshots.take("check_elements_visibility")
            LoginScreen {
                inputUsername {
                    isVisible()
                    hasHint(R.string.login_activity_hint_username)
                }
                inputPassword {
                    isVisible()
                    hasHint(R.string.login_activity_hint_password)
                }
                loginButton {
                    isVisible()
                    isClickable()
                }
            }
        }
        step("Try to login") {
            LoginScreen {
                inputUsername {
                    replaceText(username)
                    device.screenshots.take("setup_username")
                }
                inputPassword {
                    replaceText(password)
                    device.screenshots.take("setup_password")
                }
                loginButton {
                    click()
                    device.screenshots.take("after_click_login")
                }
            }
        }
    }
}
In order for screenshots to be saved on the device, the application must have permission to read and write to the smartphone's file system. Therefore, in the test class, we will give the appropriate permission through GrantPermissionRule
package com.kaspersky.kaspresso.tutorial

import androidx.test.ext.junit.rules.activityScenarioRule
import androidx.test.rule.GrantPermissionRule
import com.kaspersky.kaspresso.testcases.api.testcase.TestCase
import com.kaspersky.kaspresso.tutorial.afterlogin.AfterLoginActivity
import com.kaspersky.kaspresso.tutorial.data.TestData
import org.junit.Rule
import org.junit.Test

class LoginActivityGeneratedDataTest : TestCase() {

    @get:Rule
    val activityRule = activityScenarioRule<MainActivity>()

    @get:Rule
    val permissionRule: GrantPermissionRule = GrantPermissionRule.grant(
        android.Manifest.permission.READ_EXTERNAL_STORAGE,
        android.Manifest.permission.WRITE_EXTERNAL_STORAGE
    )

    @Test
    fun loginSuccessfulIfUsernameAndPasswordCorrect() {
        run {
            val username = TestData.generateUsername()
            val password = TestData.generatePassword()

            testLogger.i("Generated data. Username: $username, Password: $password")

            step("Try to login with correct username and password") {
                scenario(
                    LoginScenario(
                        username = username,
                        password = password
                    )
                )
            }
            step("Check current screen") {
                device.activities.isCurrent(AfterLoginActivity::class.java)
            }
        }
    }
}
Let's run the test again.
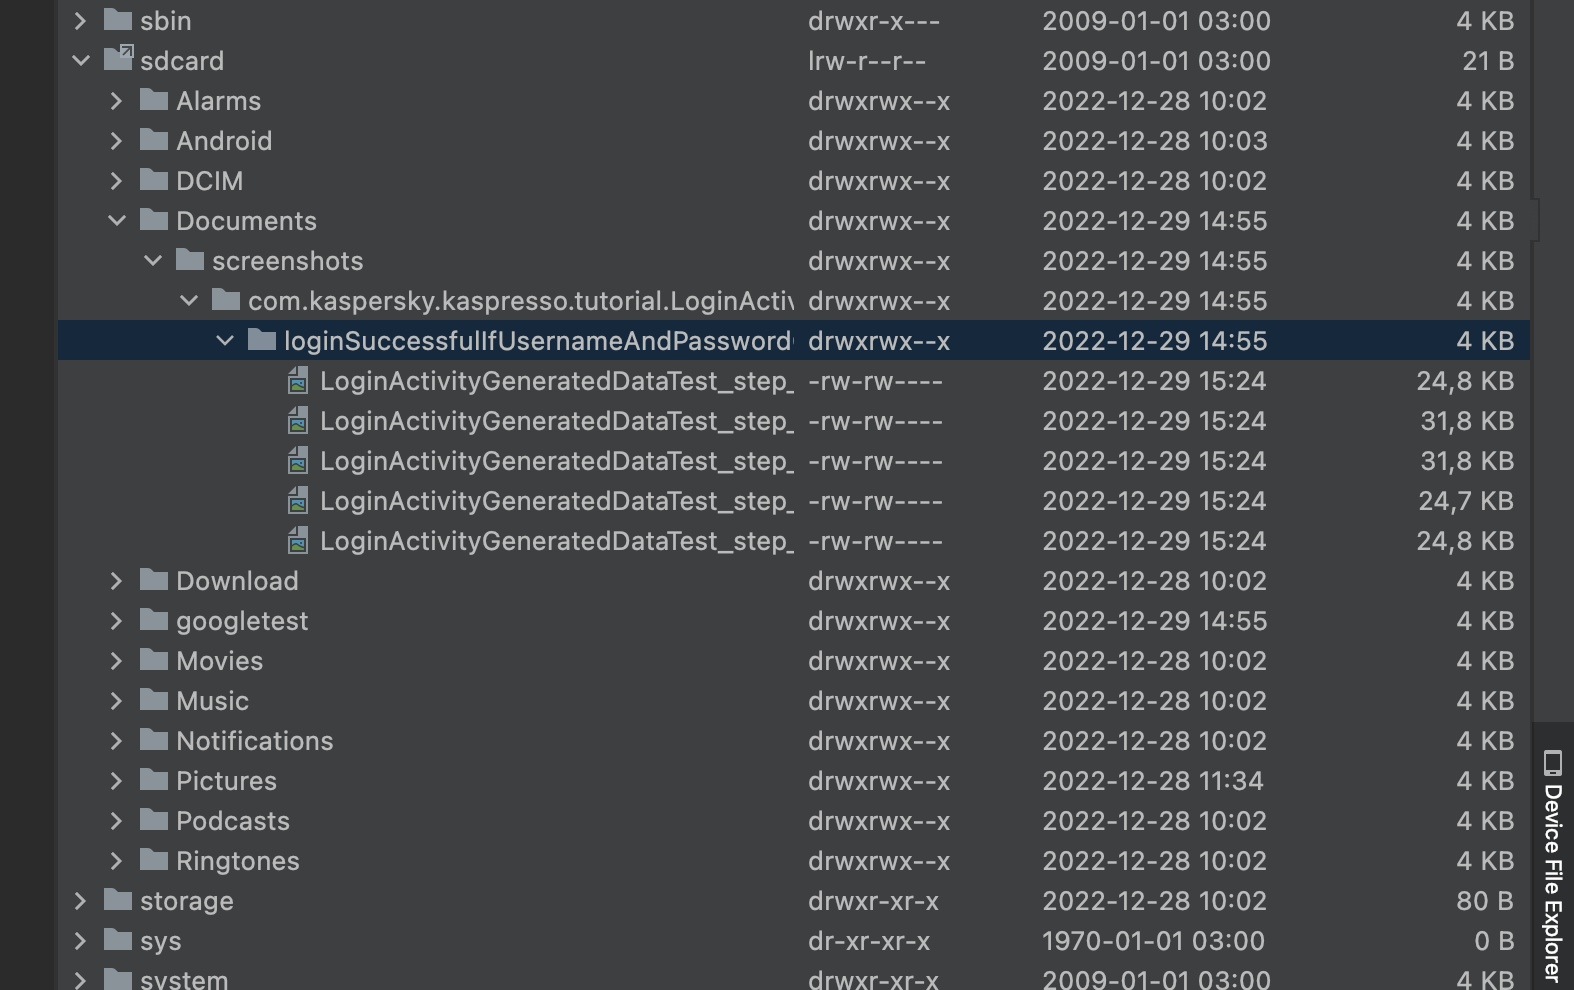
After running the test, go to Device File Explorer and open the sdcard/Documents/screenshots folder. If it is not displayed for you, then right-click on the sdcard folder and click Synchronize
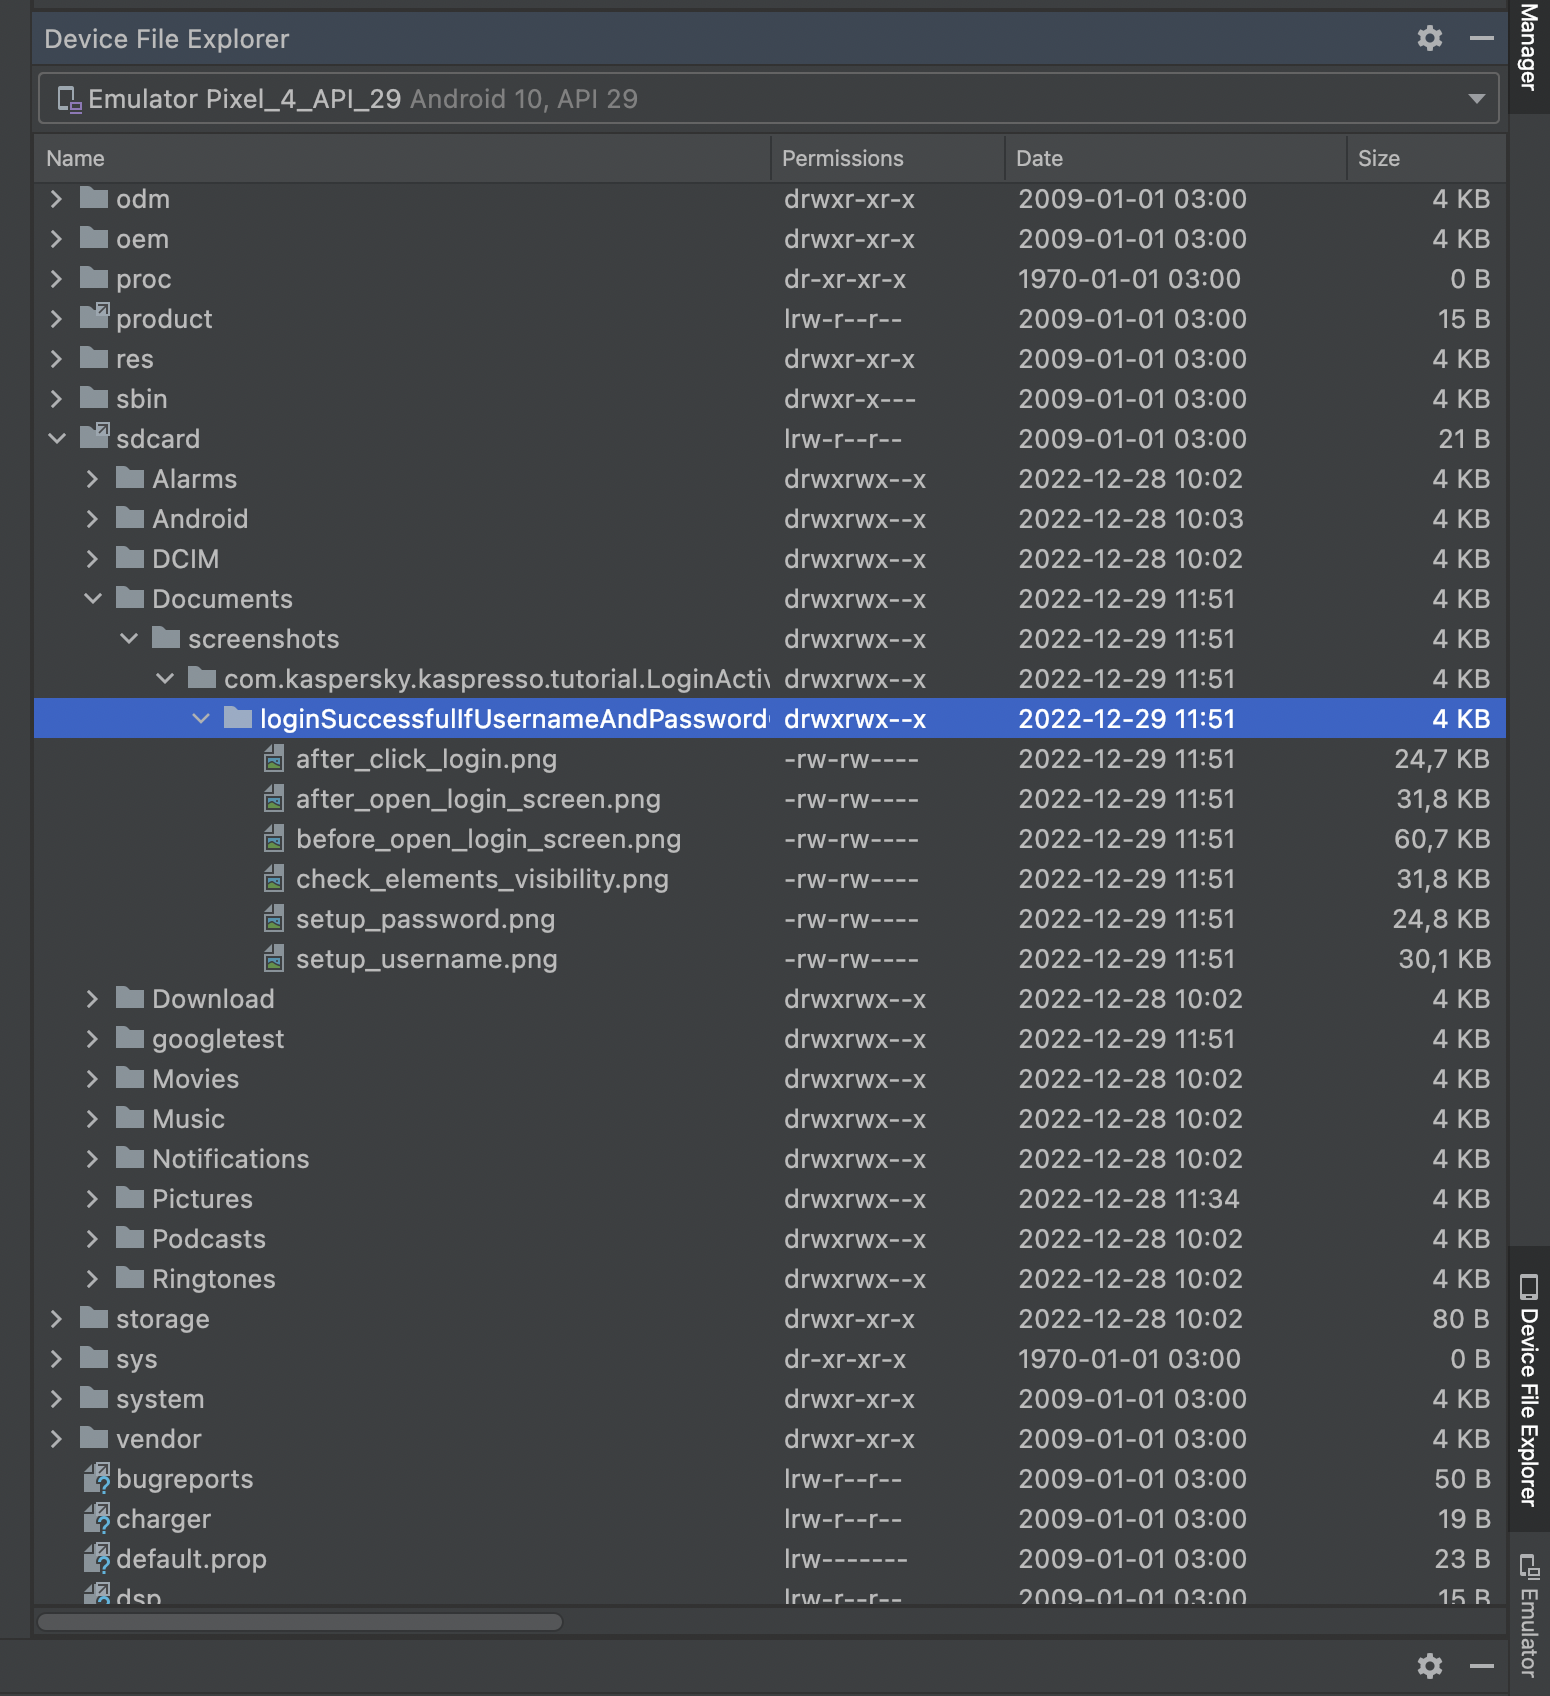
Here, from the screenshots, you can determine what the problem is - at the stage of setting the password, the number of characters entered is 3
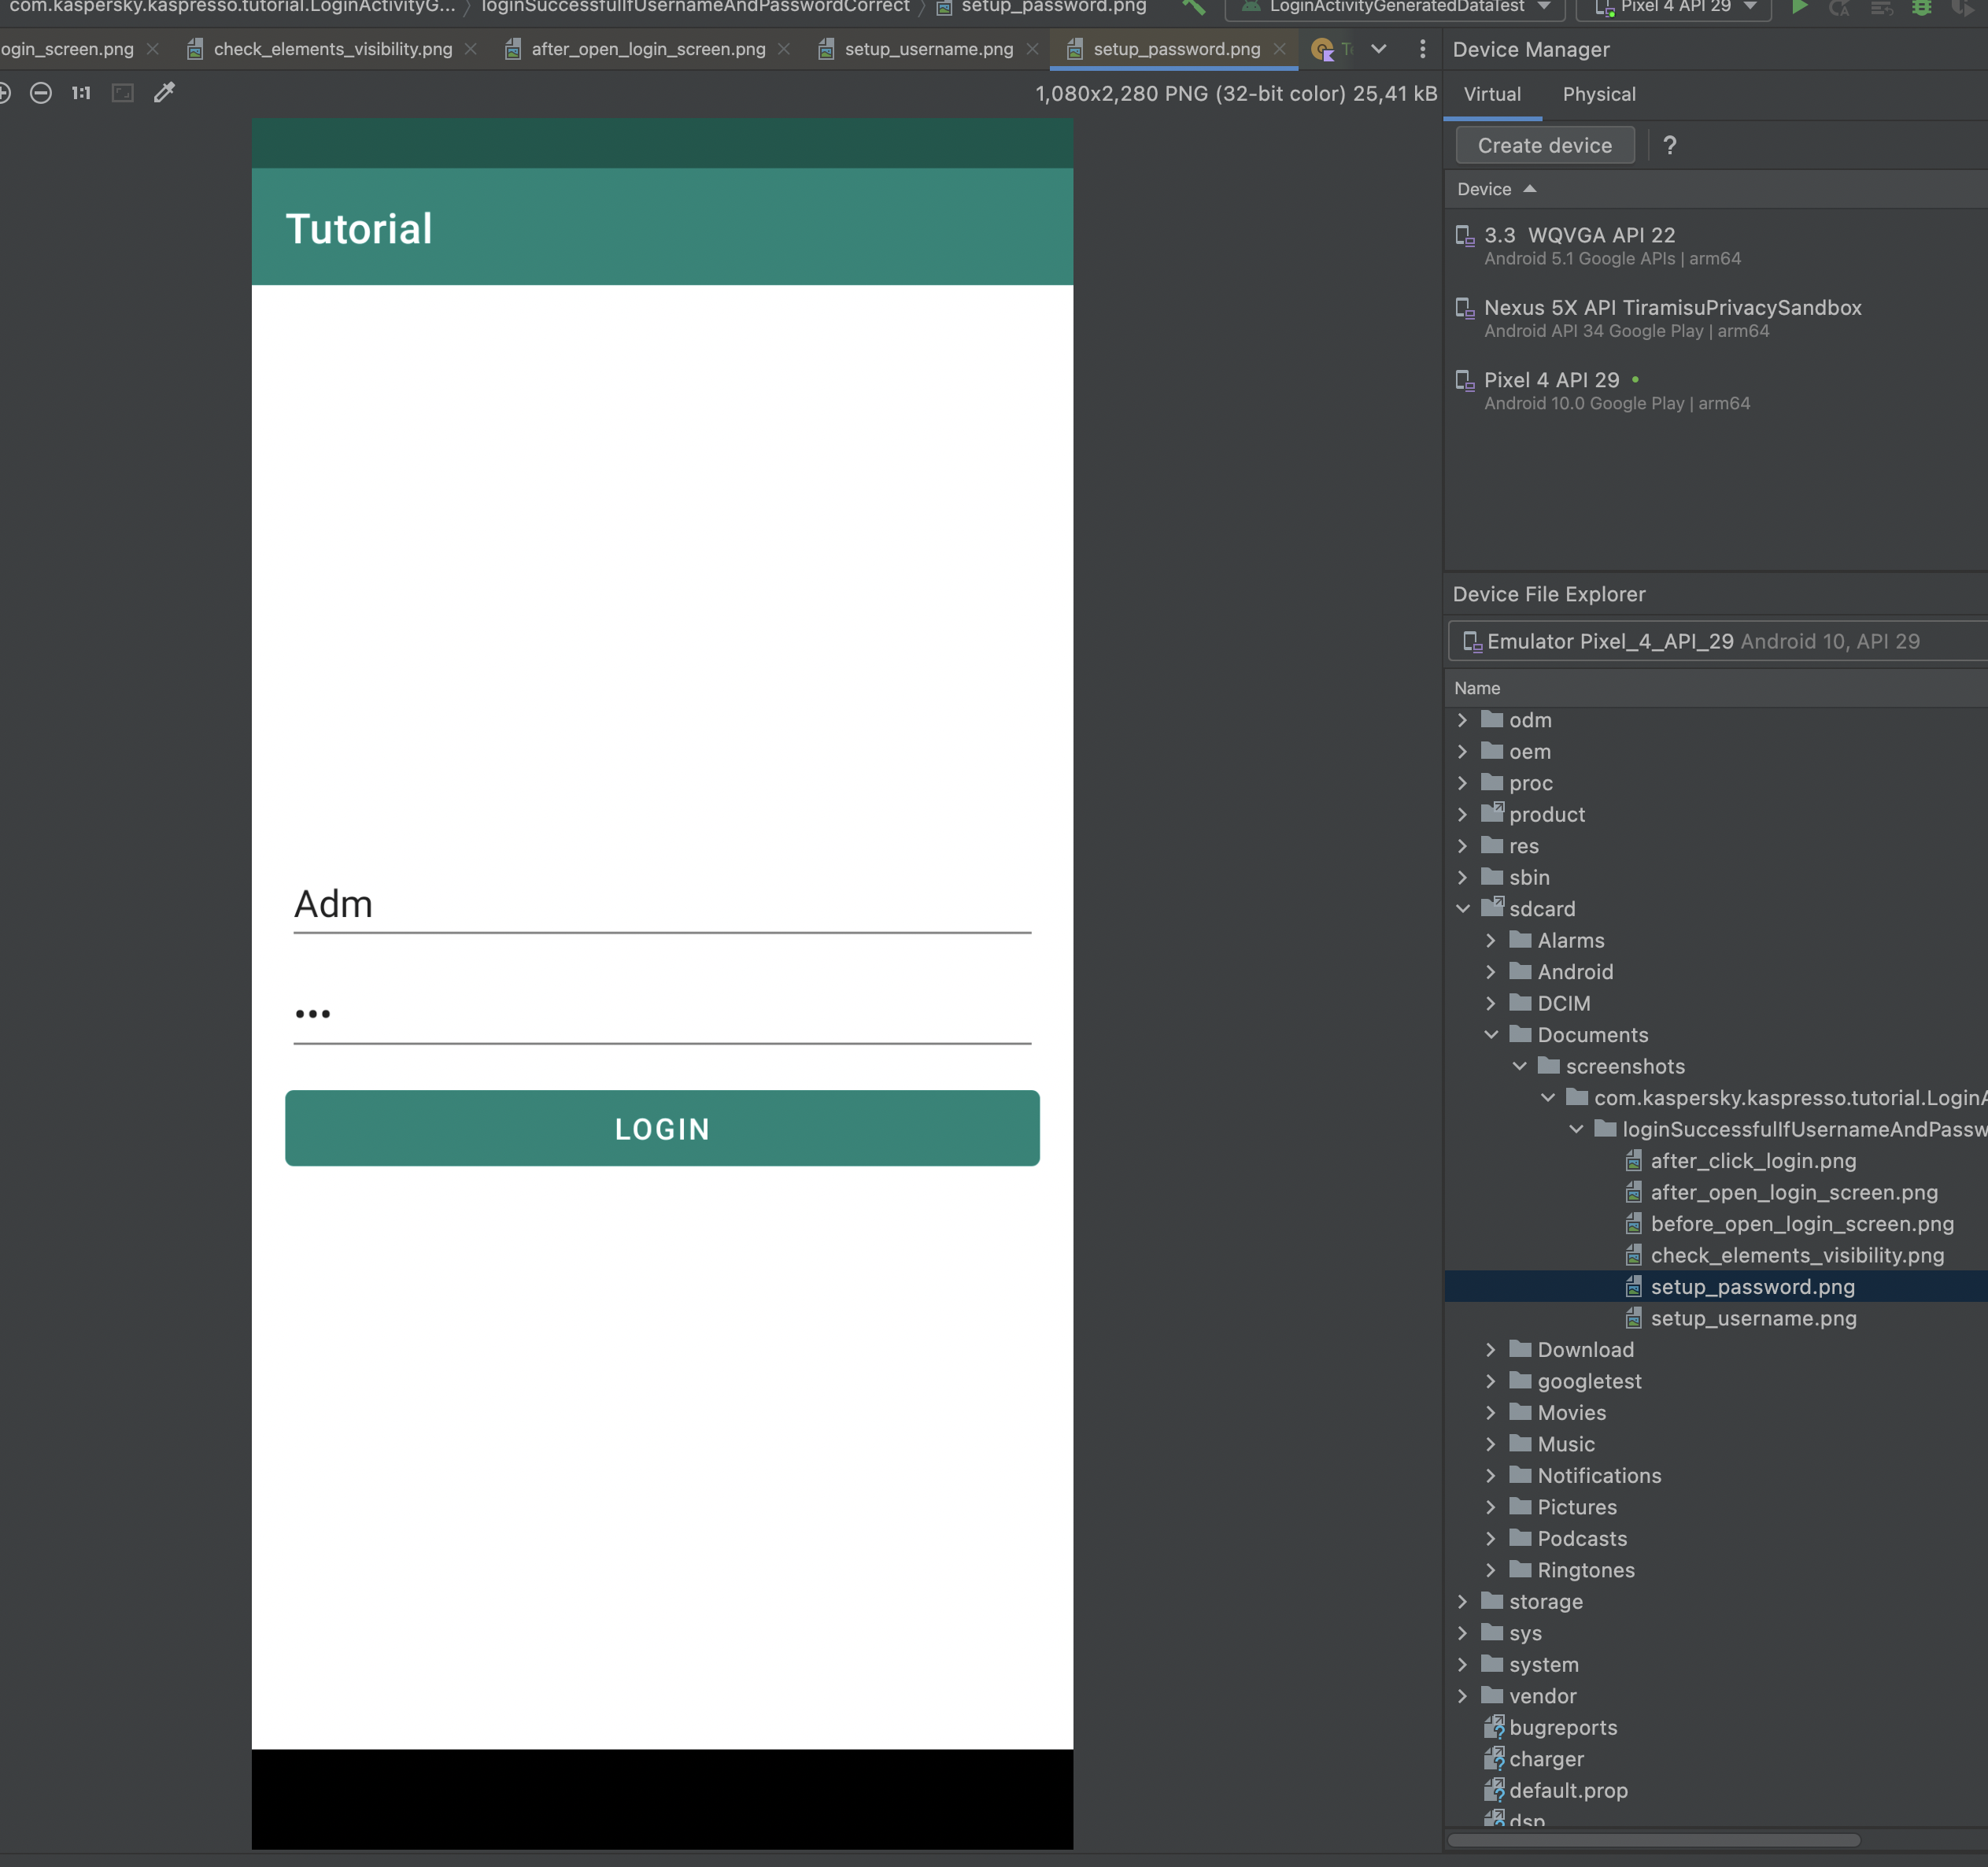
So, after analyzing the screenshots, you can determine which error occurred at the time of the tests.
Info
One way to take a screenshot is to call the device.uiDevice.takeScreenshot method. This is a method from the uiautomator library and should never be used directly.
Firstly, a screenshot taken with Kaspresso (device.screenshots.take) will be in the correct folder, which is easy to find by the name of the test, and the files for each test and step will be in their own folders with understandable names, and in the case of uiautomator, finding the right screenshots will be problematic.
Secondly, Kaspresso has made a lot of convenient improvements for working with screenshots, such as scaling, photo quality settings, full-screen screenshots (when all the content does not fit on the screen), and so on.
Therefore, for screenshots, always use only the Kaspresso device.screenshots objects.
Setting up Kaspresso.Builder
Theoretically, all tests you write can fail. In such cases, I would like to always be able to look at screenshots to understand what went wrong. How to achieve this? As an option, add a method call that takes a screenshot to all steps of all tests, but this is not very convenient.
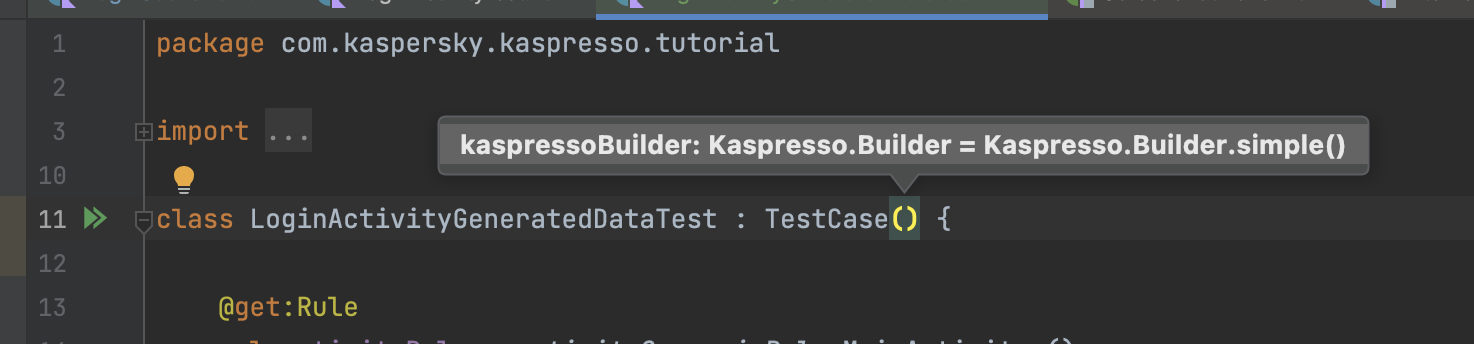
Therefore, Kaspresso has added the ability to configure test parameters when creating a test class. To do this, you can pass the Kaspresso.Builder object to the TestCase constructor, which by default takes the value Kaspresso.Builder.simple().
Info
To see the parameters a method or constructor takes, you can left-click inside the parentheses and press ctrl + P (or cmd + P on Mac)
We can add many different settings, you can read more about them in the Wiki.
Now we are interested in adding screenshots if the tests have failed. The easiest way to do this is to use advanced builder instead of simple. This is done as follows:
class LoginActivityGeneratedDataTest : TestCase(
    kaspressoBuilder = Kaspresso.Builder.advanced()
)
Info
Please note that permissions to access the file system are required, without them screenshots will not be saved.
package com.kaspersky.kaspresso.tutorial

import com.kaspersky.kaspresso.testcases.api.scenario.Scenario
import com.kaspersky.kaspresso.testcases.core.testcontext.TestContext
import com.kaspersky.kaspresso.tutorial.screen.LoginScreen
import com.kaspersky.kaspresso.tutorial.screen.MainScreen

class LoginScenario(
    private val username: String,
    private val password: String
) : Scenario() {

    override val steps: TestContext<Unit>.() -> Unit = {
        step("Open login screen") {
            MainScreen {
                loginActivityButton {
                    isVisible()
                    isClickable()
                    click()
                }
            }
        }
        step("Check elements visibility") {
            LoginScreen {
                inputUsername {
                    isVisible()
                    hasHint(R.string.login_activity_hint_username)
                }
                inputPassword {
                    isVisible()
                    hasHint(R.string.login_activity_hint_password)
                }
                loginButton {
                    isVisible()
                    isClickable()
                }
            }
        }
        step("Try to login") {
            LoginScreen {
                inputUsername {
                    replaceText(username)
                }
                inputPassword {
                    replaceText(password)
                }
                loginButton {
                    click()
                }
            }
        }
    }
}
Let's start the test. Tests failed and screenshots appeared on the device (don't forget to press Synchronize):
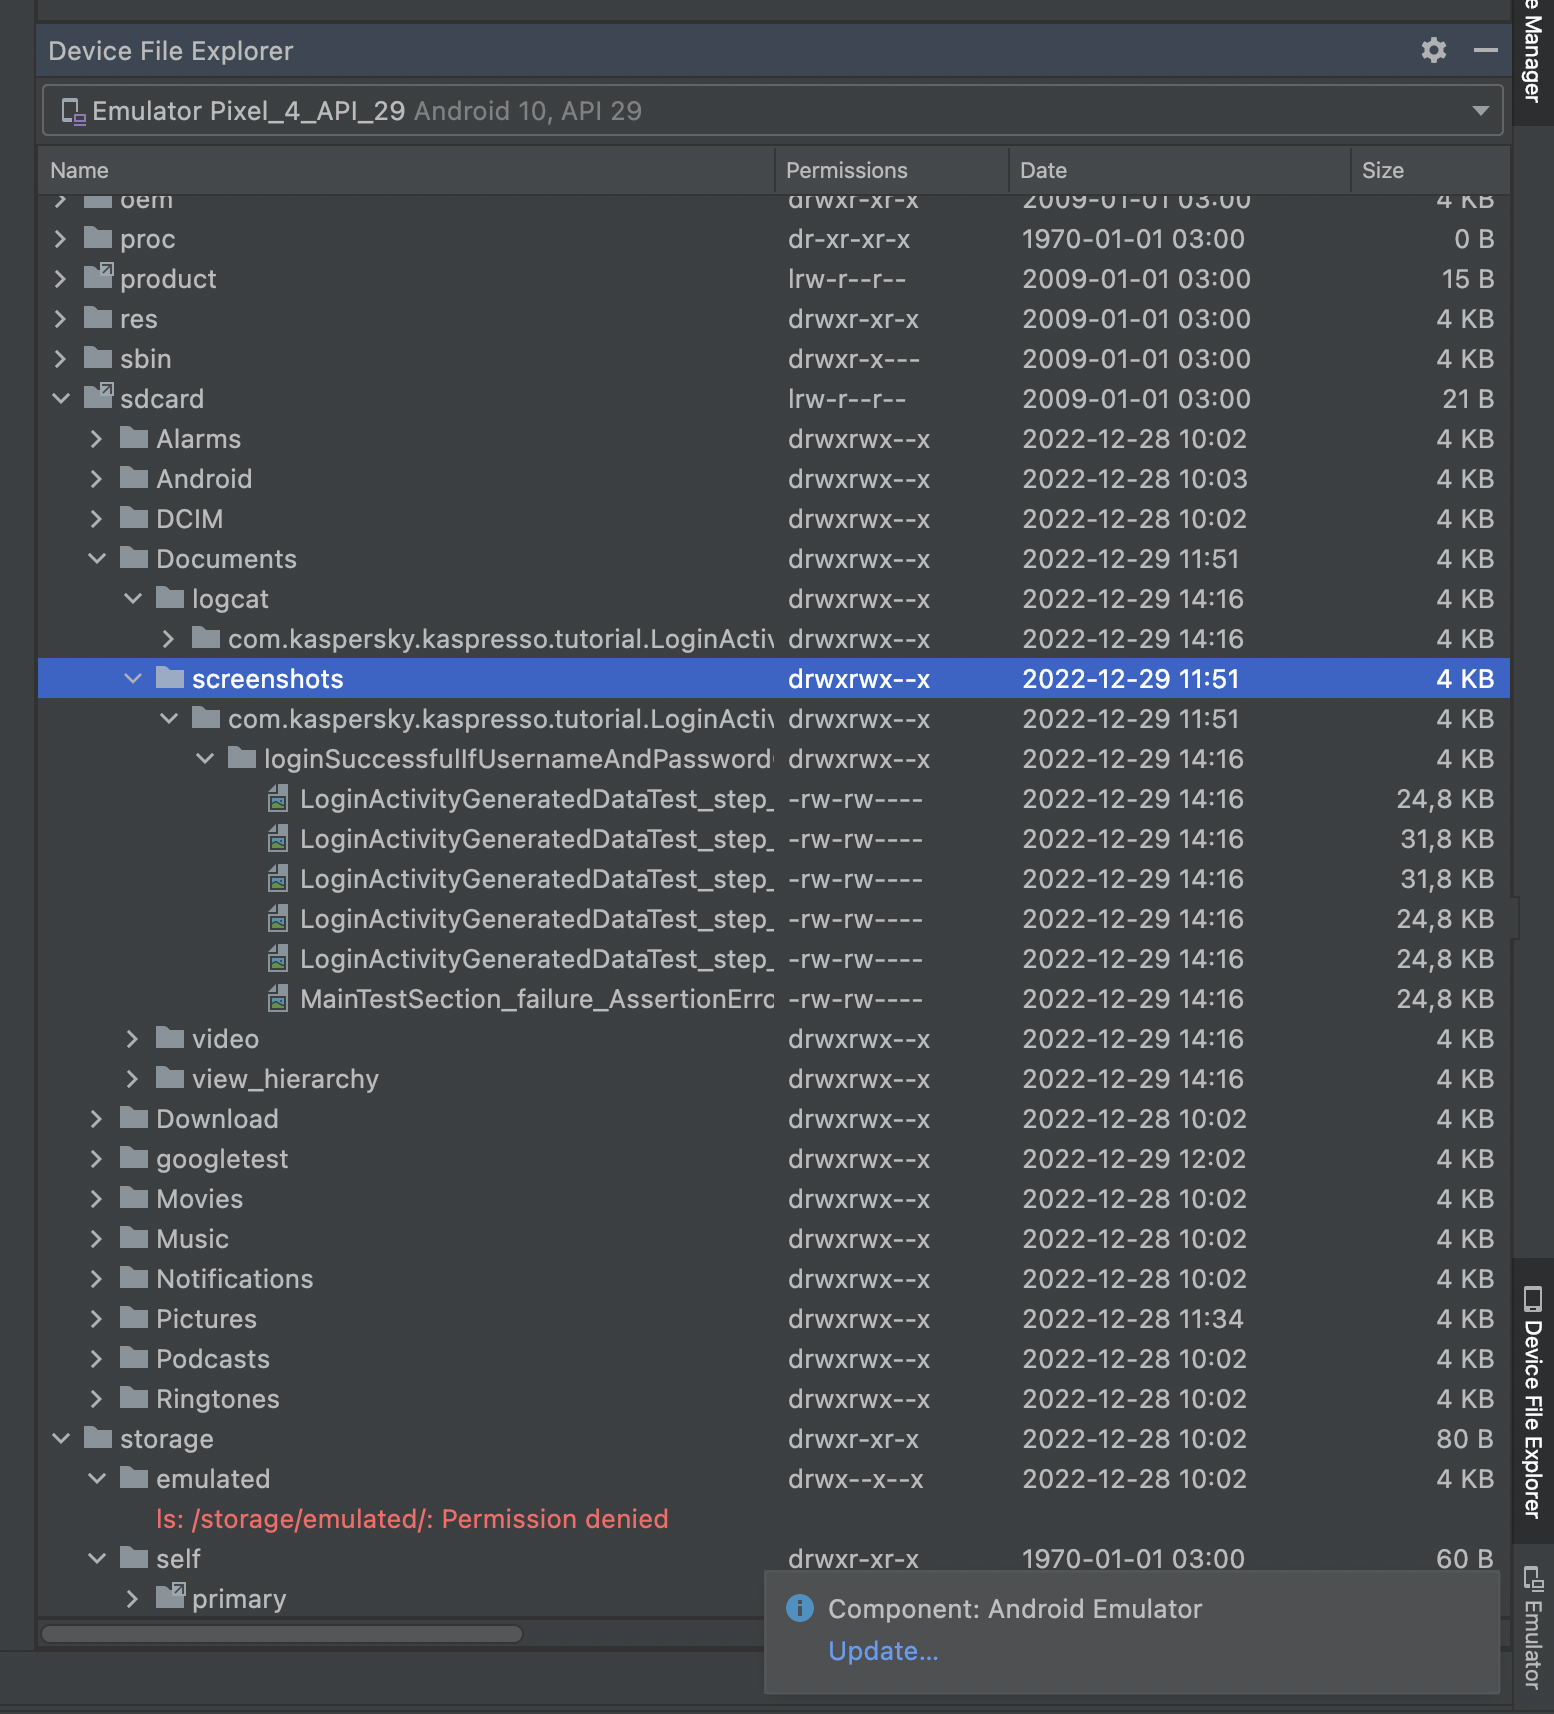
When using the advanced builder, there are a few more changes. In addition to screenshots, files with logs, the View hierarchy, and more are also added.
If you do not need all these changes, then you can only change certain settings of a simple builder.
Info
If you're not a developer, customizing the default builder can be quite tricky. In case it was not possible to figure out the setting, use the advanced builder to get screenshots
Interceptors
You should remember that in the previous tests, in addition to executing our methods, there were many additional actions “under the hood”: writing logs for each step, implicitly calling flakySafely, automatically scrolling to the element if the check was unsuccessful, and so on.
All this worked thanks to Interceptors. Interceptors are classes that intercept the actions we call and add some functionality to them. There are a lot of such classes in Kaspresso, you can read more about them in documentation
We are interested in adding screenshots, the ScreenshotStepWatcherInterceptor, ScreenshotFailStepWatcherInterceptor and TestRunnerScreenshotWatcherInterceptor classes are responsible for this.
- ScreenshotStepWatcherInterceptor - adds screenshots whether the step failed or not
- ScreenshotFailStepWatcherInterceptor - adds a screenshot of only the step that failed
- TestRunnerScreenshotWatcherInterceptor - adds a screenshot if an error occurs in the `before` or `after` section
If the test fails, it is convenient to look not only at the step at which the error occurred, but also at the previous ones - this way it is much easier to figure out the problem. Therefore, we will add the first Interceptor option, which will screenshot all the steps, regardless of the result. This is done as follows:
class LoginActivityGeneratedDataTest : TestCase(
    kaspressoBuilder = Kaspresso.Builder.simple().apply {
        stepWatcherInterceptors.add(ScreenshotStepWatcherInterceptor(screenshots))
    }
)
apply method, and add all the necessary settings in curly braces. In this case, we get all the Interceptors that intercept the step event (step) and add a ScreenshotStepWatcherInterceptor there, passing the screenshots object to the constructor.
Now that we have added this Interceptor, after each test step, regardless of the result of its execution, screenshots will be saved on the device.
We launch. The test failed and screenshots were saved to the device
Let's return the correct implementation of the TestData class
package com.kaspersky.kaspresso.tutorial.data

object TestData {

    fun generateUsername(): String = "Admin"

    fun generatePassword(): String = "123456"
}
Let's run the test again. The test passed successfully and all screenshots are saved on the device.
Summary
In this tutorial, we learned how to add logging and screenshots to our tests. We found out when standard logs are not enough, learned how to customize Kaspresso.Builder by adding various Interceptors to it.
We also looked at ways to create screenshots manually, and how this process can be automated.