Sections and steps
Improve the code
In the last lesson, we wrote a test for the Internet availability screen, the test class code looked like this:
package com.kaspersky.kaspresso.tutorial

import androidx.test.ext.junit.rules.activityScenarioRule
import com.kaspersky.kaspresso.device.exploit.Exploit
import com.kaspersky.kaspresso.testcases.api.testcase.TestCase
import com.kaspersky.kaspresso.tutorial.screen.MainScreen
import com.kaspersky.kaspresso.tutorial.screen.WifiScreen
import org.junit.Rule
import org.junit.Test

class WifiSampleTest : TestCase() {

    @get:Rule
    val activityRule = activityScenarioRule<MainActivity>()

    @Test
    fun test() {
        MainScreen {
            wifiActivityButton {
                isVisible()
                isClickable()
                click()
            }
        }
        WifiScreen {
            device.exploit.setOrientation(Exploit.DeviceOrientation.Portrait)
            checkWifiButton.isVisible()
            checkWifiButton.isClickable()
            wifiStatus.hasEmptyText()
            checkWifiButton.click()
            wifiStatus.hasText(R.string.enabled_status)
            device.network.toggleWiFi(false)
            checkWifiButton.click()
            wifiStatus.hasText(R.string.disabled_status)
            device.exploit.rotate()
            wifiStatus.hasText(R.string.disabled_status)
        }
    }
}
And we talked about how one of the problems with this code is that it is difficult to read and maintain even at this stage, and if the functionality of the screen expands and we have to add more tests, then the code will become completely unreadable.
In fact, usually any tests (including manual ones) are performed on test cases. That is, the tester has a sequence of steps that he performs to check the performance of the screen. In our case, we have this sequence of steps, but it is written in one block of code and it is not clear where one step ends and another begins. We can solve this problem with comments.
Let's copy this WifiSampleTest class and paste it into the same package, but with a different name WifiSampleWithStepsTest. This is necessary so that you can then compare the new and old implementations of this test. We will not change the WifiSampleTest code today. Now in the new class WifiSampleWithStepsTest we add comments to each step.
package com.kaspersky.kaspresso.tutorial

import androidx.test.ext.junit.rules.activityScenarioRule
import com.kaspersky.kaspresso.device.exploit.Exploit
import com.kaspersky.kaspresso.testcases.api.testcase.TestCase
import com.kaspersky.kaspresso.tutorial.screen.MainScreen
import com.kaspersky.kaspresso.tutorial.screen.WifiScreen
import org.junit.Rule
import org.junit.Test

class WifiSampleWithStepsTest : TestCase() {

    @get:Rule
    val activityRule = activityScenarioRule<MainActivity>()

    @Test
    fun test() {
        // Step 1. Open target screen
        MainScreen {
            wifiActivityButton {
                isVisible()
                isClickable()
                click()
            }
        }
        WifiScreen {
            // Step 2. Check correct wifi status
            device.exploit.setOrientation(Exploit.DeviceOrientation.Portrait)
            checkWifiButton.isVisible()
            checkWifiButton.isClickable()
            wifiStatus.hasEmptyText()
            checkWifiButton.click()
            wifiStatus.hasText(R.string.enabled_status)
            device.network.toggleWiFi(false)
            checkWifiButton.click()
            wifiStatus.hasText(R.string.disabled_status)

            // Step 3. Rotate device and check wifi status
            device.exploit.rotate()
            wifiStatus.hasText(R.string.disabled_status)
        }
    }
}
This slightly improved the readability of the code, but did not solve all the problems. For example, if your test fails, how do you know at what step it happened? You will have to examine the logs, trying to figure out what went wrong. It would be much better if the logs showed entries like Step 1 started -> ... -> Step 1 succeed or Step 2 started -> ... -> Step 2 failed. This will allow you to immediately determine by the notes in the log at what stage the problem arose.
To do this, we can manually add output to the log for each step before and after its execution and wrap it all in a try catch block to make the test failure also recorded in logs. In this case, our test would look like this:
package com.kaspersky.kaspresso.tutorial

import android.util.Log
import androidx.test.core.app.takeScreenshot
import androidx.test.ext.junit.rules.activityScenarioRule
import com.kaspersky.kaspresso.device.exploit.Exploit
import com.kaspersky.kaspresso.testcases.api.testcase.TestCase
import com.kaspersky.kaspresso.tutorial.screen.MainScreen
import com.kaspersky.kaspresso.tutorial.screen.WifiScreen
import org.junit.Rule
import org.junit.Test

class WifiSampleWithStepsTest : TestCase() {

    @get:Rule
    val activityRule = activityScenarioRule<MainActivity>()

    @Test
    fun test() {
        try {
            Log.i("KASPRESSO", "Step 1. Open target screen -> started")
            MainScreen {
                wifiActivityButton {
                    isVisible()
                    isClickable()
                    click()
                }
            }
            Log.i("KASPRESSO", "Step 1. Open target screen -> succeed")
        } catch (e: Throwable) {
            Log.i("KASPRESSO", "Step 1. Open target screen -> failed")
            takeScreenshot()
        }
        WifiScreen {
            try {
                Log.i("KASPRESSO", "Step 2. Check correct wifi status -> started")
                device.exploit.setOrientation(Exploit.DeviceOrientation.Portrait)
                checkWifiButton.isVisible()
                checkWifiButton.isClickable()
                wifiStatus.hasEmptyText()
                checkWifiButton.click()
                wifiStatus.hasText(R.string.enabled_status)
                device.network.toggleWiFi(false)
                checkWifiButton.click()
                wifiStatus.hasText(R.string.disabled_status)
                Log.i("KASPRESSO", "Step 2. Check correct wifi status -> succeed")
            } catch (e: Throwable) {
                Log.i("KASPRESSO", "Step 2. Check correct wifi status -> failed")
            }

            try {
                Log.i("KASPRESSO", "Step 3. Rotate device and check wifi status -> started")
                device.exploit.rotate()
                wifiStatus.hasText(R.string.disabled_status)
                Log.i("KASPRESSO", "Step 3. Rotate device and check wifi status -> succeed")
            } catch (e: Throwable) {
                Log.i("KASPRESSO", "Step 3. Rotate device and check wifi status -> failed")
                takeScreenshot()
            }
        }
    }
}
Let's turn on the Internet on the device and check the operation of our test.
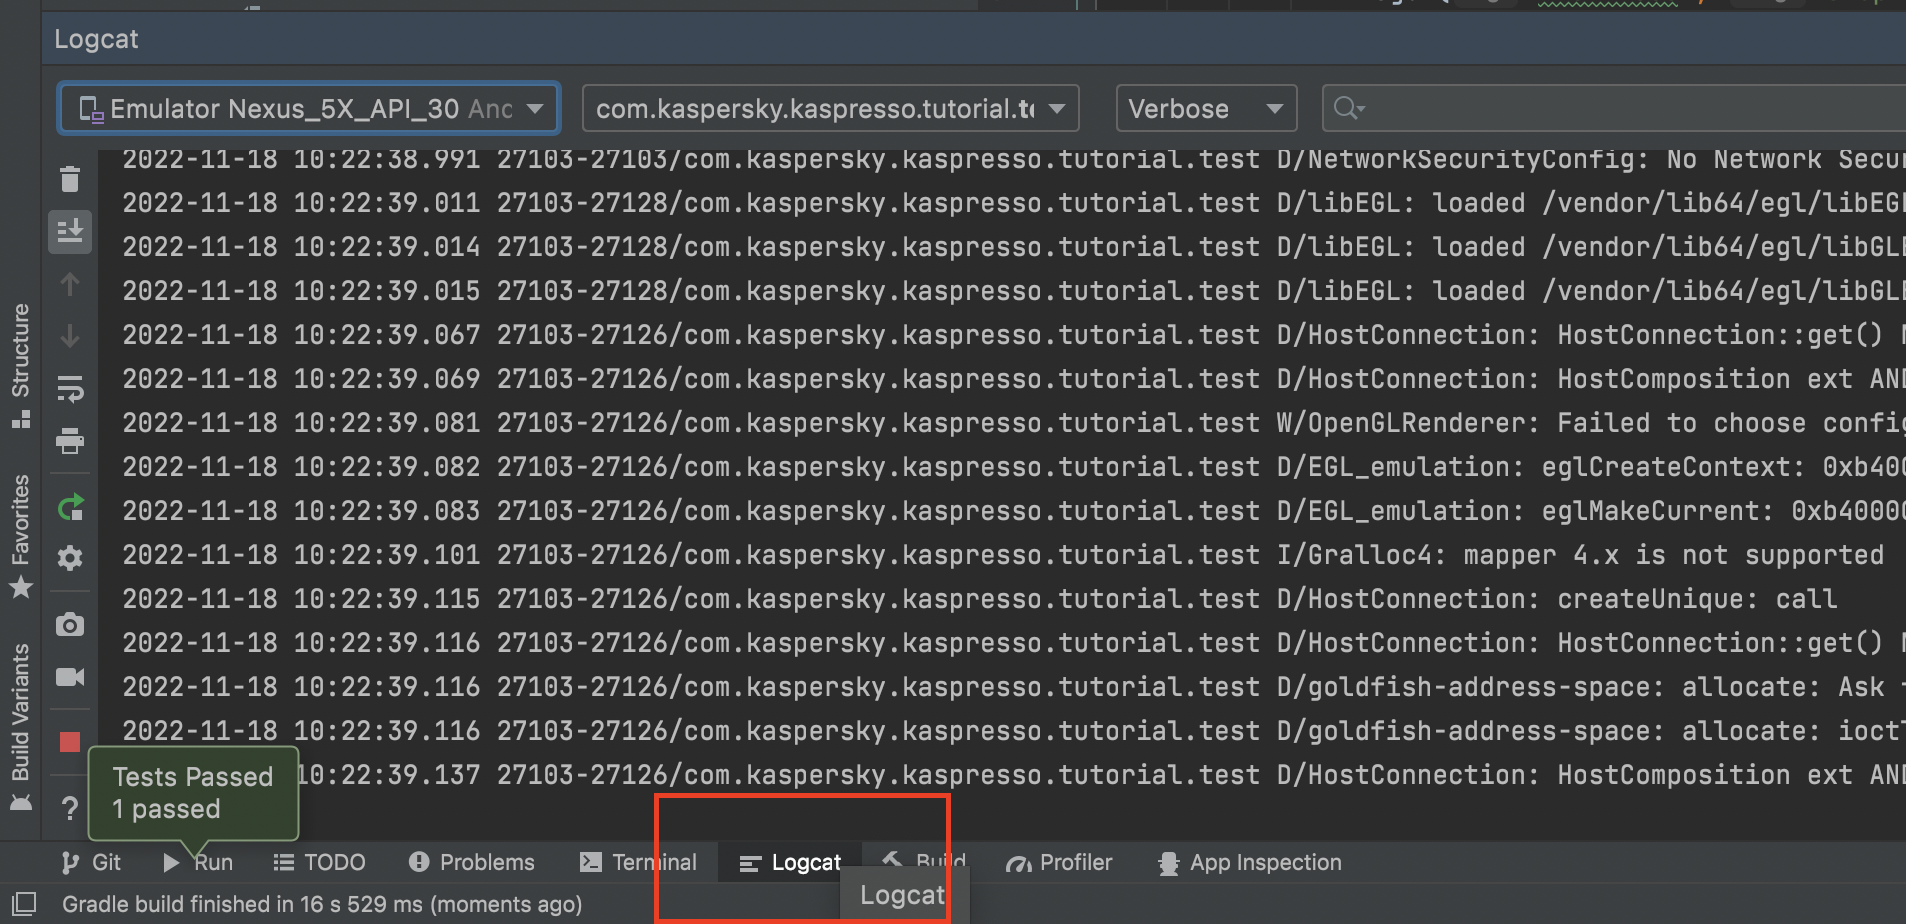
Let's launch the test. It passed successfully.
Now let's see the logs. To do this, open the Logcat tab at the bottom of Android Studio
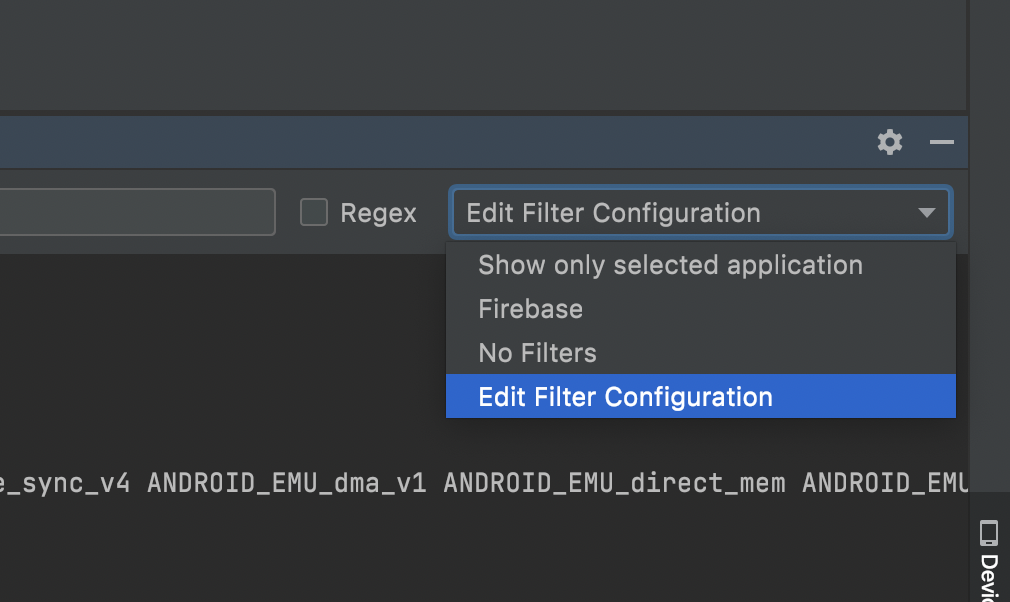
There are a lot of logs displayed here and finding ours is quite difficult. We can filter the logs by the tag we specified ("KASPRESSO"). To do this, click on the arrow at the top right of Logcat window and select Edit Configuration
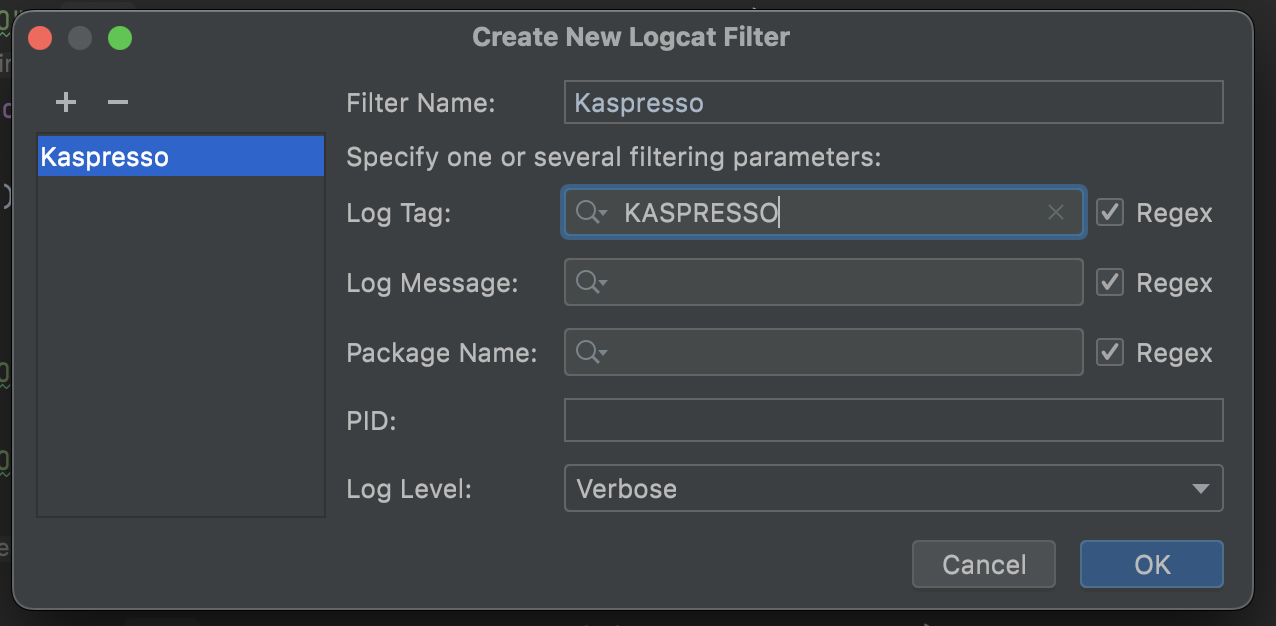
A filter creation window will open. Add the name of the filter and the tag that we are interested in:
Now we can see only useful information. Let's clear the log
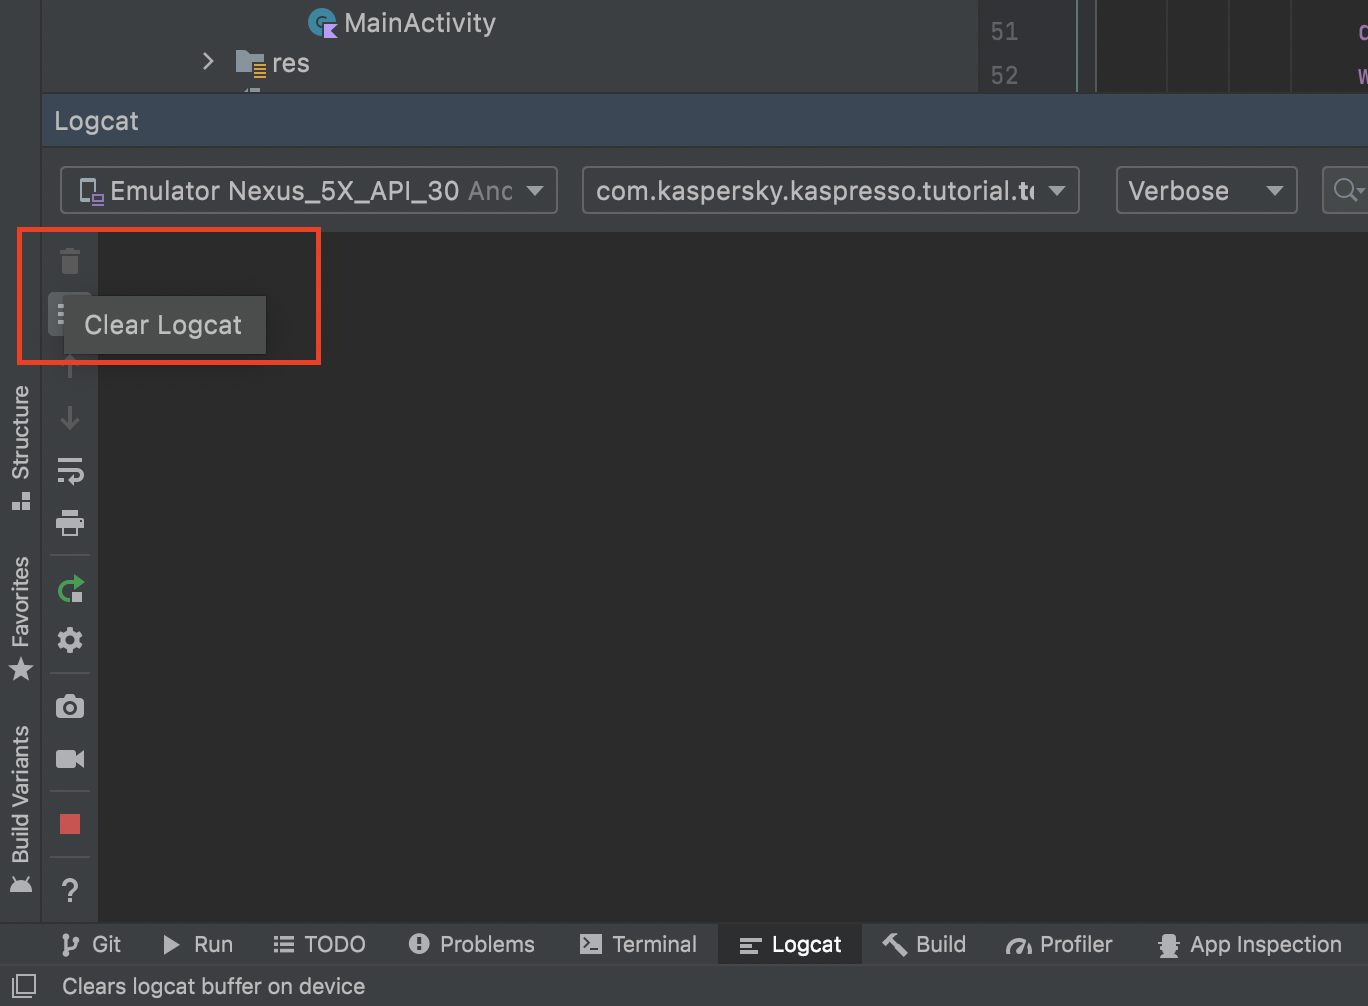
and run the test again. Do not forget to turn on the Internet on the device before this. Read the logs:

Here are the logs we added: step 1 is run, then checks are done, then step 1 succeeds.
Looking further:
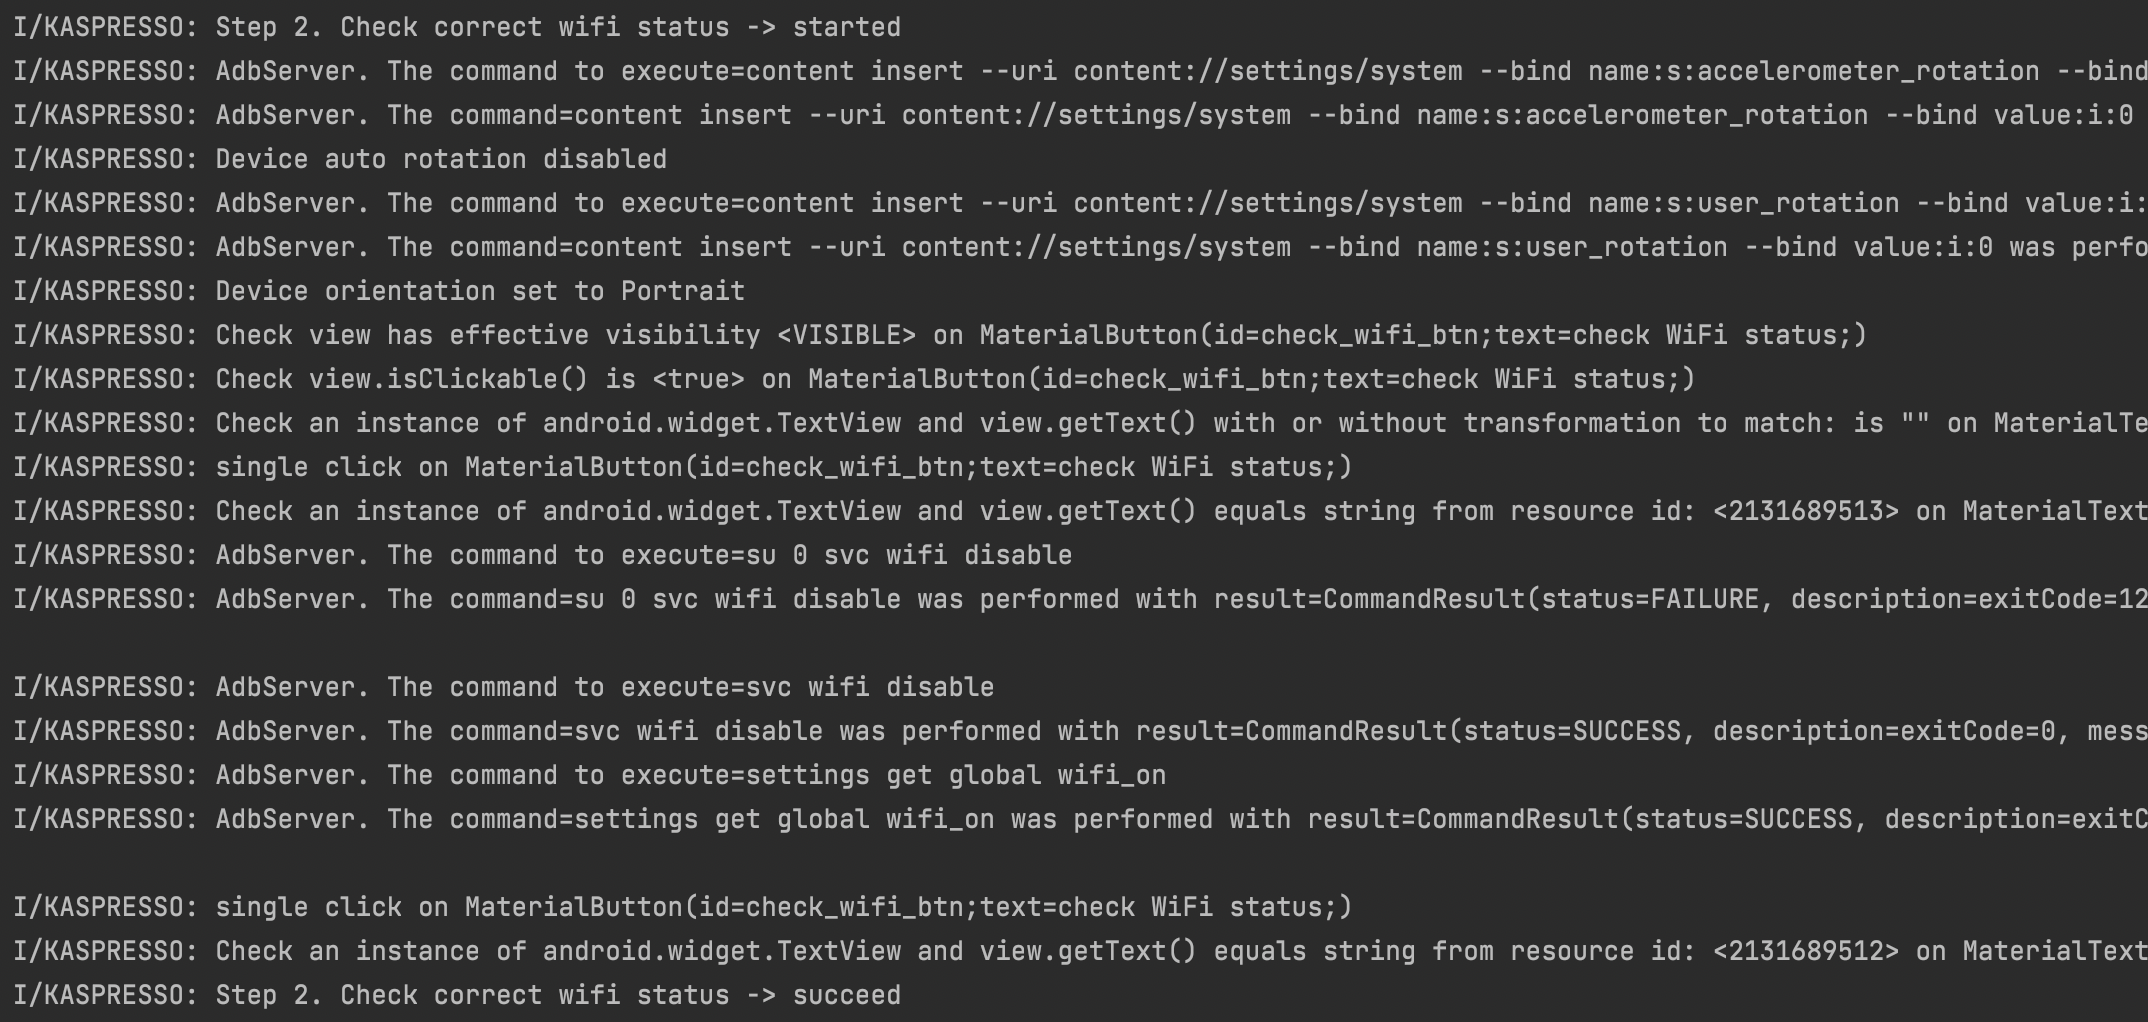
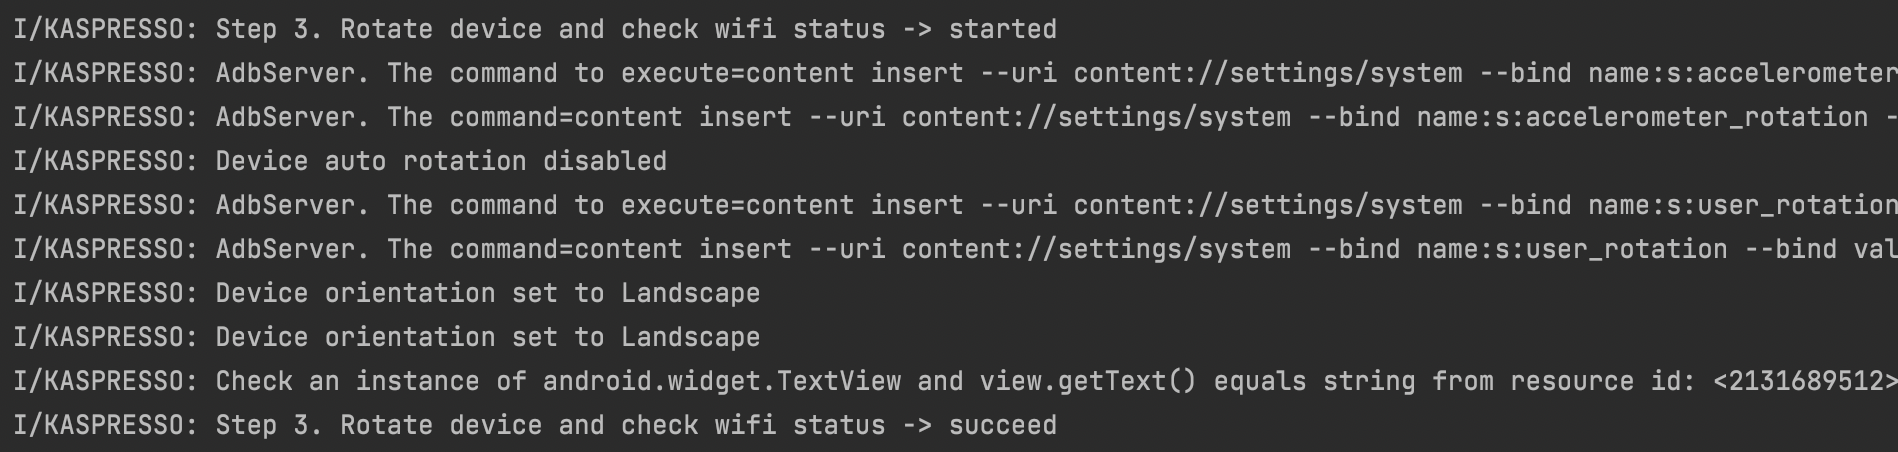
With the second and third steps, everything is also fine. We understand when and what step starts the execution, we can see the specific actions that the test is currently performing, and we can see the result of the test.
Now let's turn off the Internet and run the test again. According to our logic, the test should fail.
Even though the test should have failed, all tests are green. We look at the log - now we are interested in step 2, which should have failed due to the fact that the Internet was initially turned off on the device.
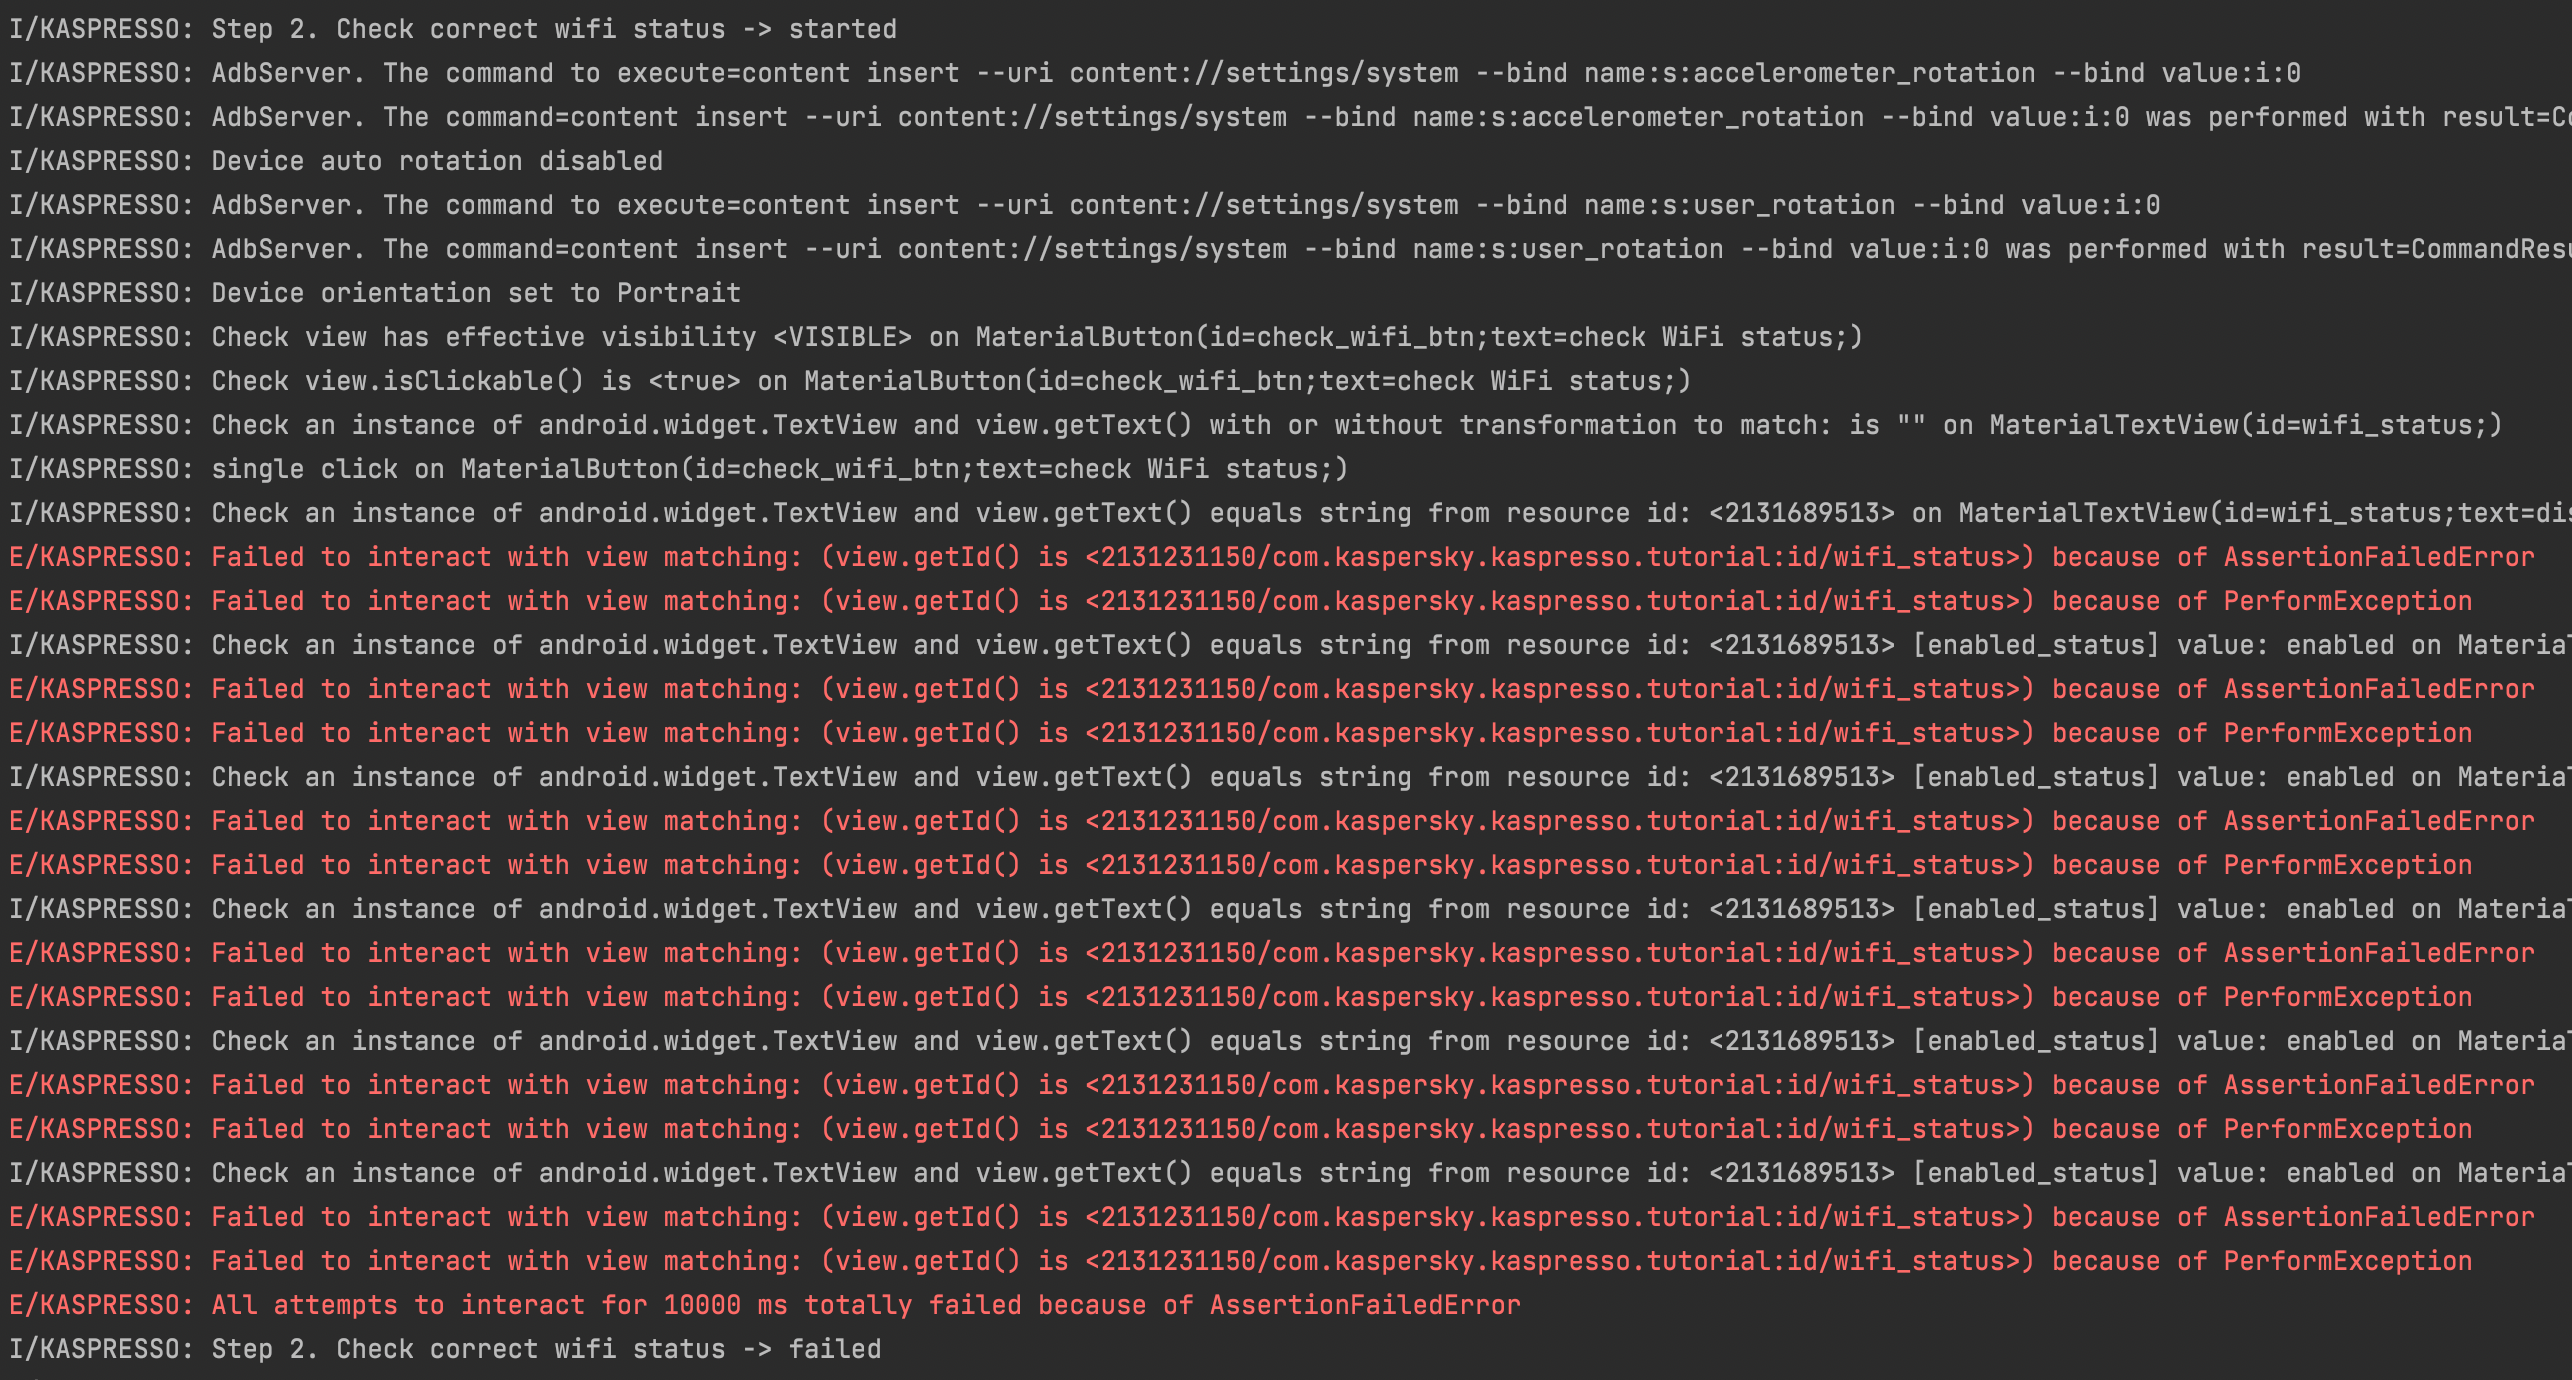
Judging by the logs, step 2 really failed. The status of the header was checked, the text did not match, the program made several more attempts to check that the text on the header contains the text enabled, but all these attempts were unsuccessful and the step ended with an error. Why do we have green tests in this case?
The fact is that if the test fails, then an exception is thrown, and if no one handled this exception in the try catch block, then the tests will be red. But we handle all exceptions in the code in order to make an entry in the log that the test ended with an error.
try {
        ...
} catch (e: Throwable) {
    /**
     * Мы обработали исключение и дальше оно проброшено не будет, поэтому такой
     * тест считается выполненным успешно
     */
    Log.i("KASPRESSO", "Step 2. Check correct wifi status -> failed")
}
To solve this problem, it is necessary to throw this exception further after the error message is output to the log so that the test fails. This is done using the throw keyword. Then the test code will look like this:
package com.kaspersky.kaspresso.tutorial

import android.util.Log
import androidx.test.ext.junit.rules.activityScenarioRule
import com.kaspersky.kaspresso.device.exploit.Exploit
import com.kaspersky.kaspresso.testcases.api.testcase.TestCase
import com.kaspersky.kaspresso.tutorial.screen.MainScreen
import com.kaspersky.kaspresso.tutorial.screen.WifiScreen
import org.junit.Rule
import org.junit.Test

class WifiSampleWithStepsTest : TestCase() {

    @get:Rule
    val activityRule = activityScenarioRule<MainActivity>()

    @Test
    fun test() {
        try {
            Log.i("KASPRESSO", "Step 1. Open target screen -> started")
            MainScreen {
                wifiActivityButton {
                    isVisible()
                    isClickable()
                    click()
                }
            }
            Log.i("KASPRESSO", "Step 1. Open target screen -> succeed")
        } catch (e: Throwable) {
            Log.i("KASPRESSO", "Step 1. Open target screen -> failed")
            throw e
        }
        WifiScreen {
            try {
                Log.i("KASPRESSO", "Step 2. Check correct wifi status -> started")
                device.exploit.setOrientation(Exploit.DeviceOrientation.Portrait)
                checkWifiButton.isVisible()
                checkWifiButton.isClickable()
                wifiStatus.hasEmptyText()
                checkWifiButton.click()
                wifiStatus.hasText(R.string.enabled_status)
                device.network.toggleWiFi(false)
                checkWifiButton.click()
                wifiStatus.hasText(R.string.disabled_status)
                Log.i("KASPRESSO", "Step 2. Check correct wifi status -> succeed")
            } catch (e: Throwable) {
                Log.i("KASPRESSO", "Step 2. Check correct wifi status -> failed")
                throw e
            }

            try {
                Log.i("KASPRESSO", "Step 3. Rotate device and check wifi status -> started")
                device.exploit.rotate()
                wifiStatus.hasText(R.string.disabled_status)
                Log.i("KASPRESSO", "Step 3. Rotate device and check wifi status -> succeed")
            } catch (e: Throwable) {
                Log.i("KASPRESSO", "Step 3. Rotate device and check wifi status -> failed")
                throw e
            }
        }
    }
}
Let's run the test again. Now it ends with an error and we have understandable logs, where you can immediately see at which step the error occurred. After step 2 there is nothing else in the logs.
The code that we wrote is working, but very cumbersome, and we have to write a whole canvas of the same code for each step (logs, try catch blocks, etc.).
Steps
In order to simplify writing tests and make the code more readable and extendable, steps have been added to Kaspresso. They implement everything that we just wrote by hand "under the hood".
To use steps, you need to call the run {} method and list all the steps that will be performed during the test in curly brackets. Each step must be called inside the step function.
Let's write it in code. First, we remove all unnecessary logs and try catch blocks.
package com.kaspersky.kaspresso.tutorial

import androidx.test.ext.junit.rules.activityScenarioRule
import com.kaspersky.kaspresso.device.exploit.Exploit
import com.kaspersky.kaspresso.testcases.api.testcase.TestCase
import com.kaspersky.kaspresso.tutorial.screen.MainScreen
import com.kaspersky.kaspresso.tutorial.screen.WifiScreen
import org.junit.Rule
import org.junit.Test

class WifiSampleWithStepsTest : TestCase() {

    @get:Rule
    val activityRule = activityScenarioRule<MainActivity>()

    @Test
    fun test() {
        MainScreen {
            wifiActivityButton {
                isVisible()
                isClickable()
                click()
            }
        }

        WifiScreen {
            device.exploit.setOrientation(Exploit.DeviceOrientation.Portrait)
            checkWifiButton.isVisible()
            checkWifiButton.isClickable()
            wifiStatus.hasEmptyText()
            checkWifiButton.click()
            wifiStatus.hasText(R.string.enabled_status)
            device.network.toggleWiFi(false)
            checkWifiButton.click()
            wifiStatus.hasText(R.string.disabled_status)

            device.exploit.rotate()
            wifiStatus.hasText(R.string.disabled_status)
        }
    }
}
Now, at the beginning of the test, we call the run method, inside which we call the step function for each step. We pass the name of the step as a parameter to this function.
@Test
    fun test() {
        run {
            step("Open target screen") {
                ...
            }
            step("Check correct wifi status") {
                ...
            }
            step("Rotate device and check wifi status") {
                ...
            }
        }
    }
Within each step, we specify the actions that are required for that step. The actions stay the same as before. Then the test code will look like this:
package com.kaspersky.kaspresso.tutorial

import androidx.test.ext.junit.rules.activityScenarioRule
import com.kaspersky.kaspresso.device.exploit.Exploit
import com.kaspersky.kaspresso.testcases.api.testcase.TestCase
import com.kaspersky.kaspresso.tutorial.screen.MainScreen
import com.kaspersky.kaspresso.tutorial.screen.WifiScreen
import org.junit.Rule
import org.junit.Test

class WifiSampleWithStepsTest : TestCase() {

    @get:Rule
    val activityRule = activityScenarioRule<MainActivity>()

    @Test
    fun test() {
        run {
            step("Open target screen") {
                MainScreen {
                    wifiActivityButton {
                        isVisible()
                        isClickable()
                        click()
                    }
                }
            }
            step("Check correct wifi status") {
                WifiScreen {
                    device.exploit.setOrientation(Exploit.DeviceOrientation.Portrait)
                    checkWifiButton.isVisible()
                    checkWifiButton.isClickable()
                    wifiStatus.hasEmptyText()
                    checkWifiButton.click()
                    wifiStatus.hasText(R.string.enabled_status)
                    device.network.toggleWiFi(false)
                    checkWifiButton.click()
                    wifiStatus.hasText(R.string.disabled_status)
                }
            }
            step("Rotate device and check wifi status") {
                WifiScreen {
                    device.exploit.rotate()
                    wifiStatus.hasText(R.string.disabled_status)
                }
            }
        }
    }
}
Turn on the Internet on the device and run the test. Test passed successfully. Let's look at the logs:
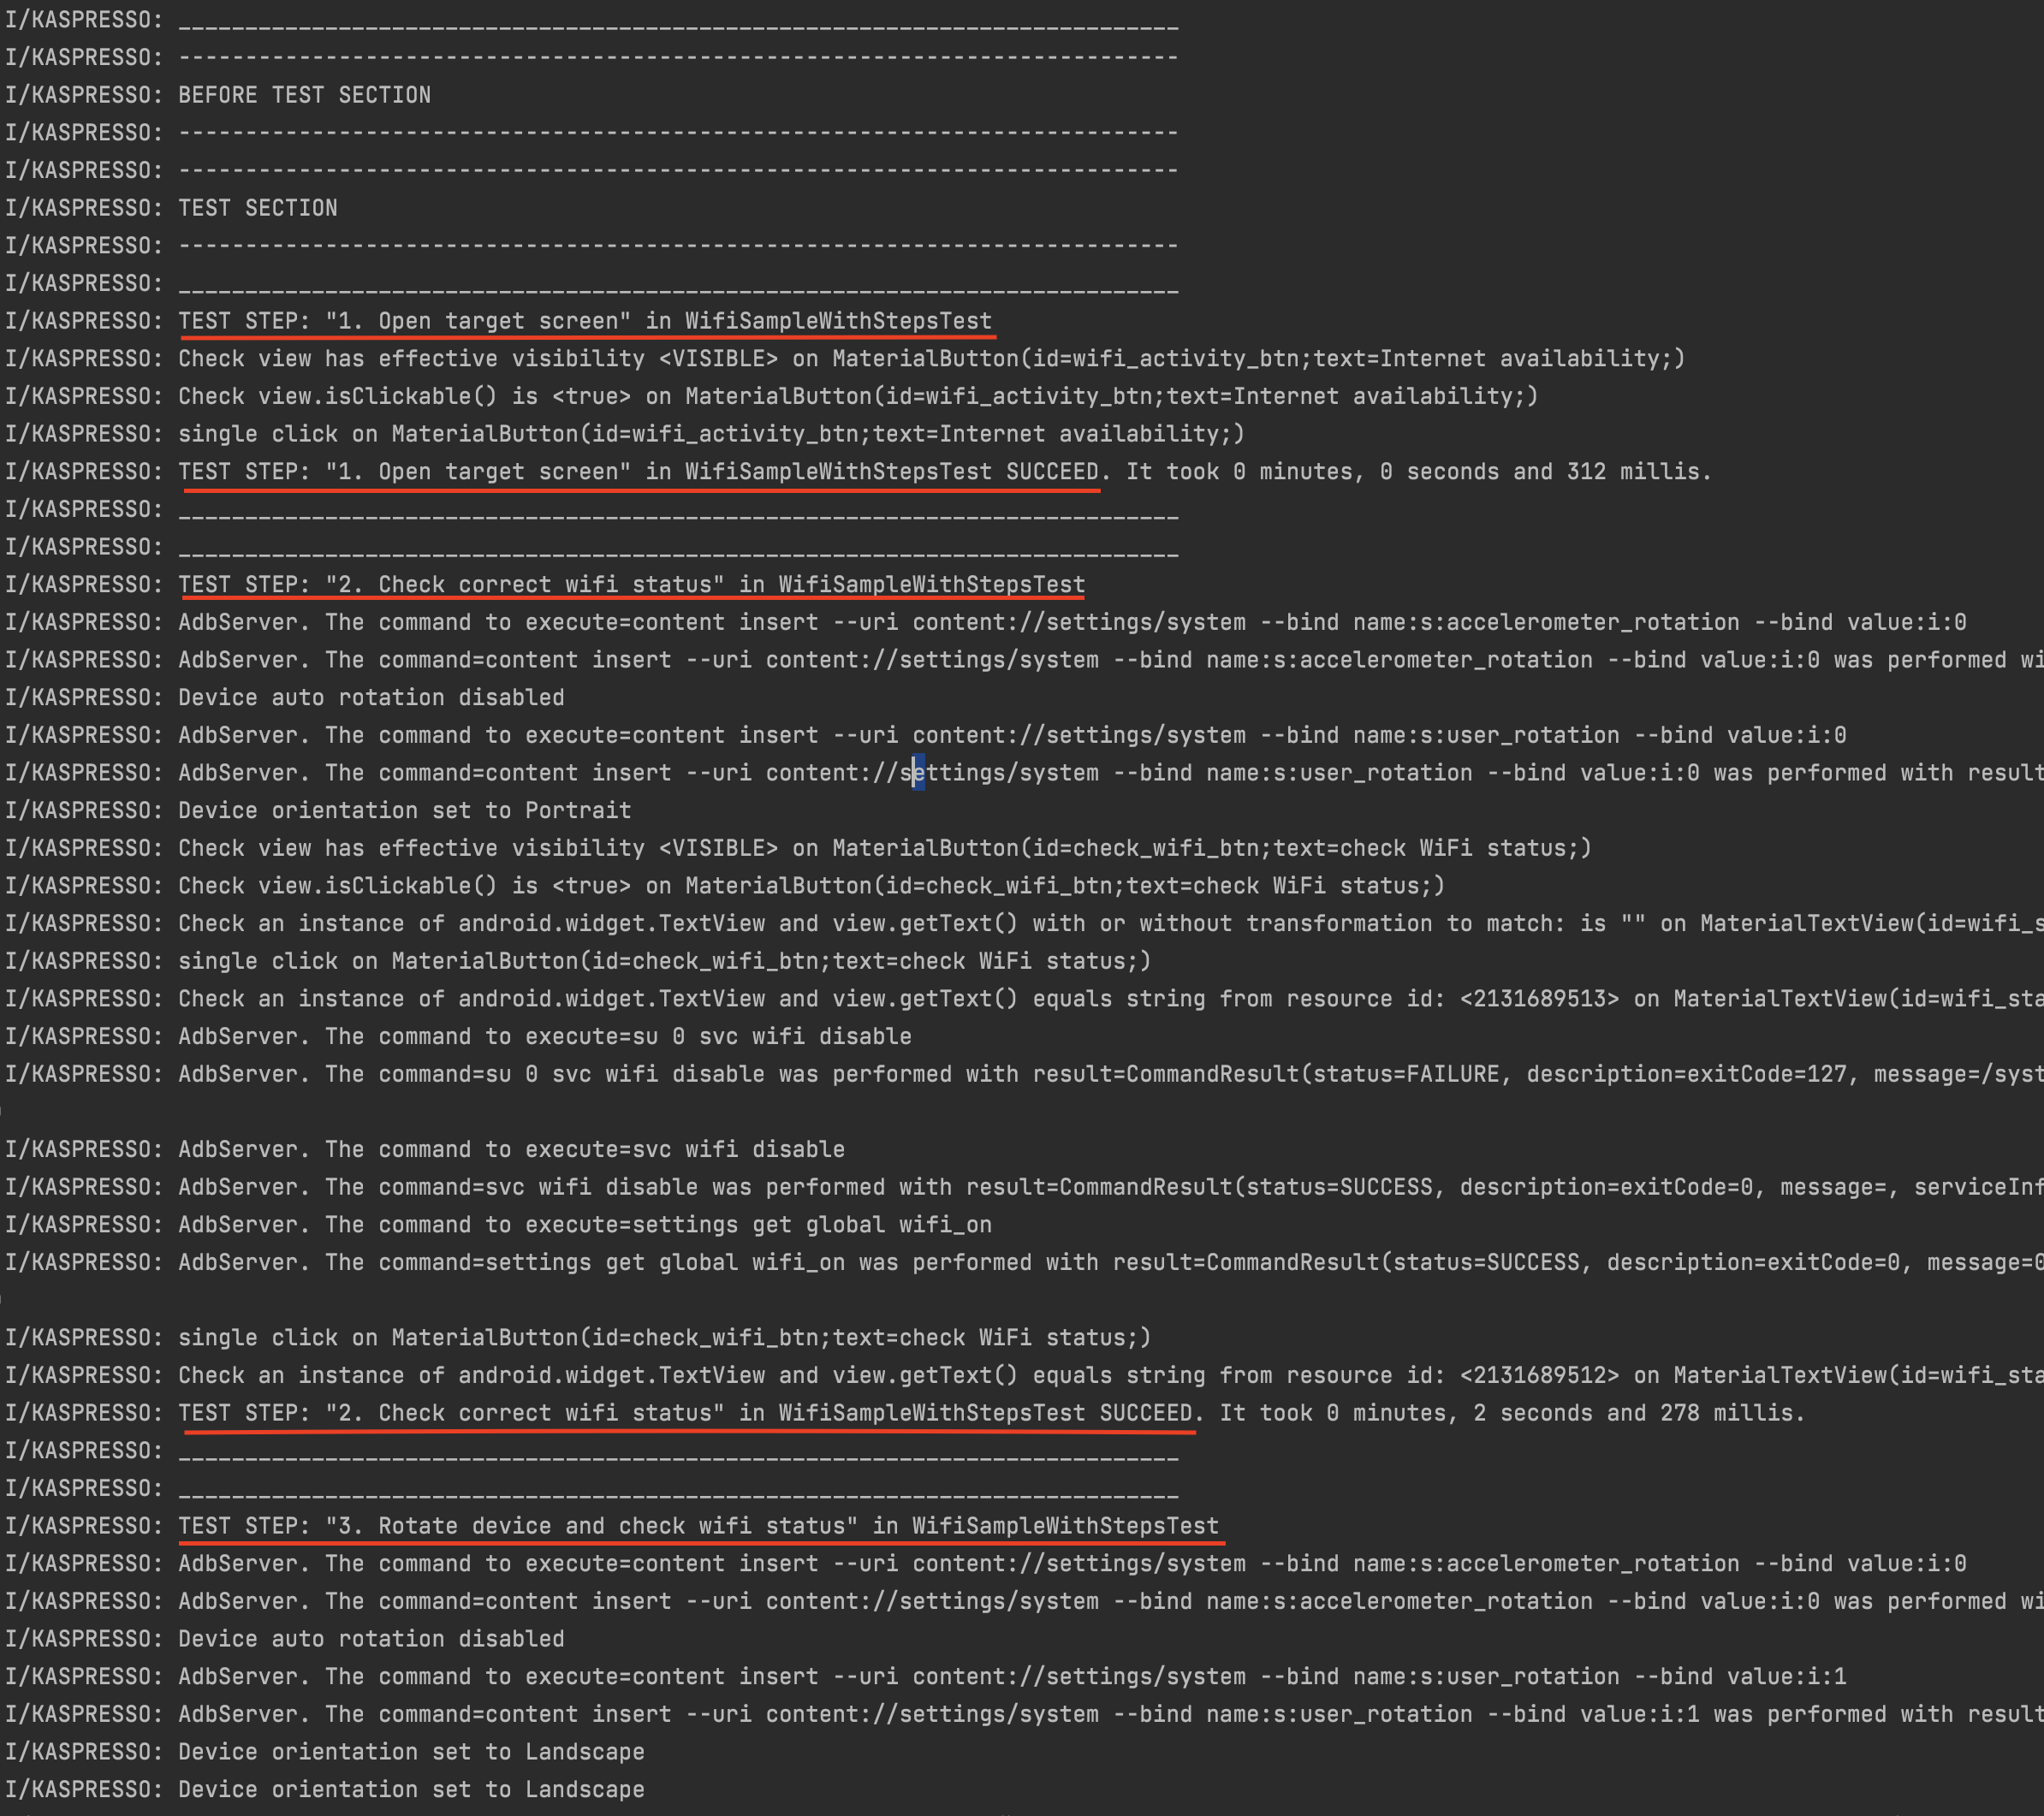
Thus, thanks to the use of steps, not only our code has become more understandable and easy to understand, but also the logs have a clear structure and allow you to quickly determine which steps were performed and what the result of these operations is.
Let's run this test again now with the internet off. The test falls. Let's look at the logs.
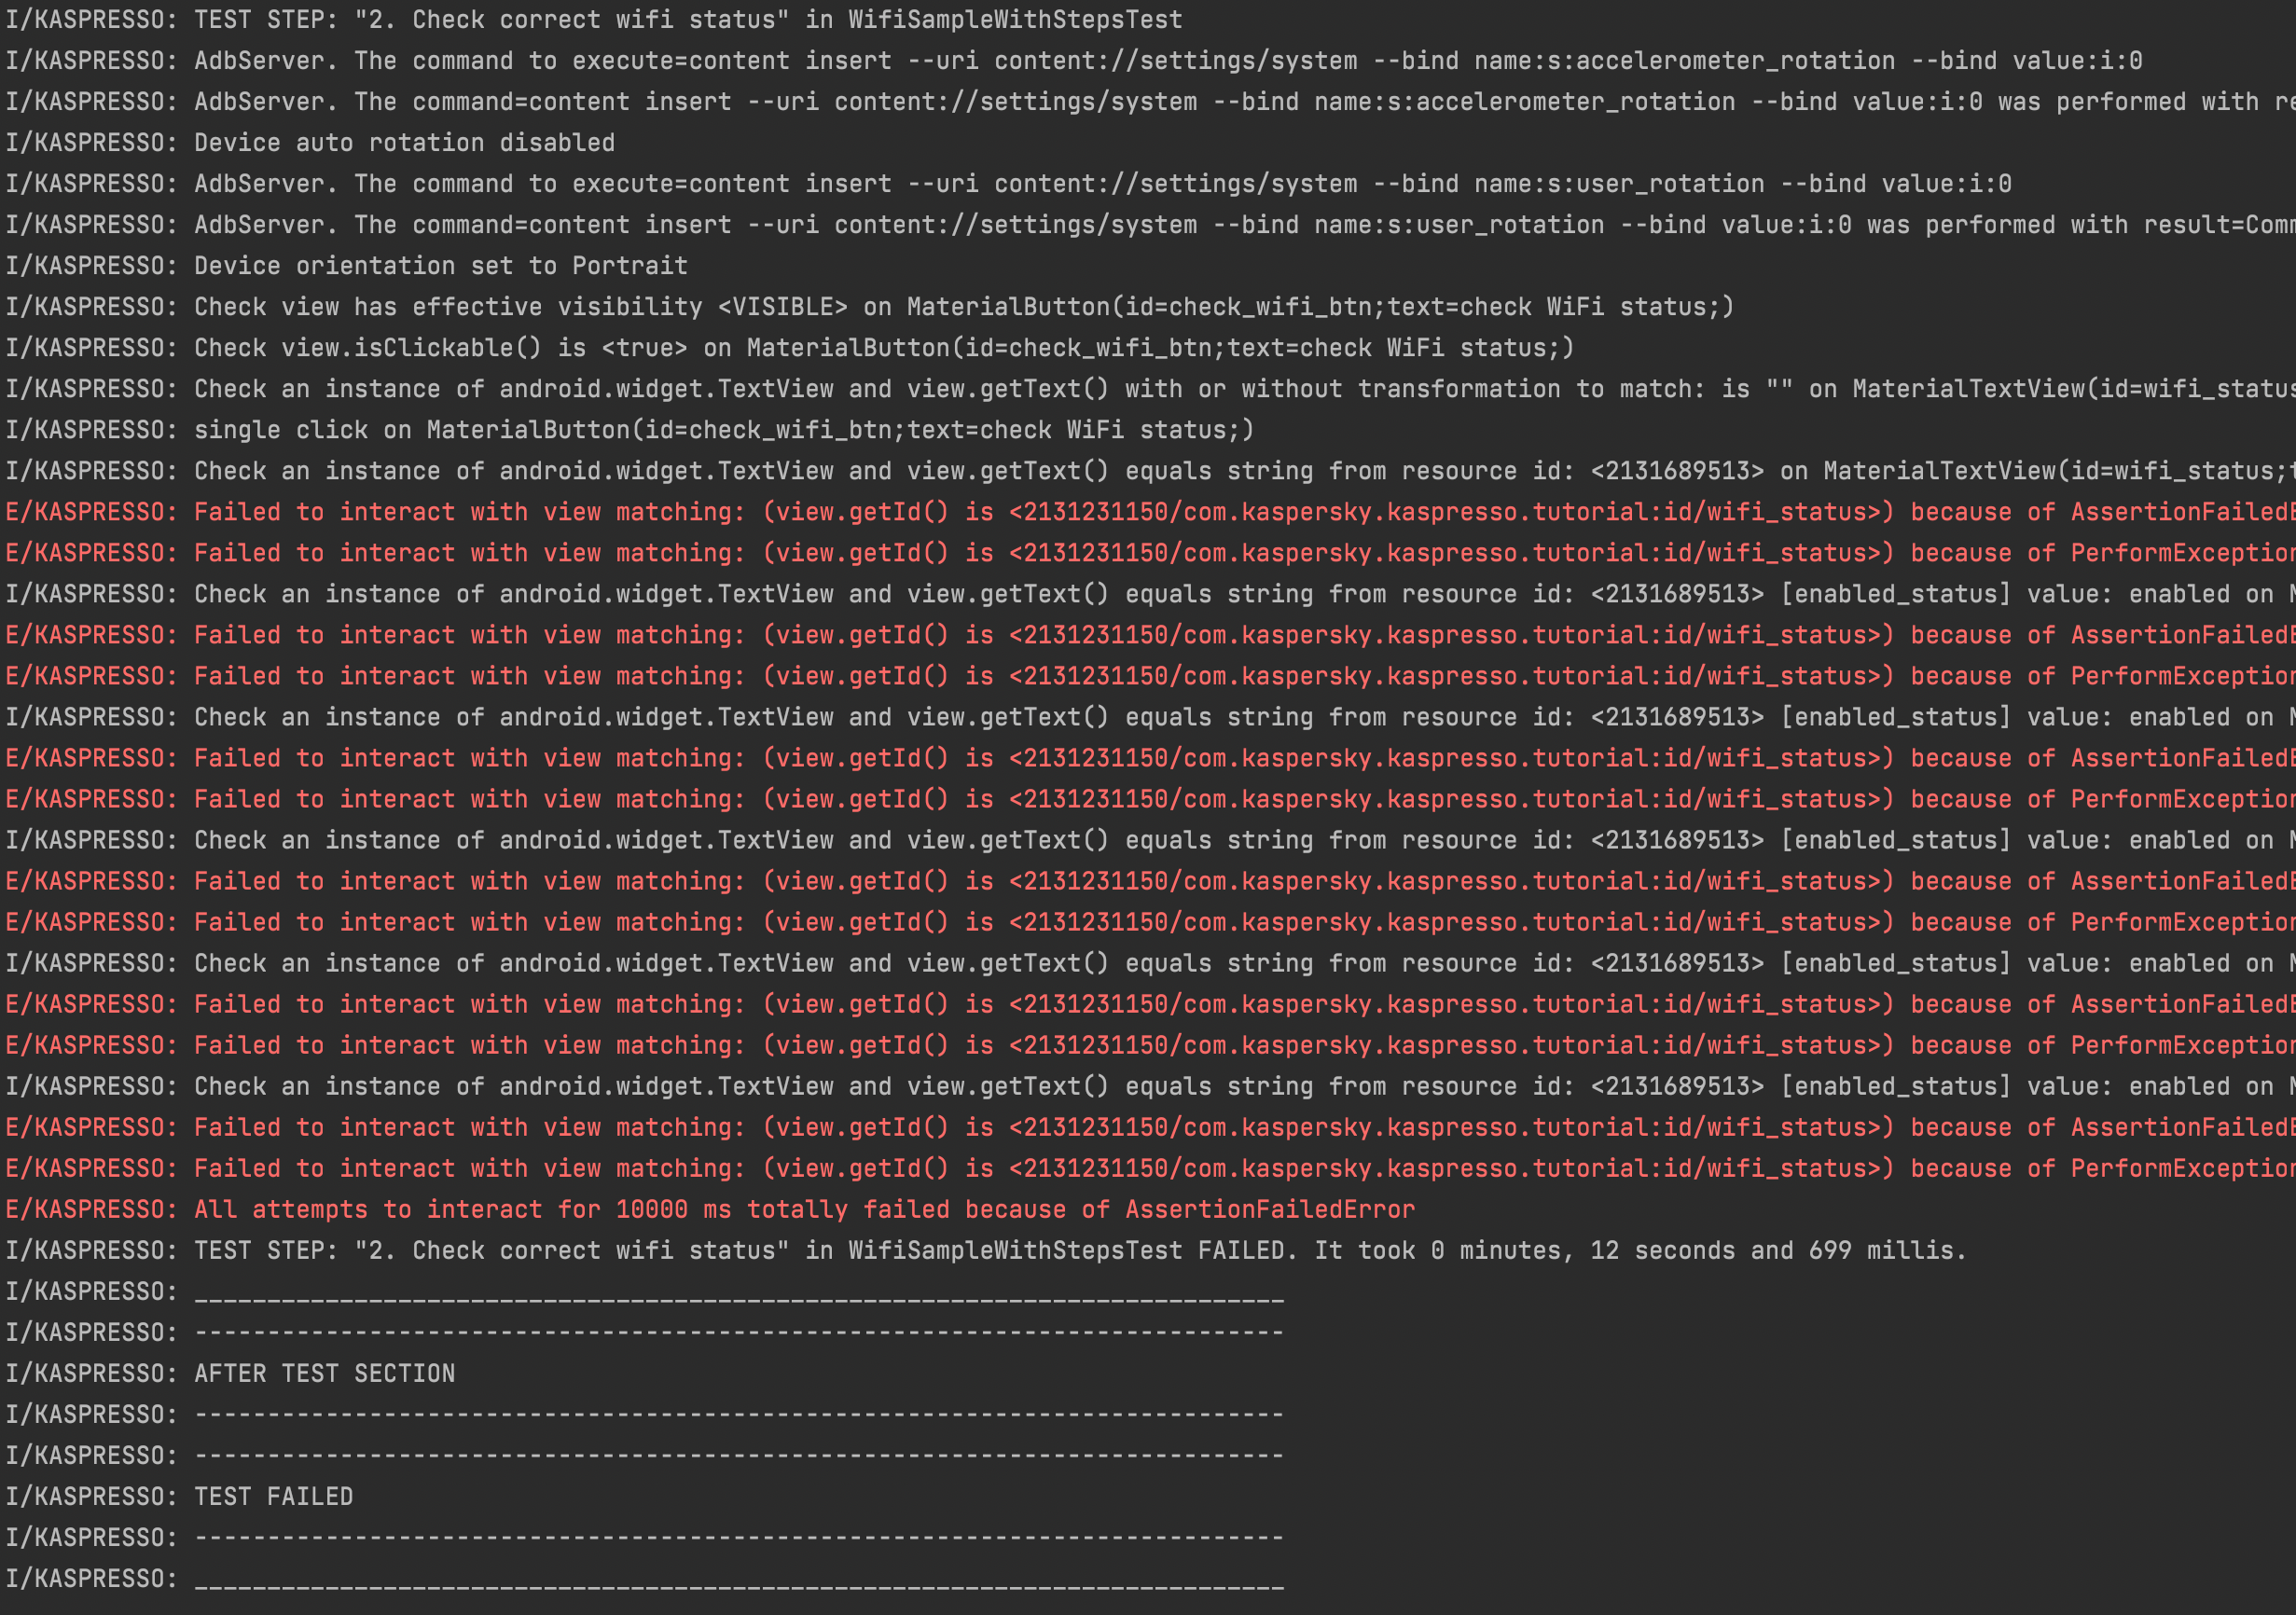
Now it becomes much easier to find an error in the test, thanks to understandable logs.
Before and After sections
Our code has become much better, but one important problem remains. It is necessary to reset the device to a default state before each test: the Internet must be turned on and the portrait orientation must be set.
Kaspresso has the ability to add before and after blocks. The code inside the before block will be executed before the test, and this is where we can set the defaults. The code inside the after block will be executed after the test. During the test, the state of the phone may change: we can turn off the Internet, change orientation, but after the test we need to return to the original state. We will do this inside the after block.
Then the test code will look like this:
package com.kaspersky.kaspresso.tutorial

import androidx.test.ext.junit.rules.activityScenarioRule
import com.kaspersky.kaspresso.device.exploit.Exploit
import com.kaspersky.kaspresso.testcases.api.testcase.TestCase
import com.kaspersky.kaspresso.tutorial.screen.MainScreen
import com.kaspersky.kaspresso.tutorial.screen.WifiScreen
import org.junit.Rule
import org.junit.Test

class WifiSampleWithStepsTest : TestCase() {

    @get:Rule
    val activityRule = activityScenarioRule<MainActivity>()

    @Test
    fun test() {
        before {
            /**
             * Set portrait orientation and enable Wifi before the test
             */
            device.exploit.setOrientation(Exploit.DeviceOrientation.Portrait)
            device.network.toggleWiFi(true)
        }.after {
            /**
             * Reset the default state after the test
             */
            device.exploit.setOrientation(Exploit.DeviceOrientation.Portrait)
            device.network.toggleWiFi(true)
        }.run {
            step("Open target screen") {
                MainScreen {
                    wifiActivityButton {
                        isVisible()
                        isClickable()
                        click()
                    }
                }
            }
            step("Check correct wifi status") {
                WifiScreen {
                    checkWifiButton.isVisible()
                    checkWifiButton.isClickable()
                    wifiStatus.hasEmptyText()
                    checkWifiButton.click()
                    wifiStatus.hasText(R.string.enabled_status)
                    device.network.toggleWiFi(false)
                    checkWifiButton.click()
                    wifiStatus.hasText(R.string.disabled_status)
                }
            }
            step("Rotate device and check wifi status") {
                WifiScreen {
                    device.exploit.rotate()
                    wifiStatus.hasText(R.string.disabled_status)
                }
            }
        }
    }
}
The test is almost ready, we can add one small improvement. Now after flipping the device, we check that the text is still the same, but we don't check that the orientation has actually changed. If it turns out that if the device.expoit.rotate() method did not work for some reason, then the orientation will not change and the check for text will be useless. Let's add a check that the device's orientation is landscape.
Assert.assertTrue(device.context.resources.configuration.orientation == Configuration.ORIENTATION_LANDSCAPE)
Now the complete test code looks like this:
package com.kaspersky.kaspresso.tutorial

import android.content.res.Configuration
import androidx.test.ext.junit.rules.activityScenarioRule
import com.kaspersky.kaspresso.device.exploit.Exploit
import com.kaspersky.kaspresso.testcases.api.testcase.TestCase
import com.kaspersky.kaspresso.tutorial.screen.MainScreen
import com.kaspersky.kaspresso.tutorial.screen.WifiScreen
import org.junit.Assert
import org.junit.Rule
import org.junit.Test

class WifiSampleWithStepsTest : TestCase() {

    @get:Rule
    val activityRule = activityScenarioRule<MainActivity>()

    @Test
    fun test() {
        before {
            device.exploit.setOrientation(Exploit.DeviceOrientation.Portrait)
            device.network.toggleWiFi(true)
        }.after {
            device.exploit.setOrientation(Exploit.DeviceOrientation.Portrait)
            device.network.toggleWiFi(true)
        }.run {
            step("Open target screen") {
                MainScreen {
                    wifiActivityButton {
                        isVisible()
                        isClickable()
                        click()
                    }
                }
            }
            step("Check correct wifi status") {
                WifiScreen {
                    checkWifiButton.isVisible()
                    checkWifiButton.isClickable()
                    wifiStatus.hasEmptyText()
                    checkWifiButton.click()
                    wifiStatus.hasText(R.string.enabled_status)
                    device.network.toggleWiFi(false)
                    checkWifiButton.click()
                    wifiStatus.hasText(R.string.disabled_status)
                }
            }
            step("Rotate device and check wifi status") {
                WifiScreen {
                    device.exploit.rotate()
                    Assert.assertTrue(device.context.resources.configuration.orientation == Configuration.ORIENTATION_LANDSCAPE)
                    wifiStatus.hasText(R.string.disabled_status)
                }
            }
        }
    }
}
Summary
In this lesson, we've significantly improved our code, making it cleaner, clearer, and easier to maintain. This is made possible by Kaspresso's step, before and after functions. We also learned how to output messages to the log, as well as read the logs, filter and analyze them.