Writing your first Kaspresso test
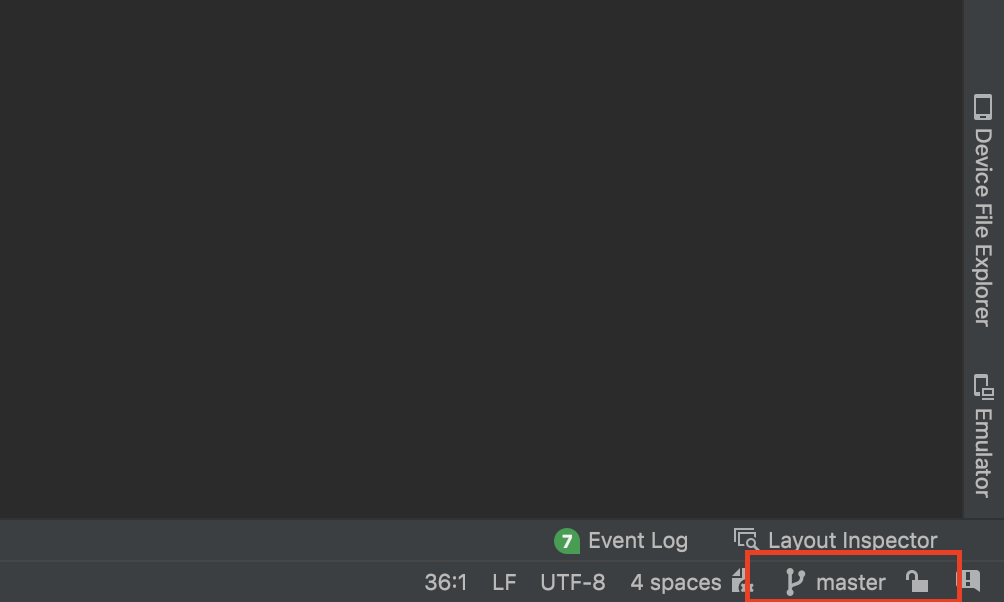
Switch to the desired branch in GIT
In Android Studio you can switch between branches and thus see different versions of a project. Initially, after downloading Kaspresso, you will be in the master branch.
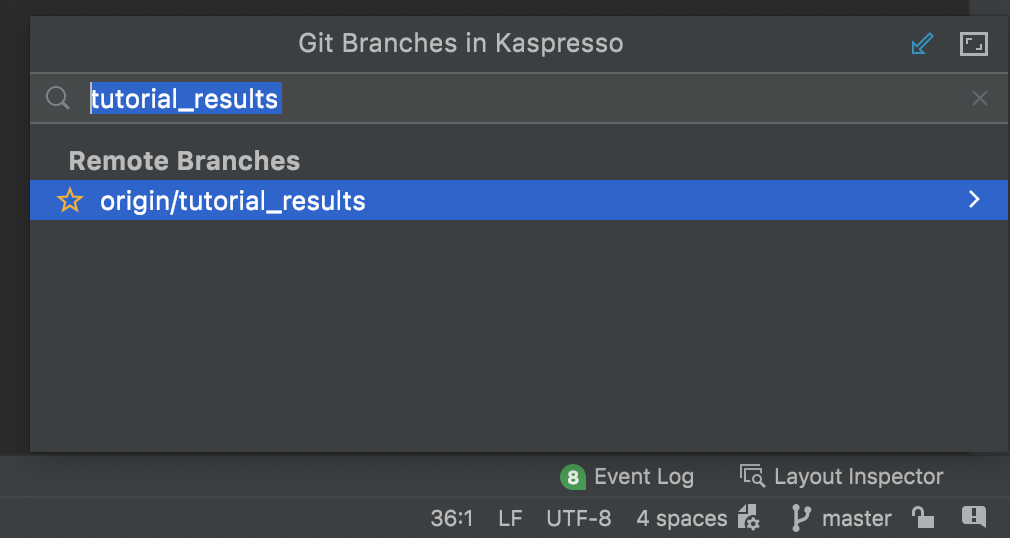
This branch contains the source code of the application, which we will cover with tests. In the current and subsequent lessons, step-by-step instructions for writing autotests will be given in codelabs format. The final result with all written tests is available in the TECH-tutorial-results branch, you can switch to it at any time and see the solution.
To do this, click on the name of the branch you are on, and in the search, enter the name of the branch you are interested in.
Manual testing
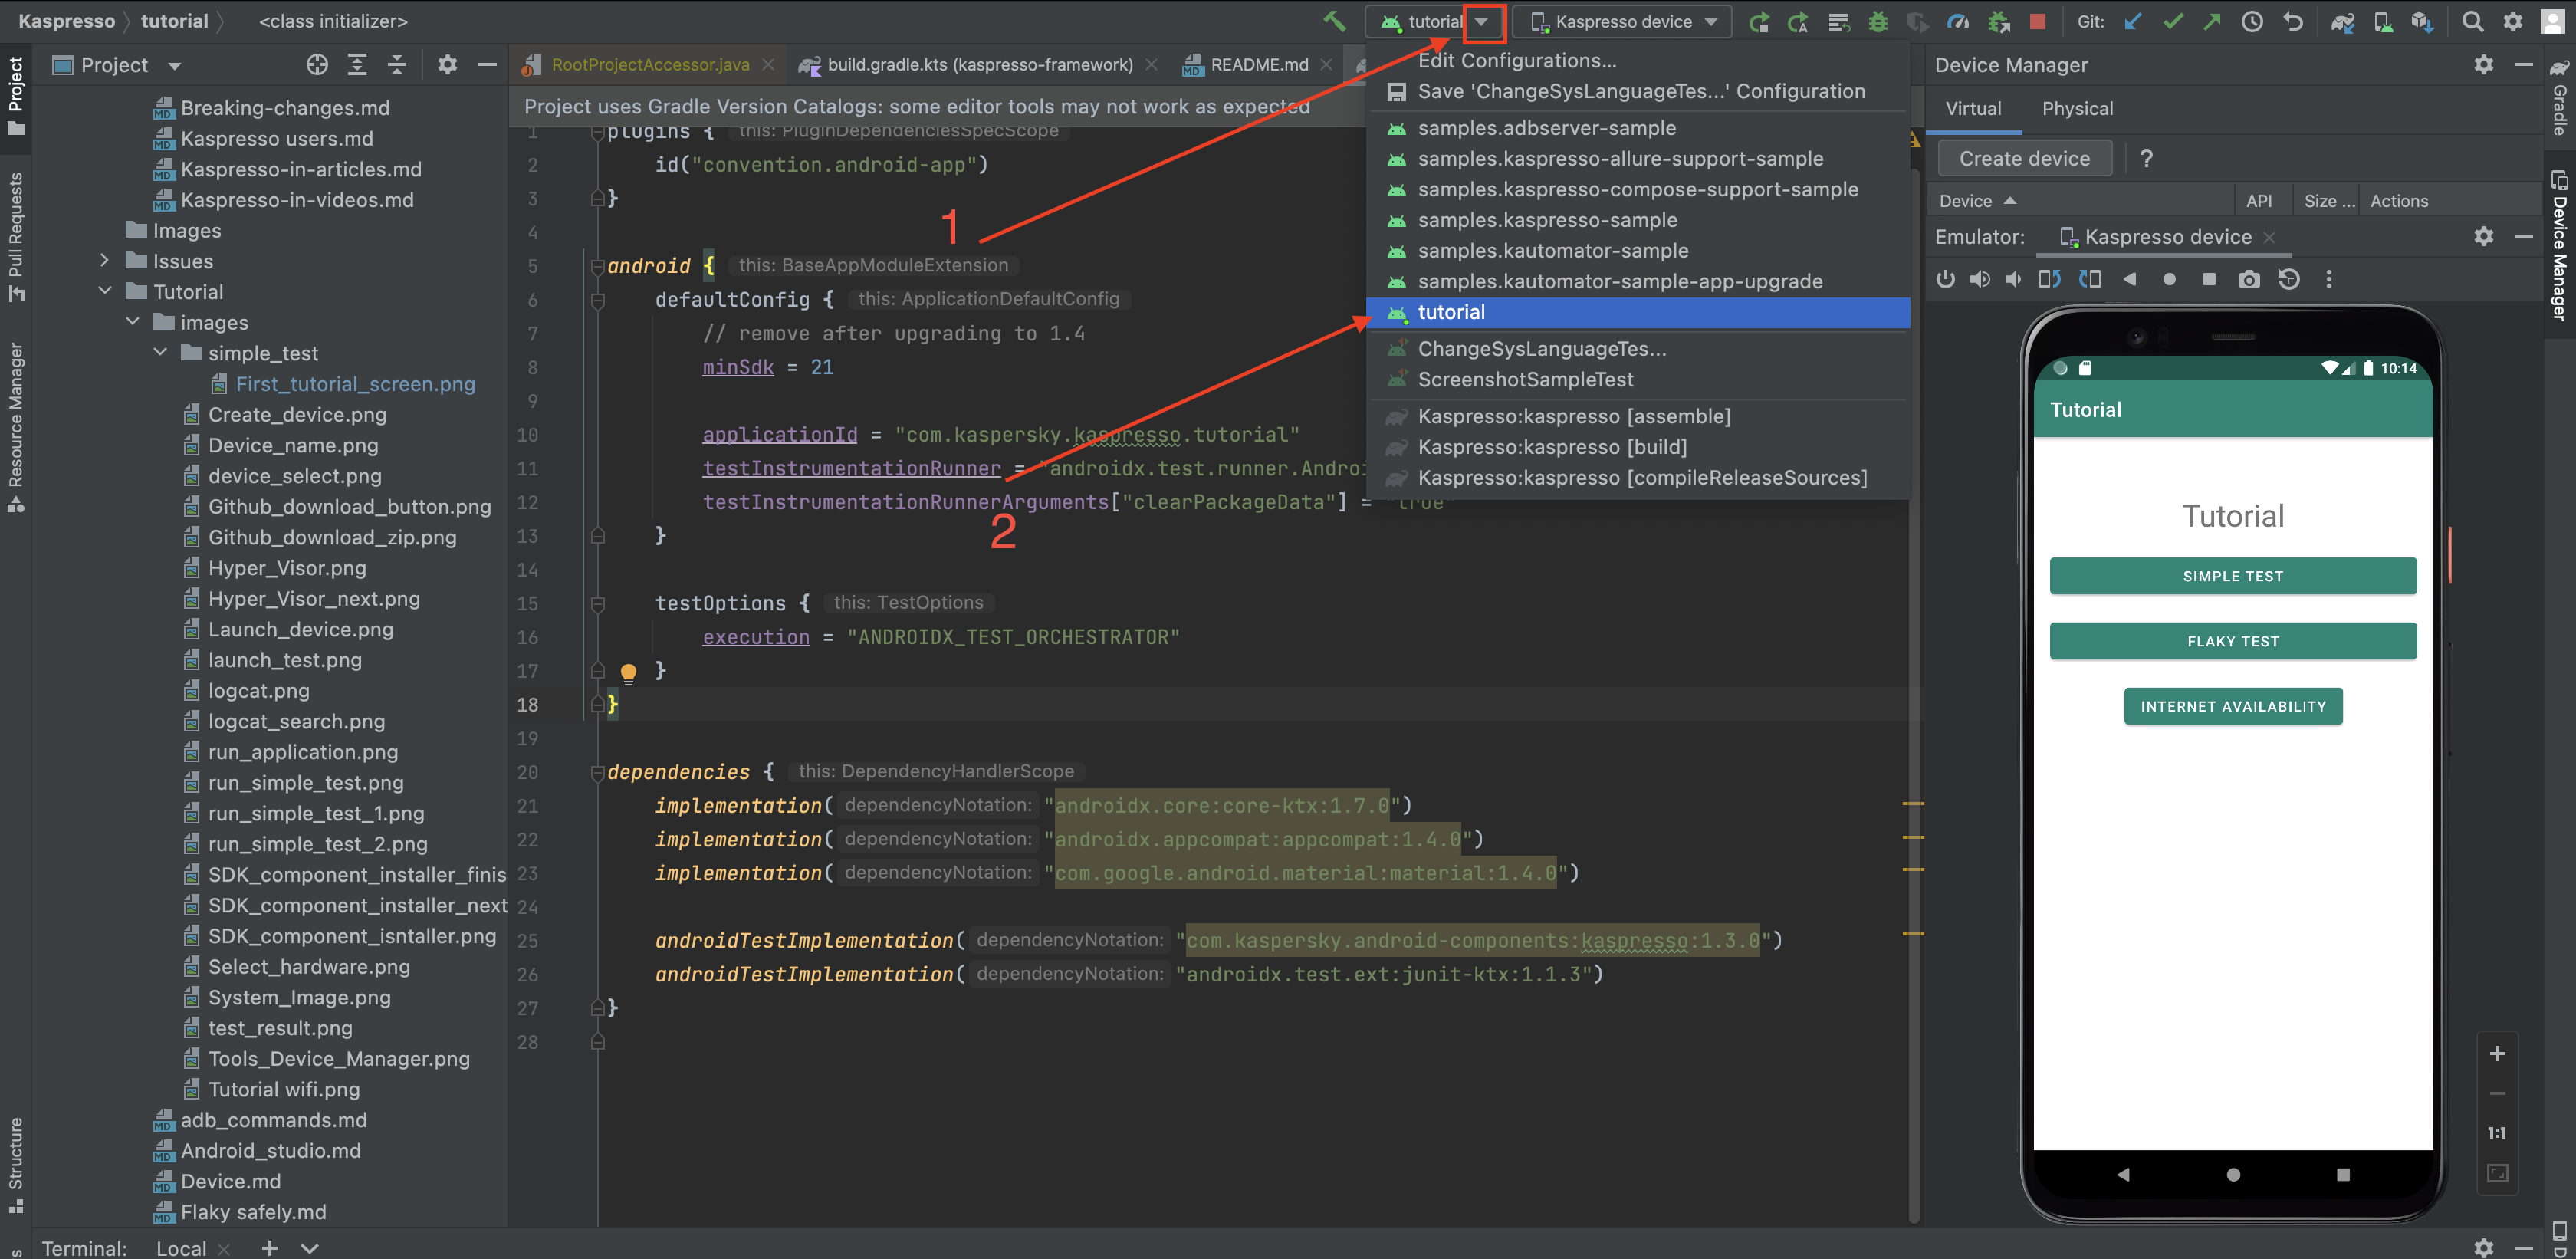
Before we start writing a test, let's take a closer look at the functionality that we will cover with autotests. To do this, switch to the 'master' branch.
Open configuration selection (1) and select tutorial (2):
Check that the desired device is selected (1) and run the application (2):
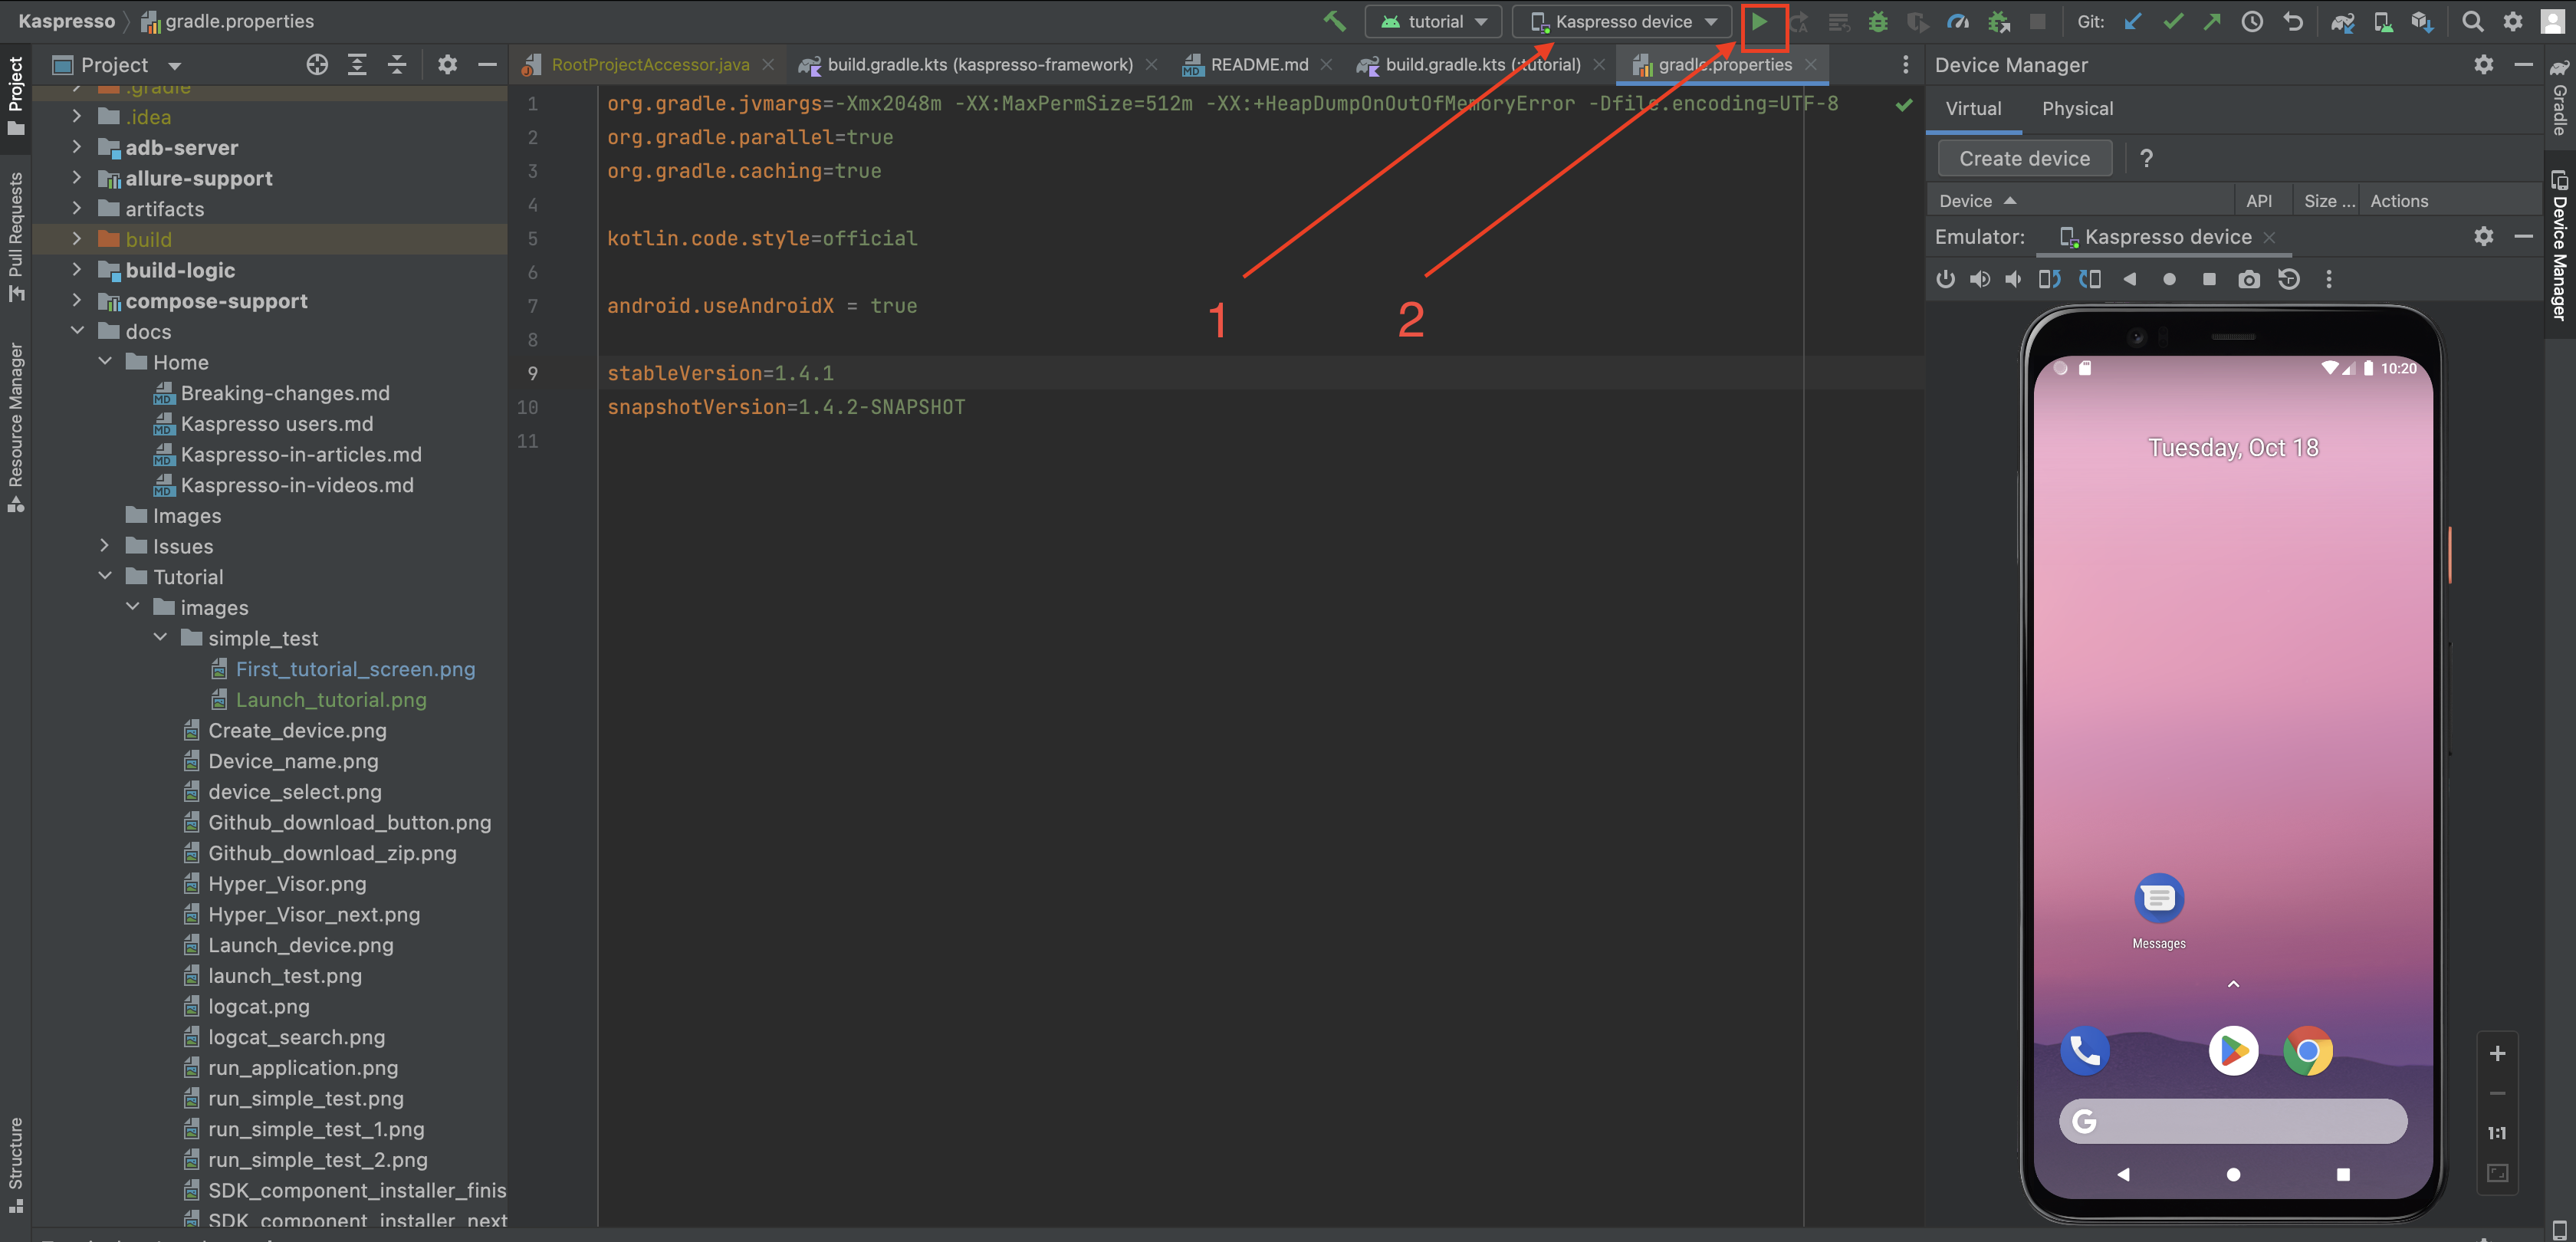
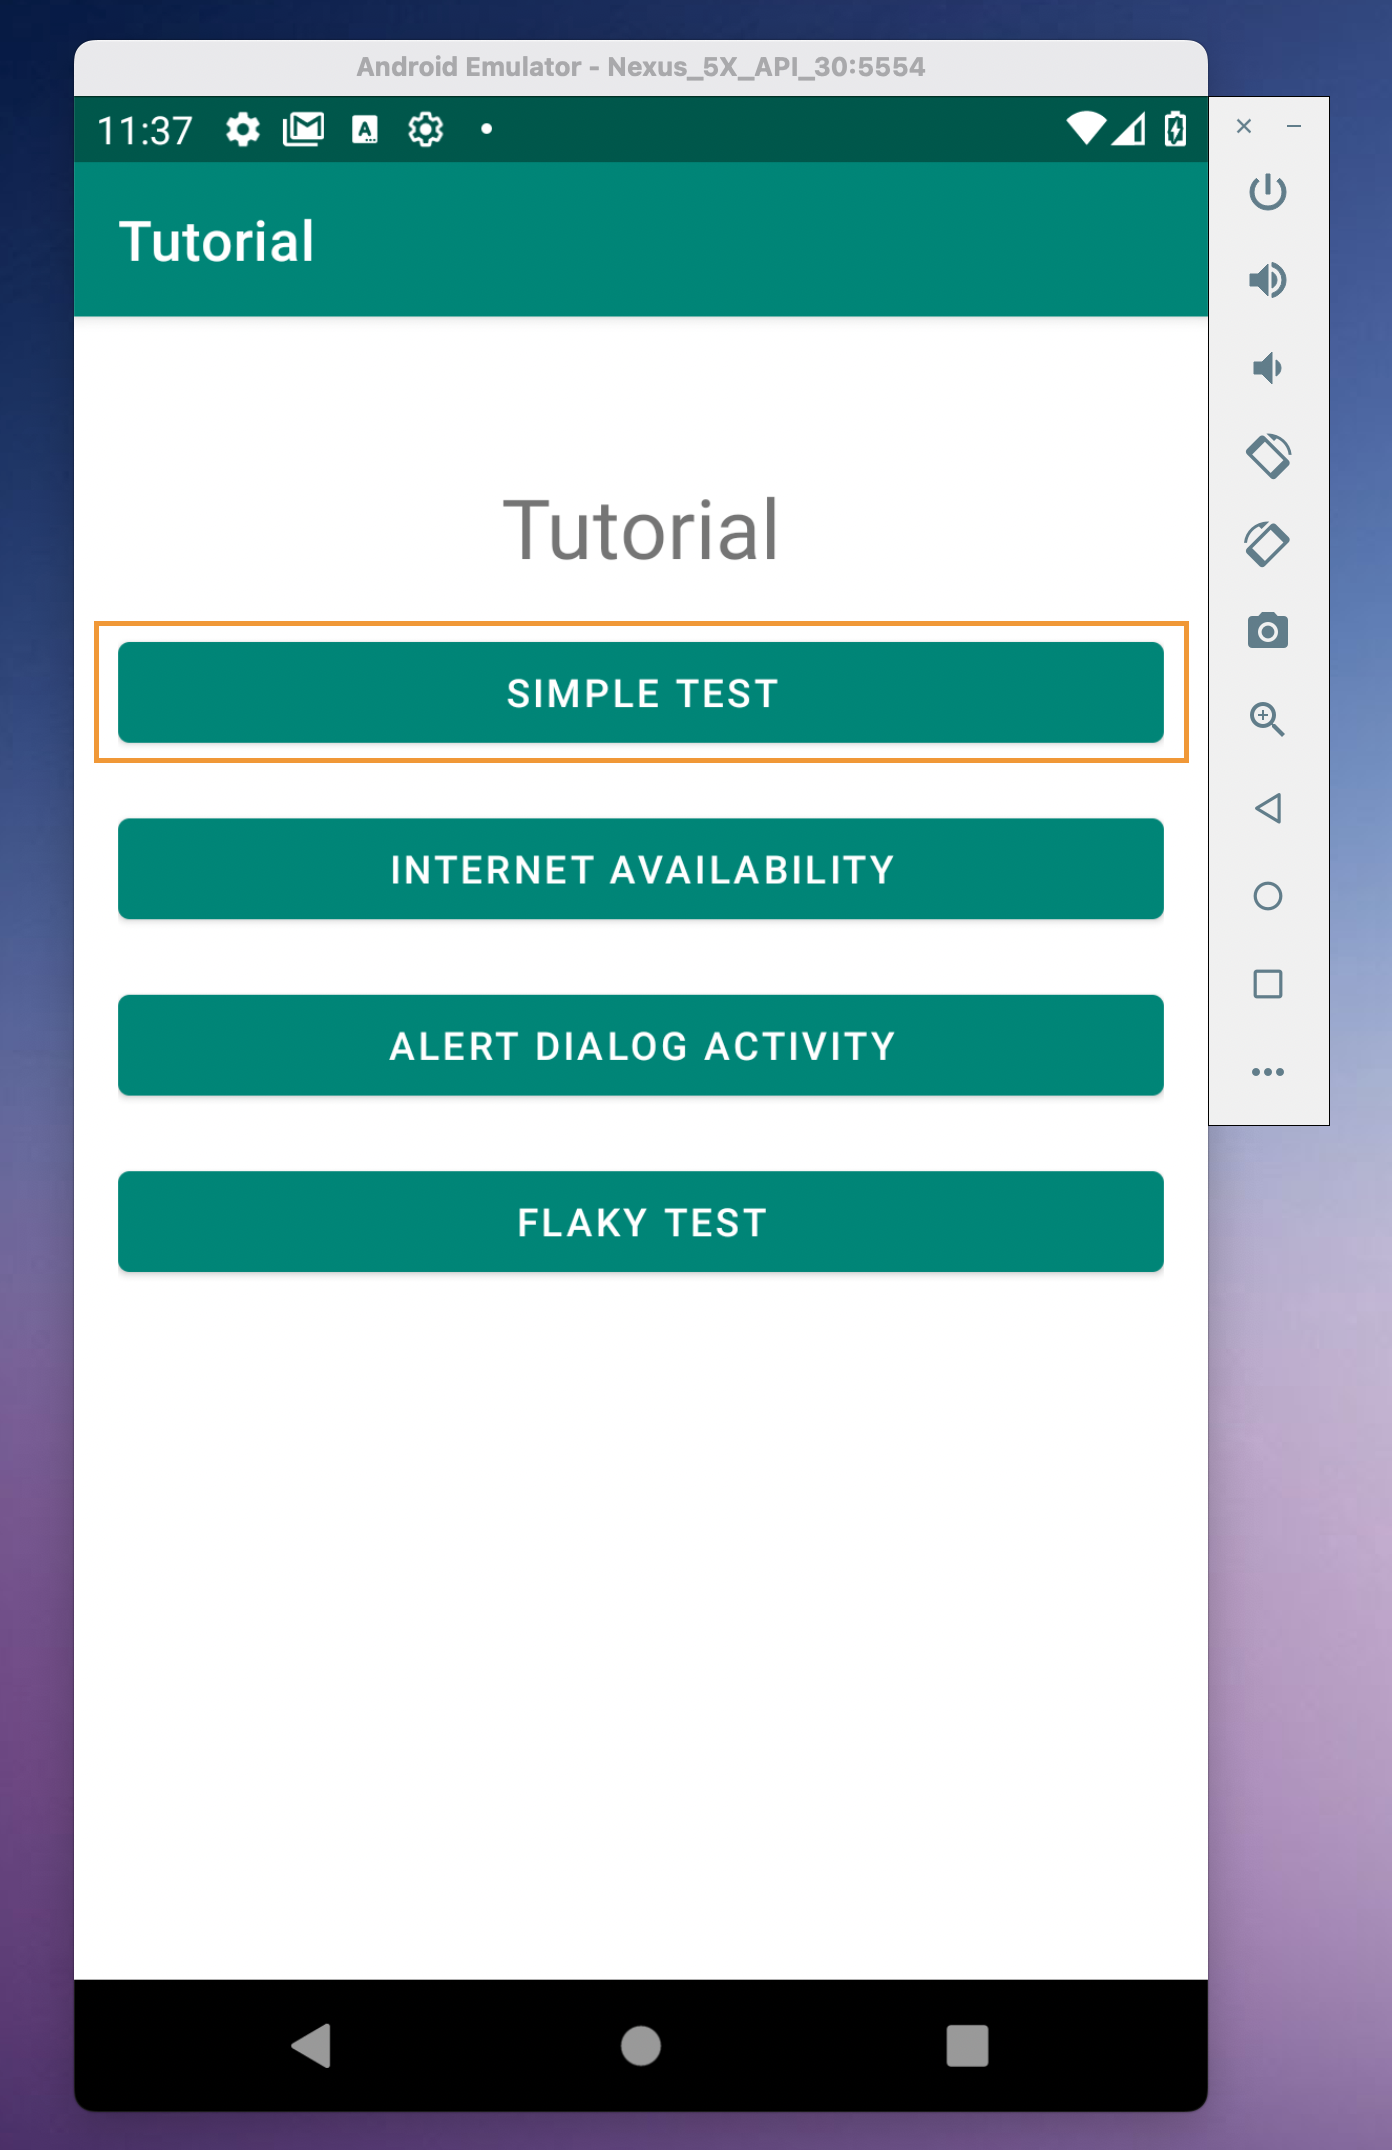
After successfully launching the application, we will see the main screen of the Tutorial application.
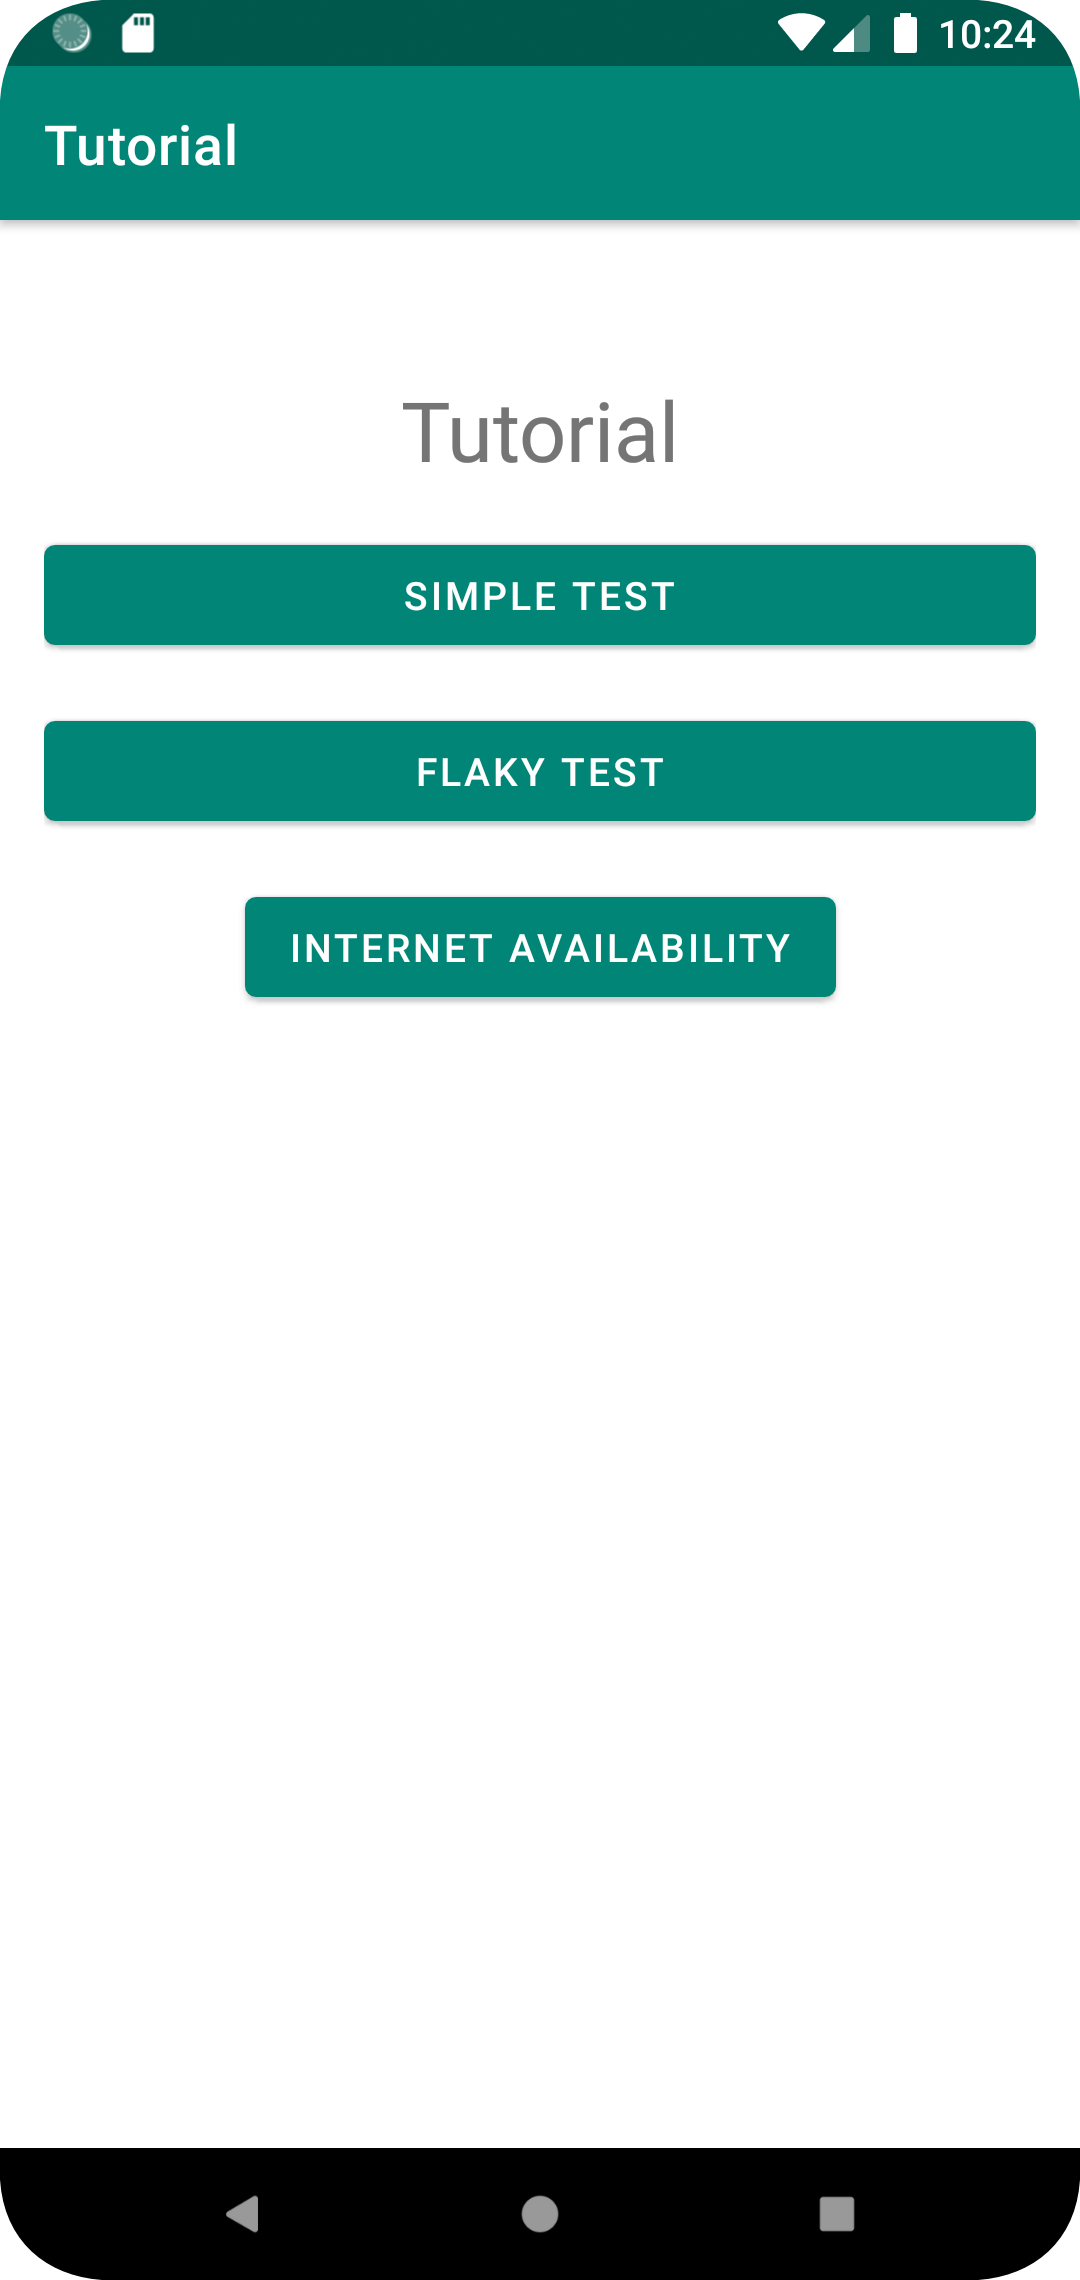
Click on the button with the text "Simple test" and see the following screen:
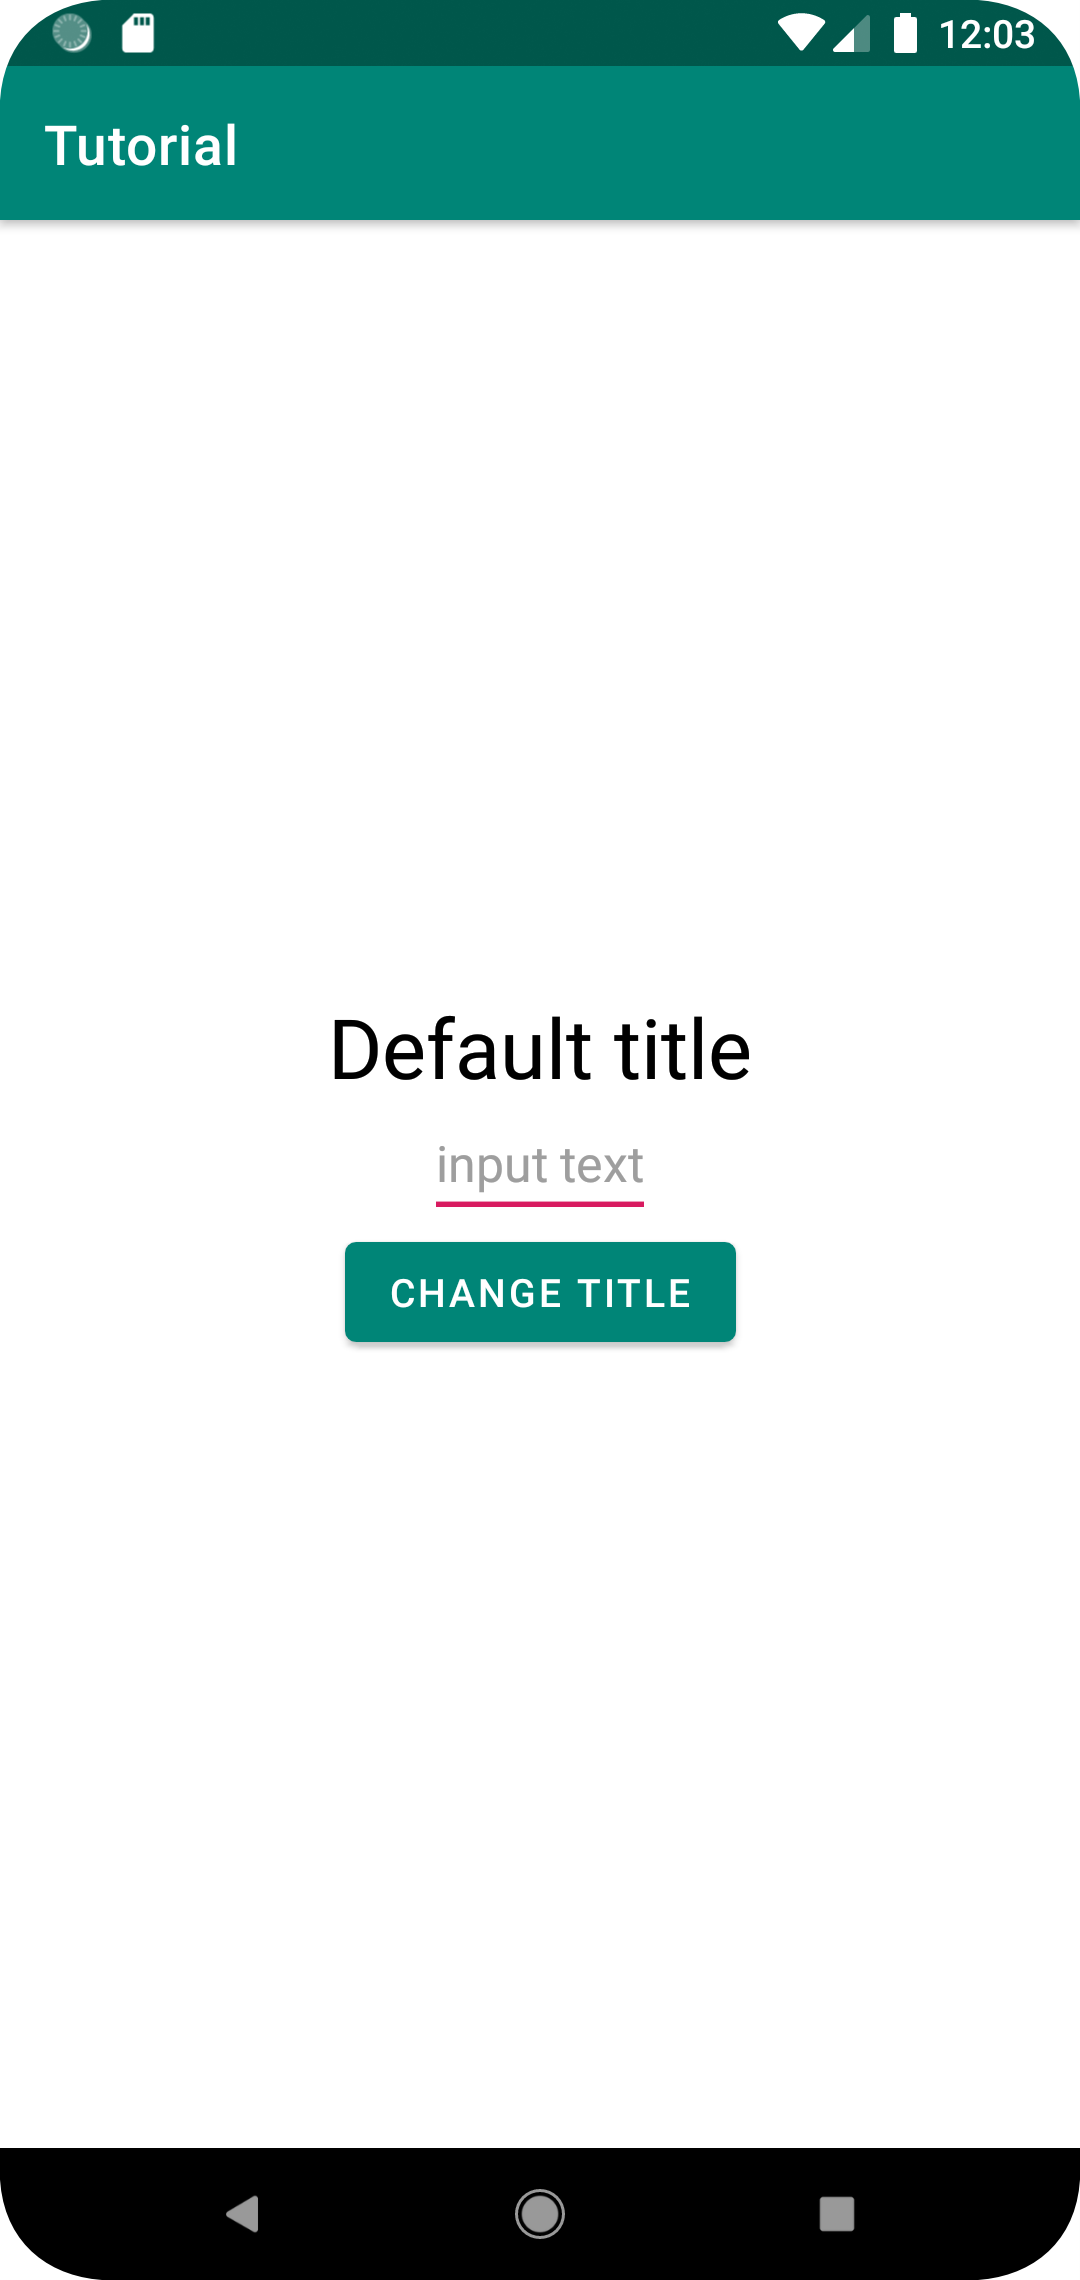
The screen consists of:
-
Header
TextView -
EditText input fields
-
Buttons
Info
A full list of widgets in Android with detailed information can be found here.
When you click on the button, the text in the header changes to the one entered in the input field.
Automatic testing
We manually checked that the result of the application meets the expectations:
- On the main screen there is a button to go to the `SimpleTest` screen (the rest of the elements on this screen do not interest us for now)
- This button is visible
- This button is clickable
- Clicking on it takes us to the SimpleTest screen
- `SimpleTest` screen has three UI elements: title, input field and button
- All these elements are visible
- Header contains default text
- If you enter some text in the input field and click on the button, then the text in the title changes to the entered one
Now we need to write all the same checks in the code so that they are performed automatically.
To cover the application with Kaspresso tests, you need to start by including the Kaspresso library in the project dependencies.
Including Kaspresso in the project
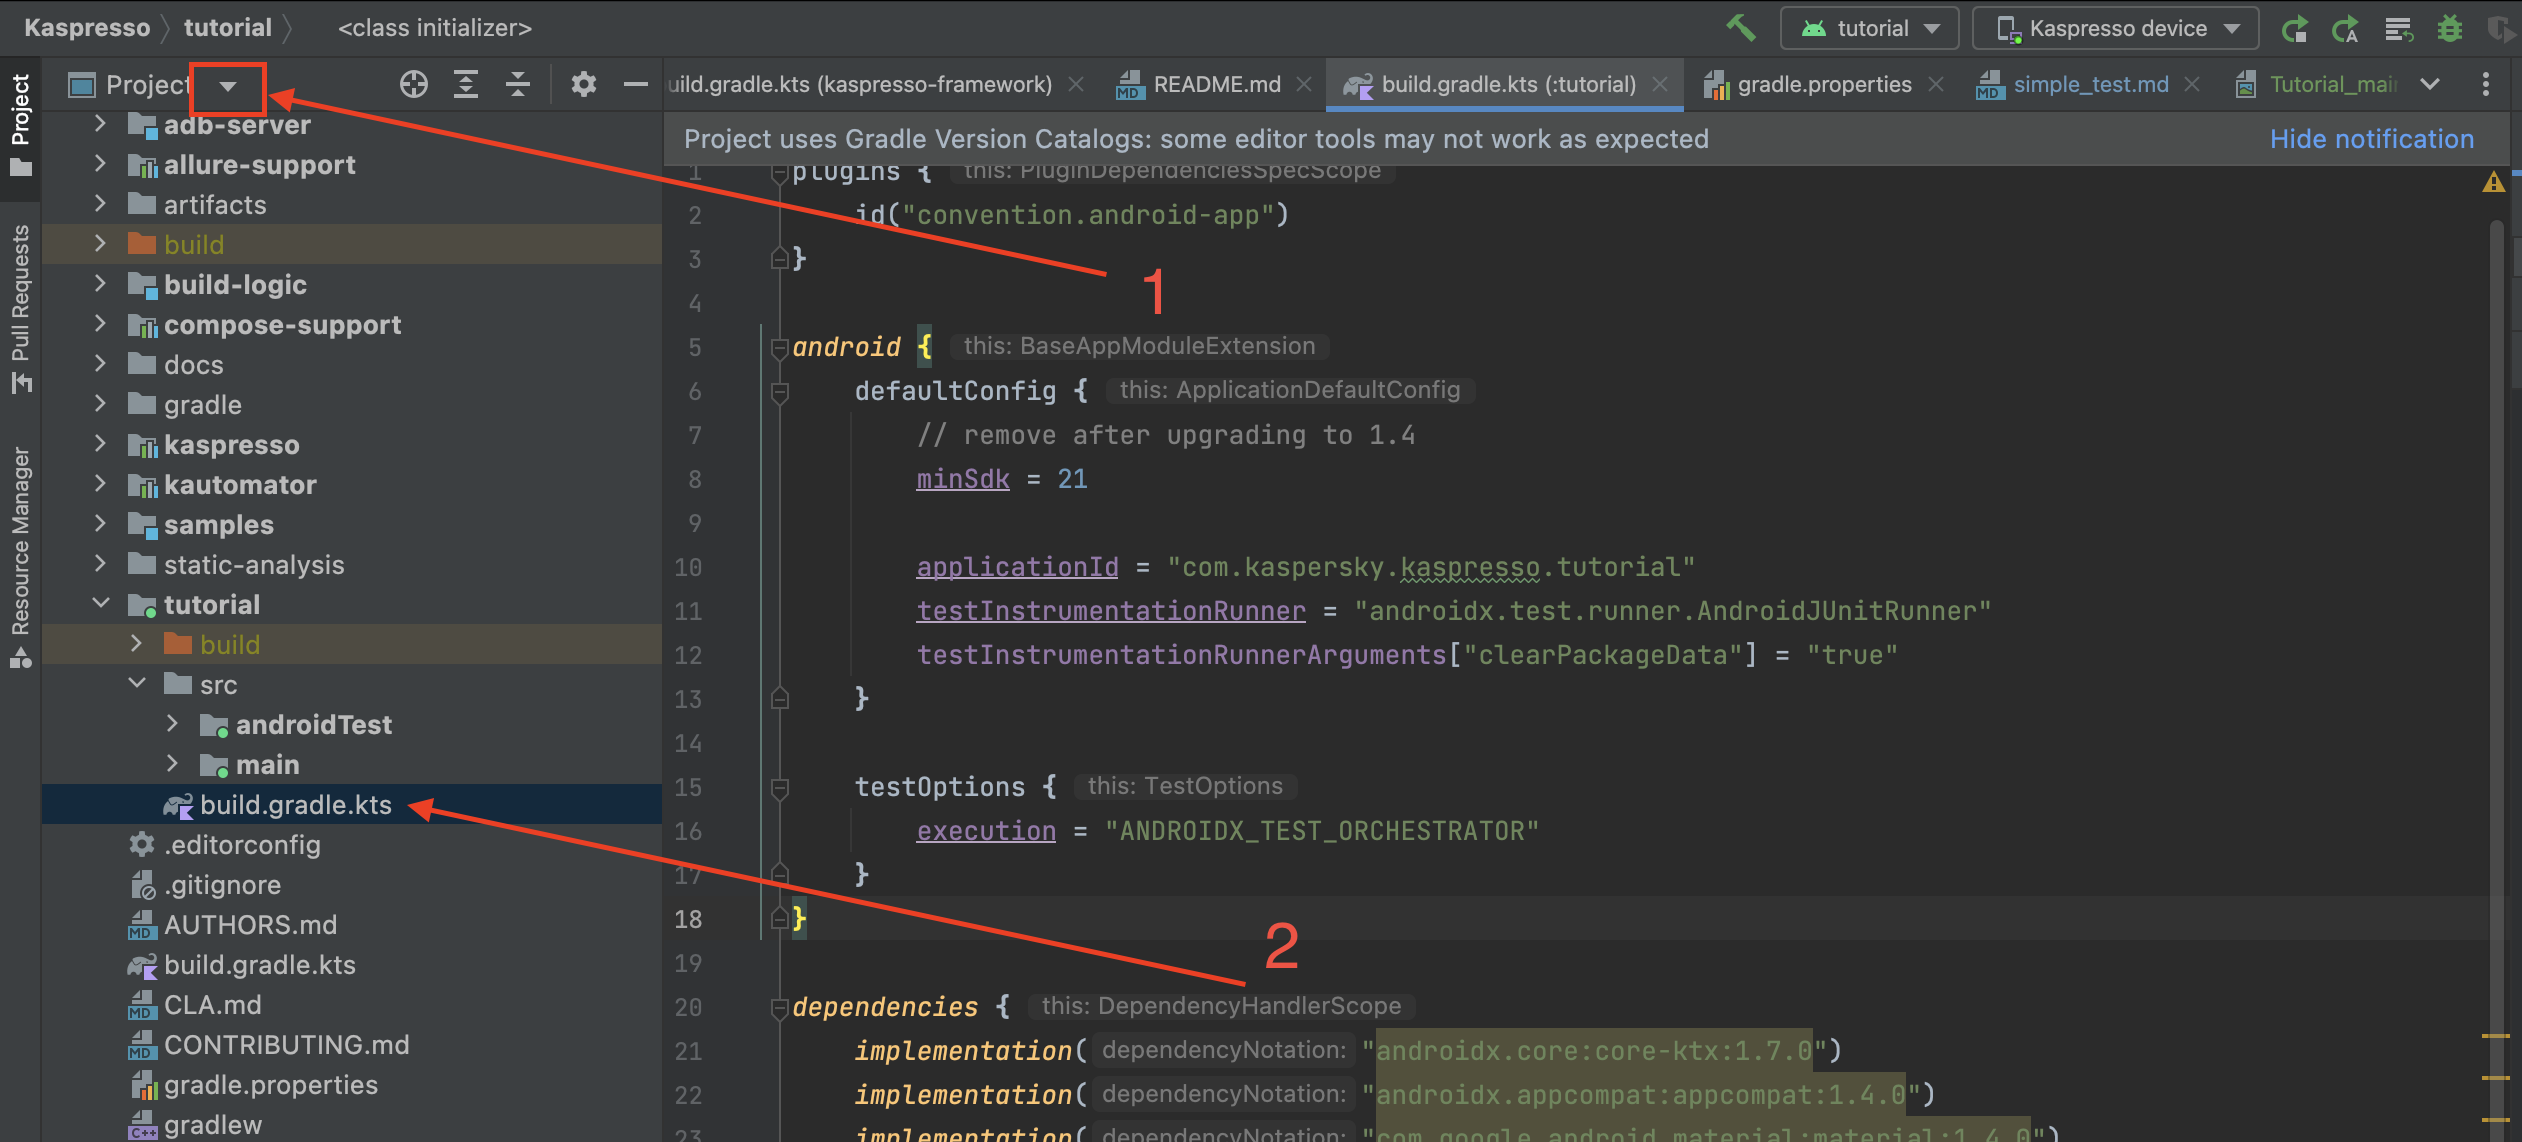
Switch the display of the project files to Project (1) and add the dependency to the existing dependencies section in the build.gradle file of the Tutorial module:
dependencies {
    androidTestImplementation("com.kaspersky.android-components:kaspresso:1.5.1")
    androidTestUtil("androidx.test:orchestrator:1.4.2")
}
Let's start writing the test by creating a Page object for the current screen
We can start writing the code of our test. To do this, it is necessary to create a model (class) for each screen that participates in the test and, inside this model, declare all the interface elements (buttons, text fields, etc.) that make up the screen that the test will interact with. This approach is called Page Object and you can read more about it in the documentation.
In the first four steps of the test, we are interacting with the main screen, so the first step is to create a Page Object for the main screen.
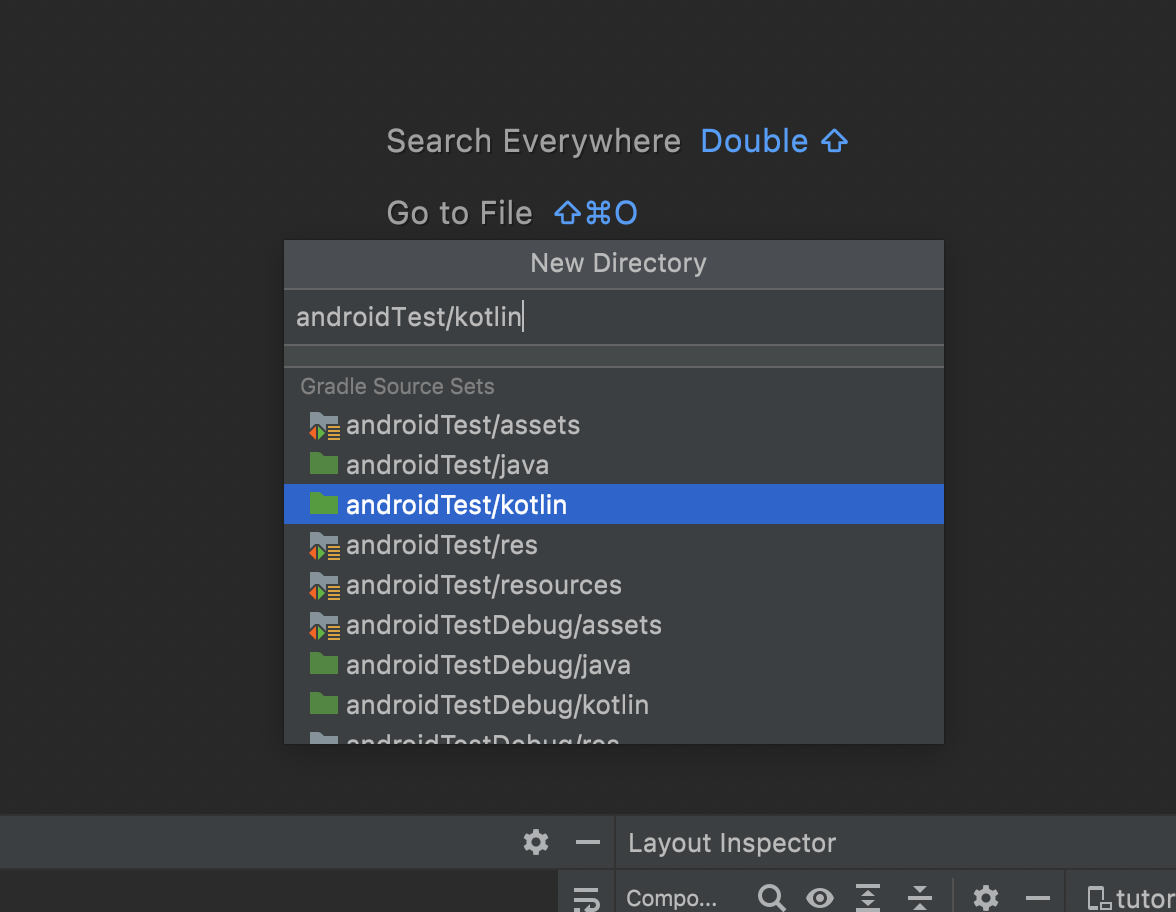
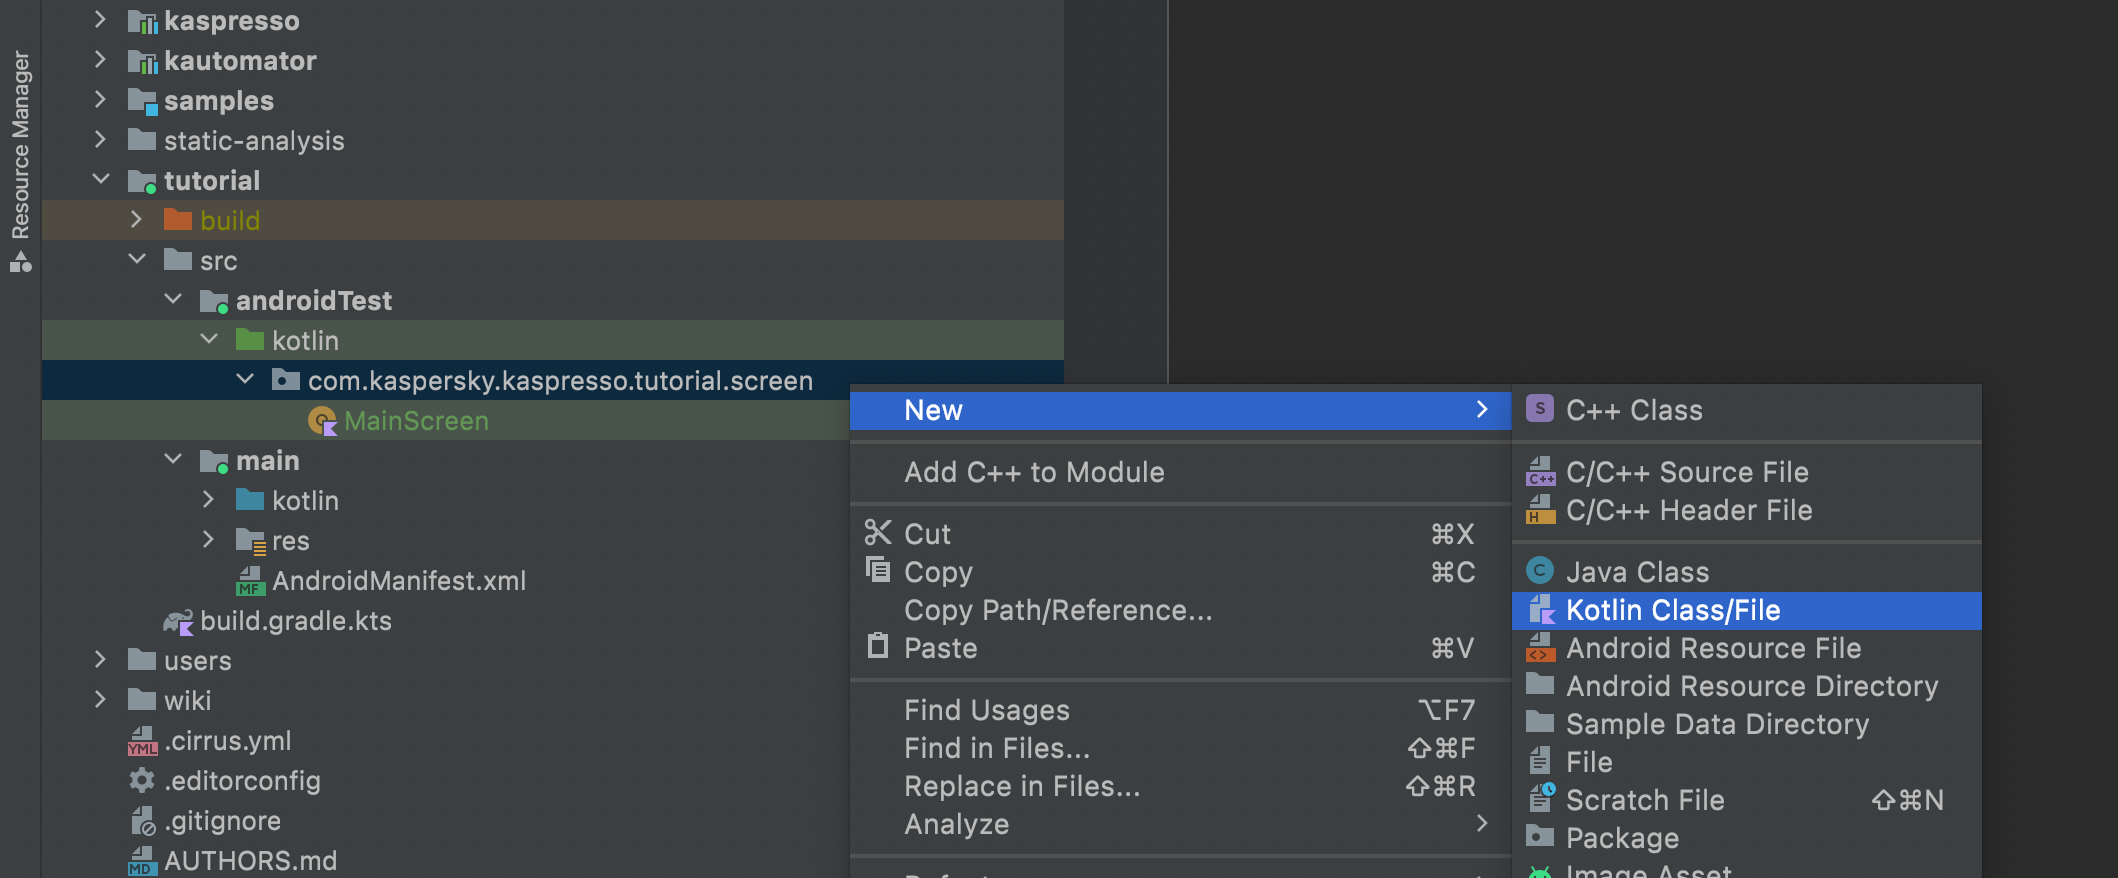
We will work in the androidTest folder of the tutorial module. If you do not have this folder, then you need to create it by right-clicking on the src folder and selecting New -> Directory.
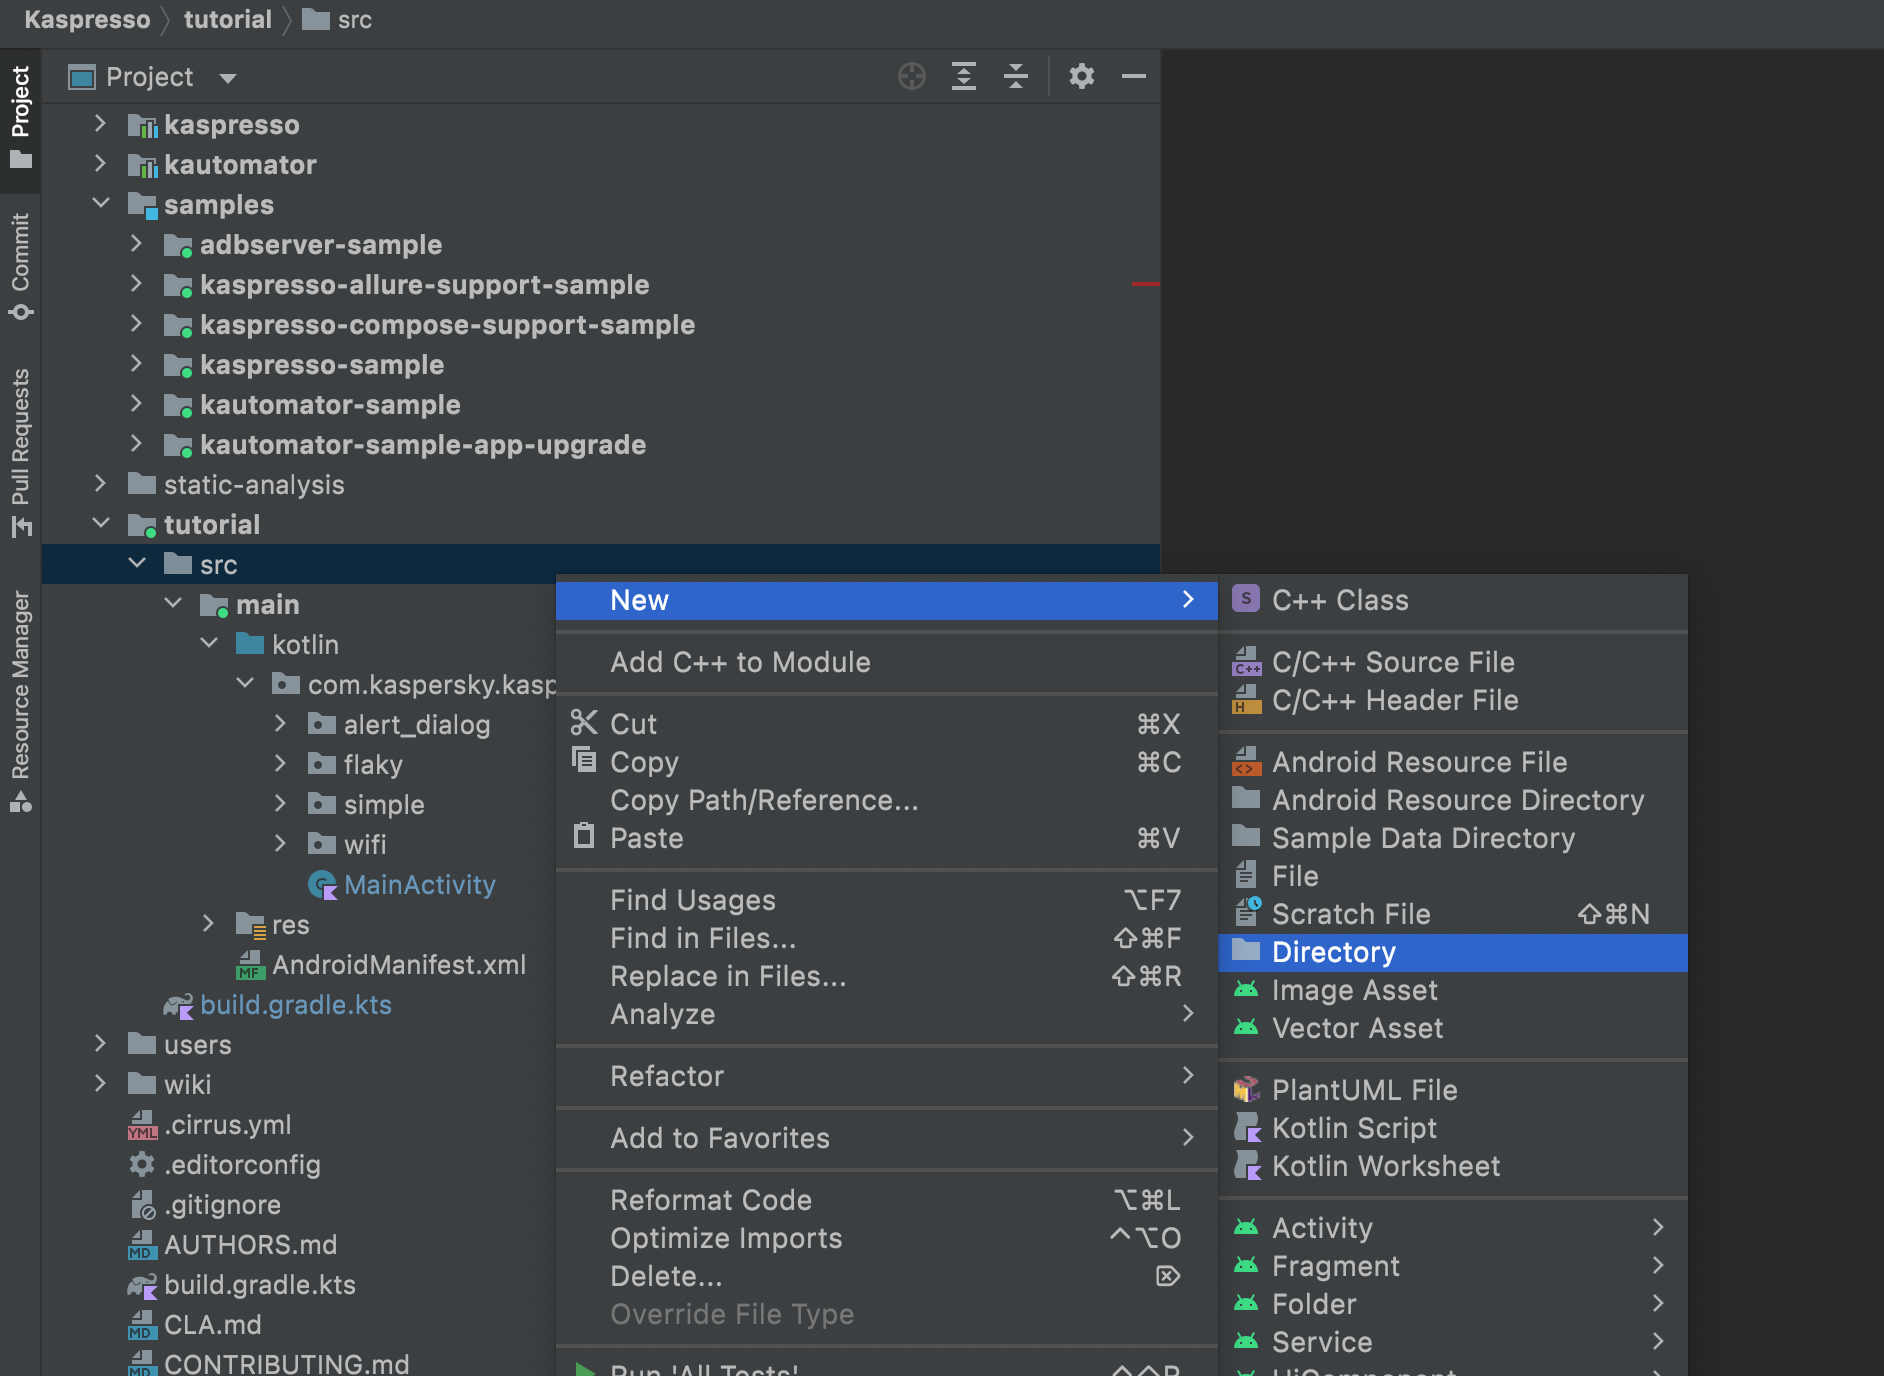
Select the item androidTest/kotlin:
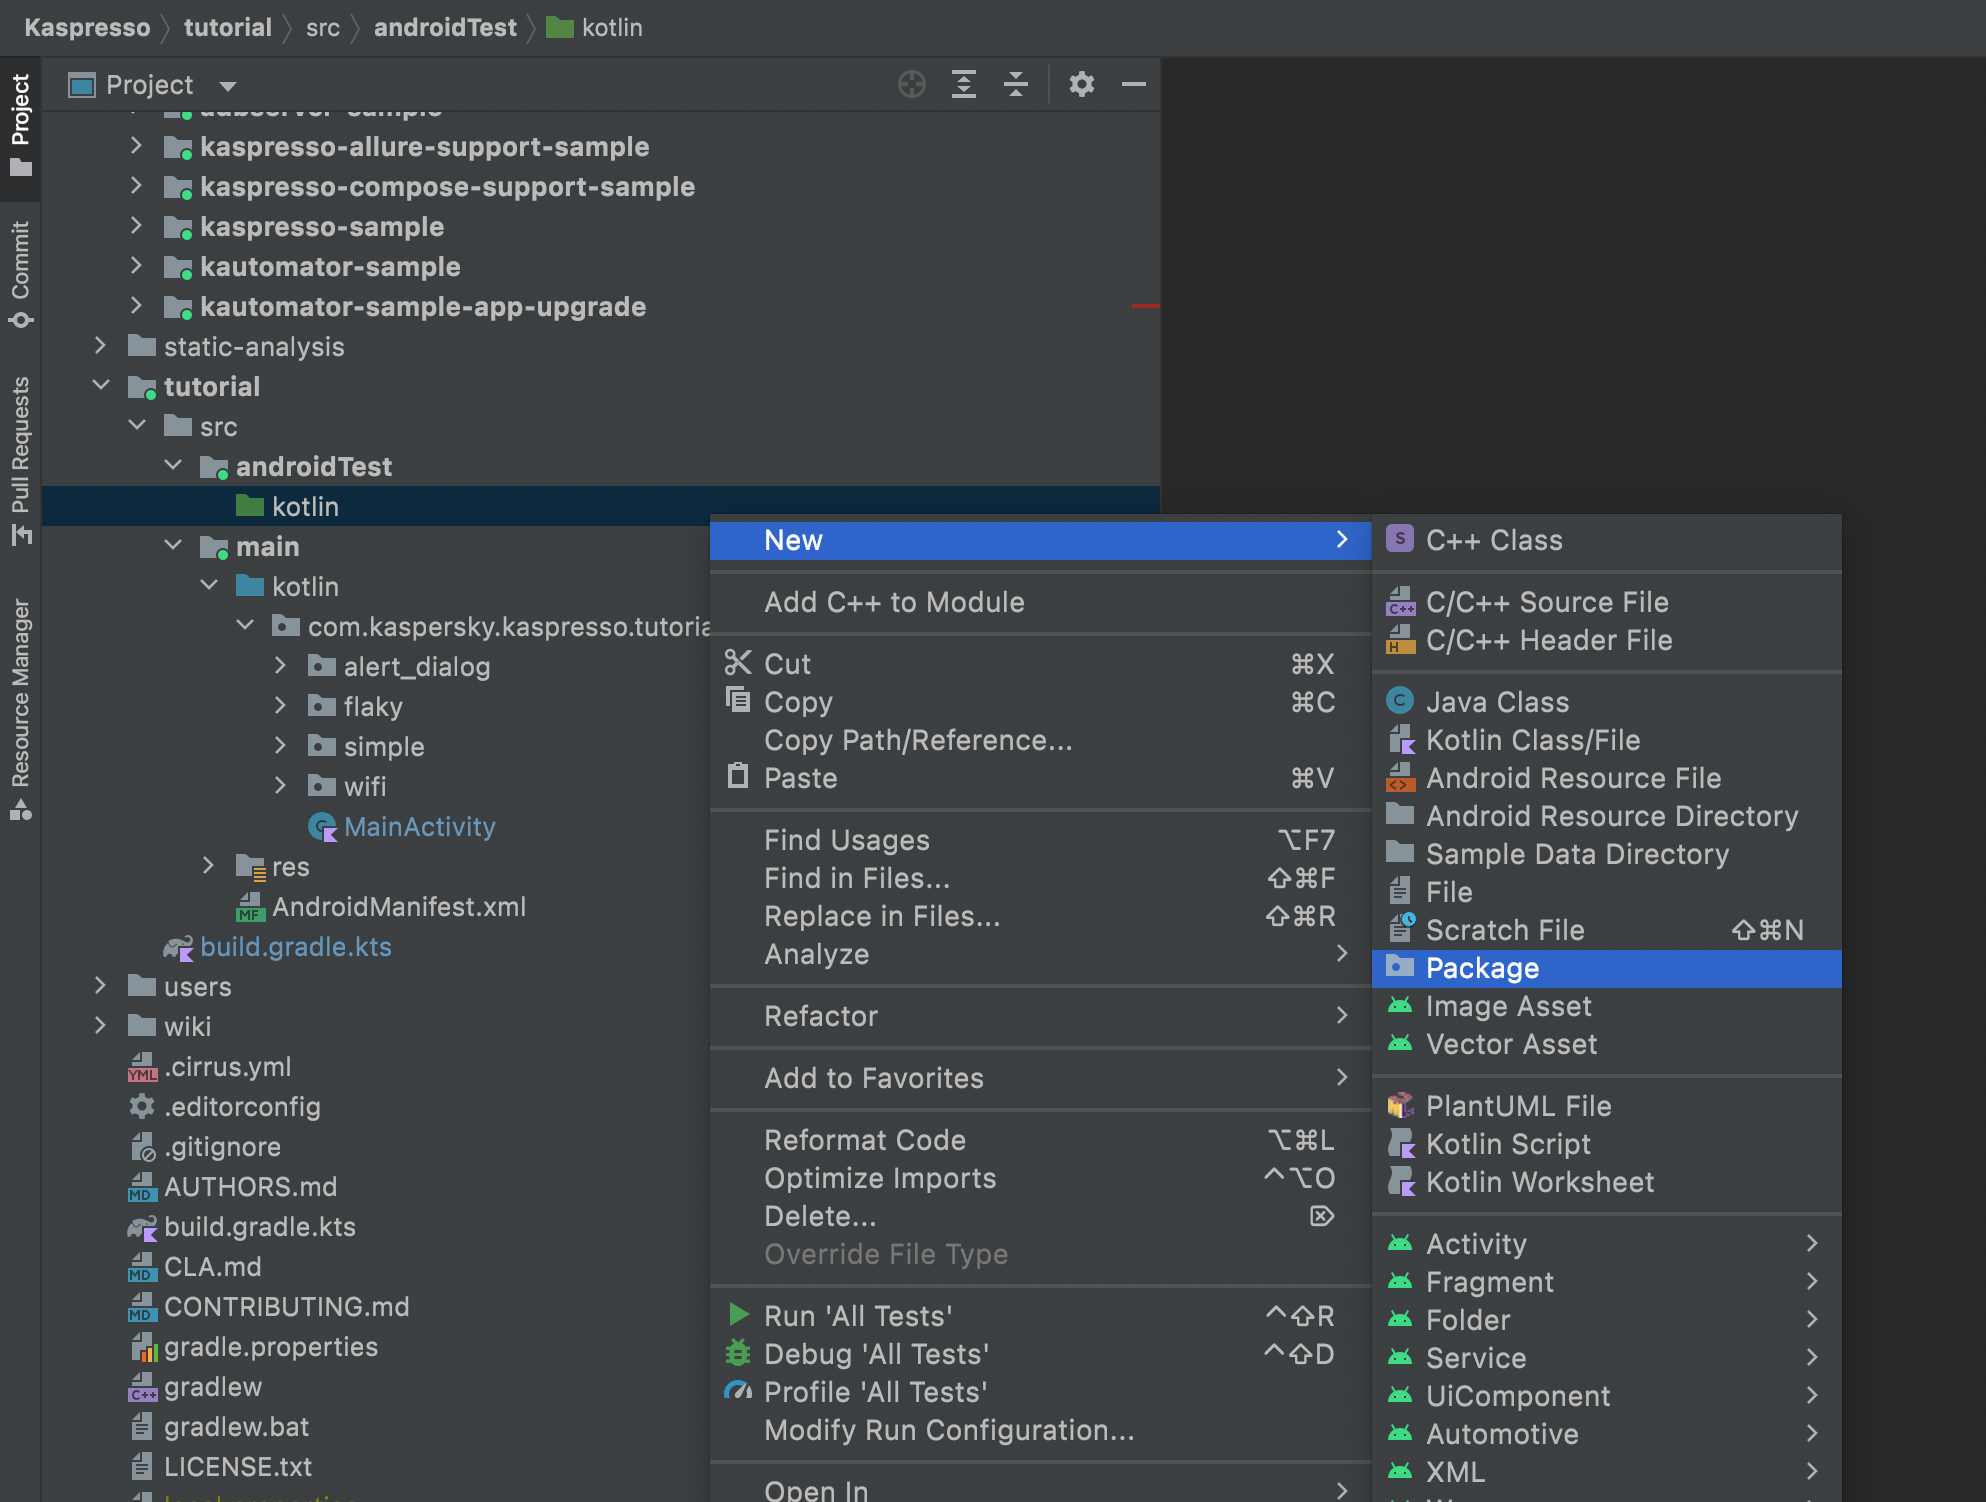
Inside the kotlin folder, let's create a separate package in which we will store all Page Objects:
Creating a separate package does not affect the functionality, we do it just for convenience, so that all screen models are in one place. You can give the package any name (with a few exceptions), but it's common for tests to use the same name as the application itself. We can go to the MainActivity file and the package name will be listed at the top.
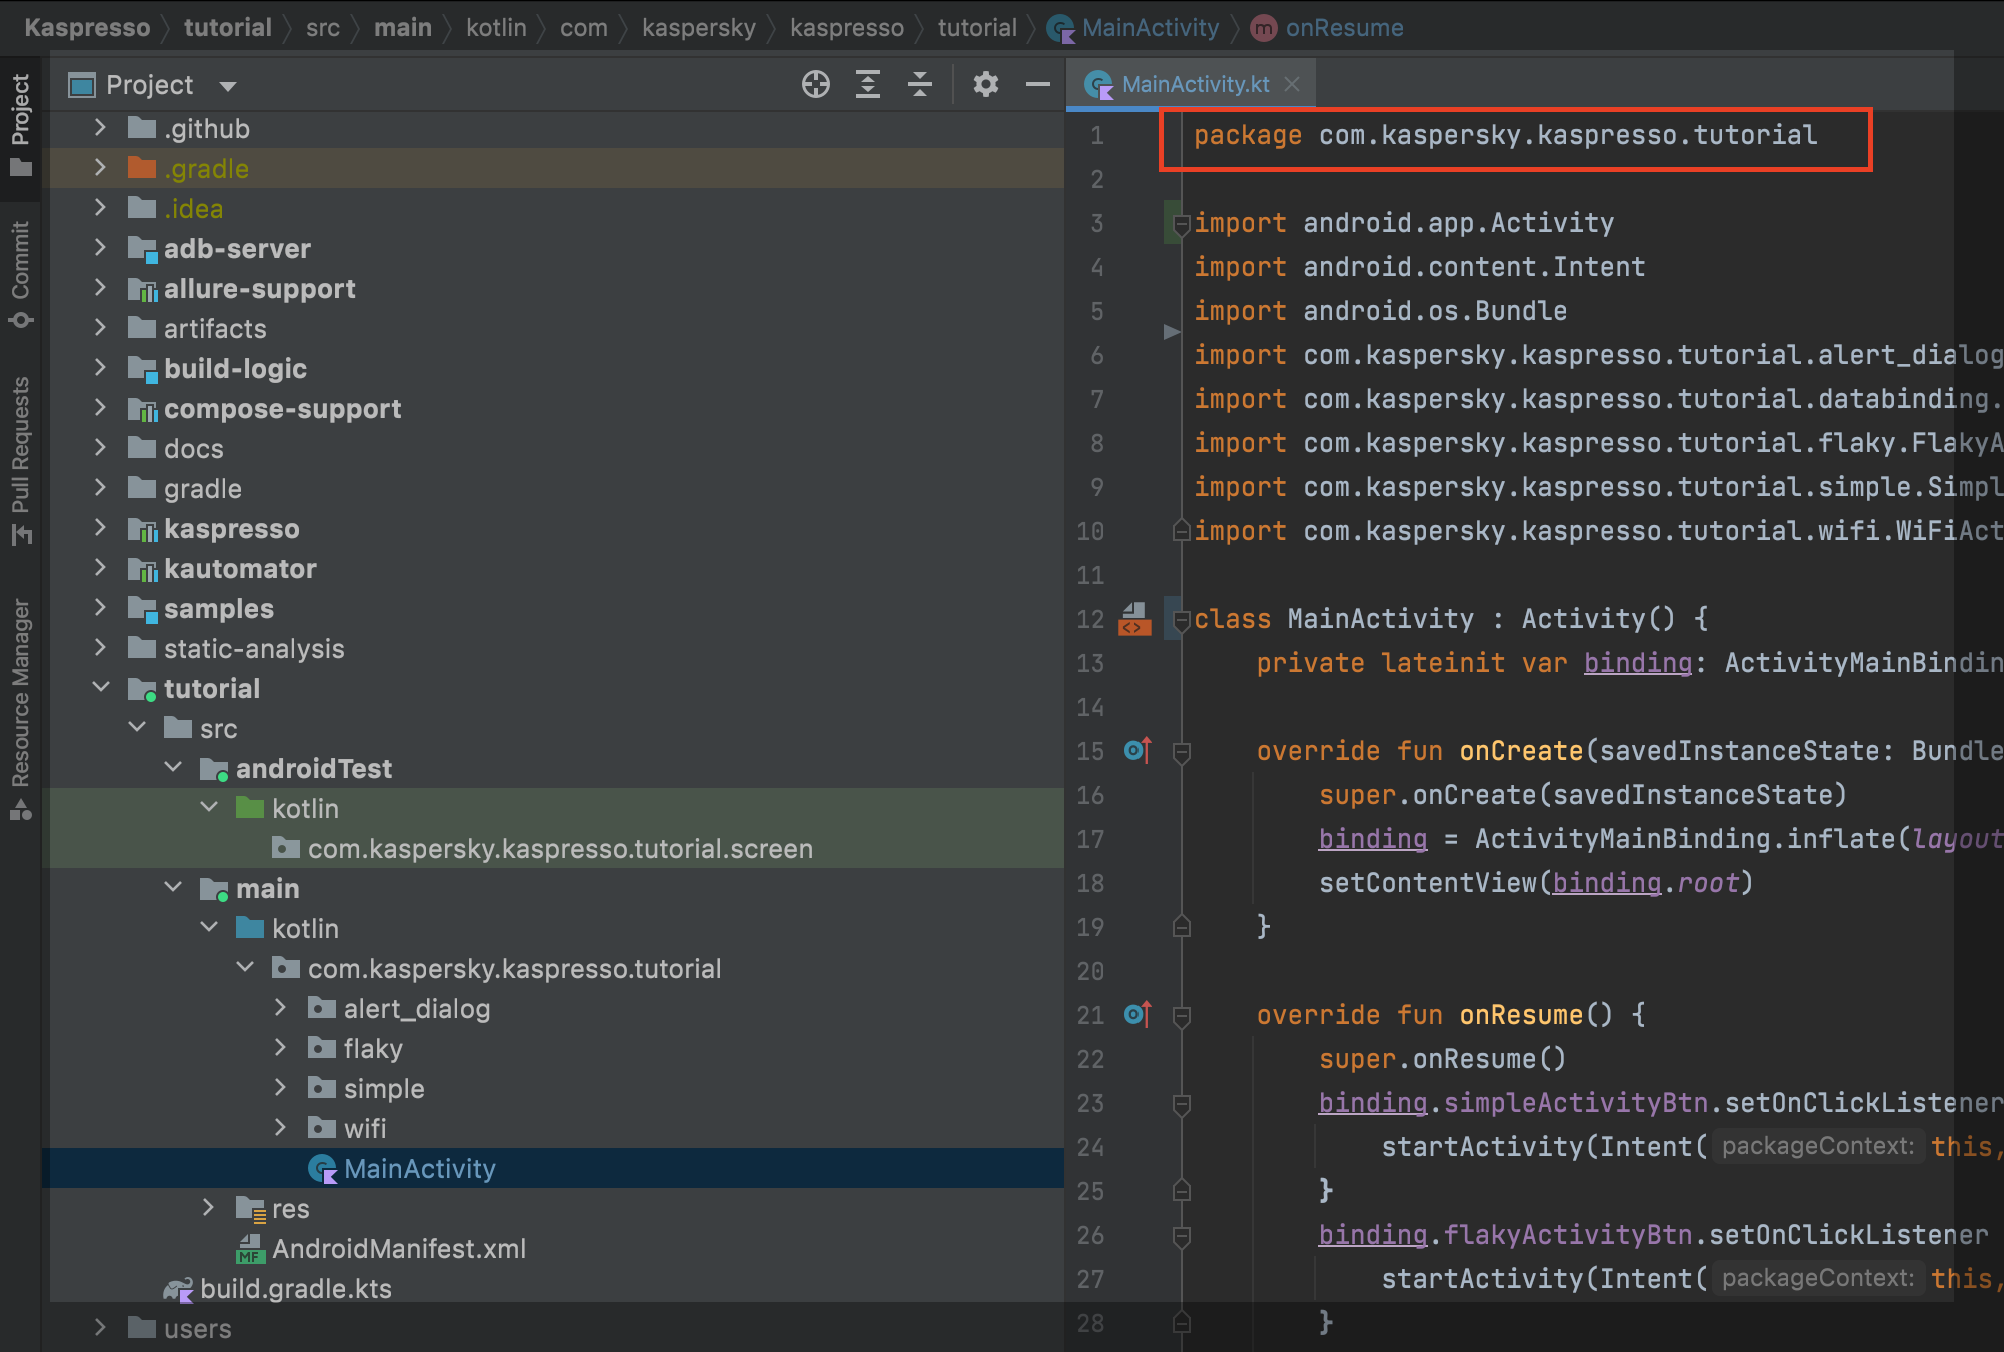
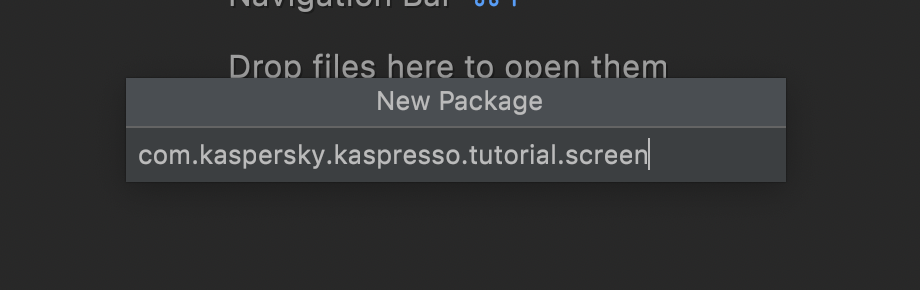
Copy this name and paste it into the package name. Specifically, in this package we will store only screen models (Page Objects), so let's add .screen at the end.
When we add other classes to the folder with tests, we will put them in other packages, but the first part of their name will be the same: com.kaspersky.kaspresso.tutorial.
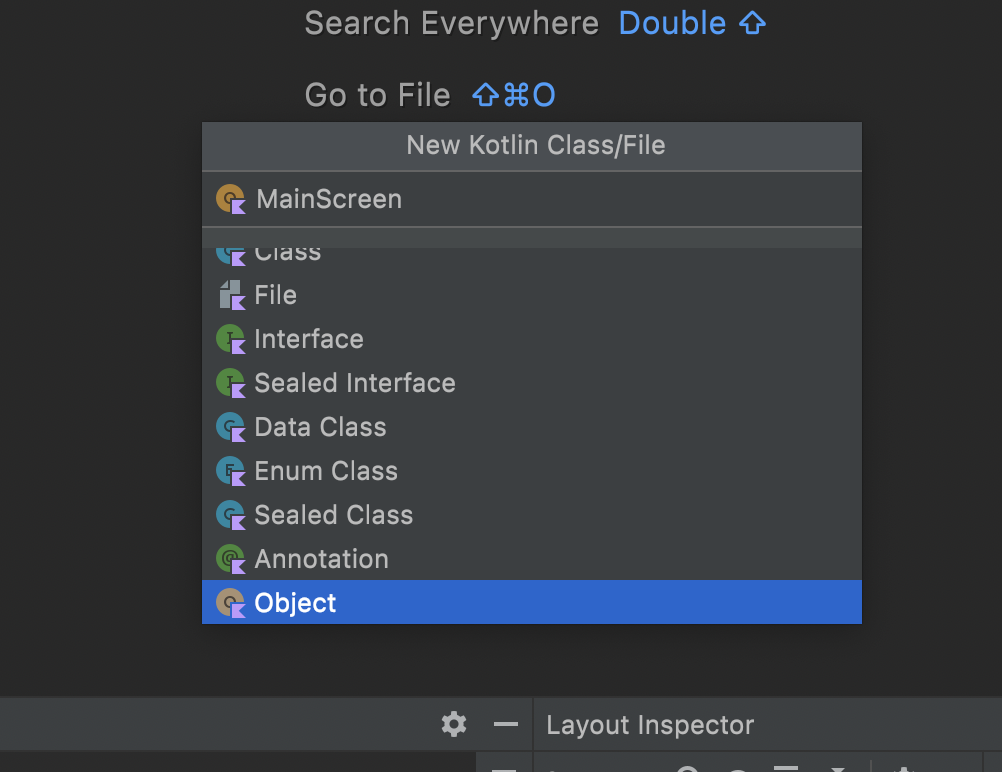
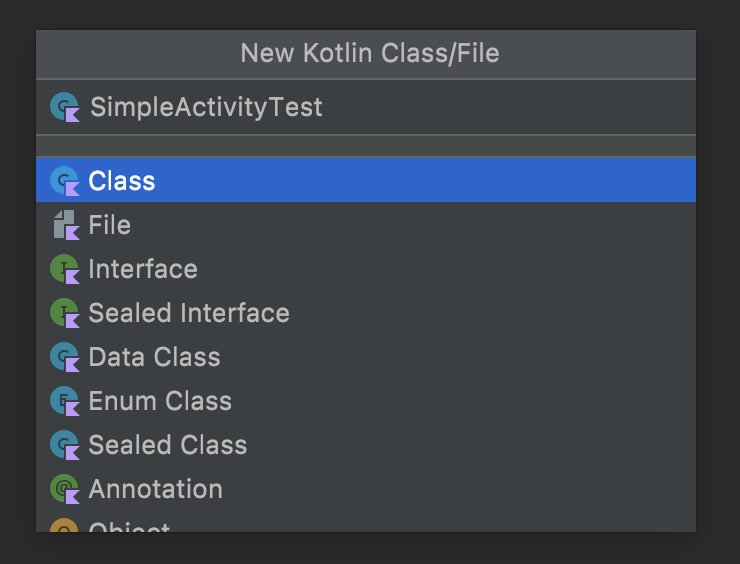
Now in the created package we add a screen model (class):
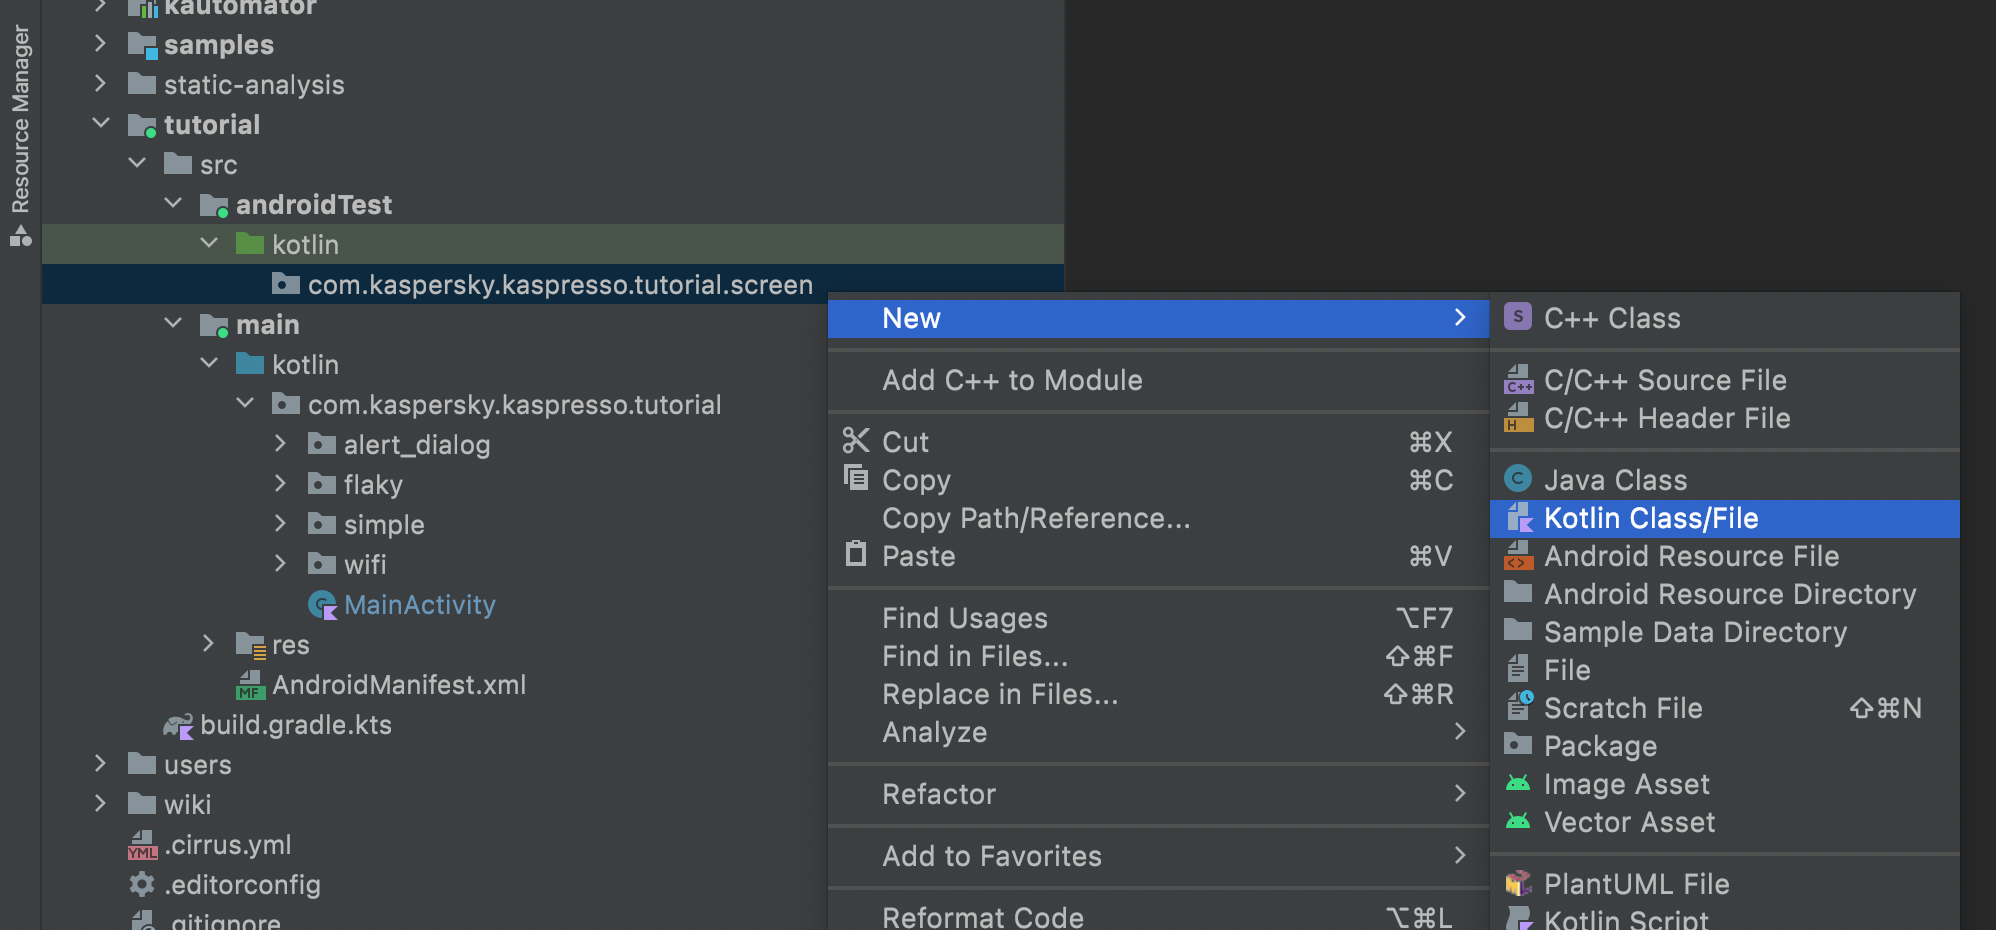
Choose the type Object and name it MainScreen.
MainScreen is a model of the main screen. In order for this model to be used in autotests, it is necessary to inherit from the KScreen class and specify the name of this class in angle brackets.
Info
Specifying the type in angle brackets in Java and Kotlin is called Generics. You can read more about this in Java and Kotlin documentation.
package com.kaspersky.kaspresso.tutorial.screen

import com.kaspersky.kaspresso.screens.KScreen

object MainScreen : KScreen<MainScreen>() {
}
An error occurred because the KScreen class contains two members that need to be redefined when inheriting. In order to do this quickly in Android Studio, we can press the key combination ctrl + i and select the elements that we want to override.
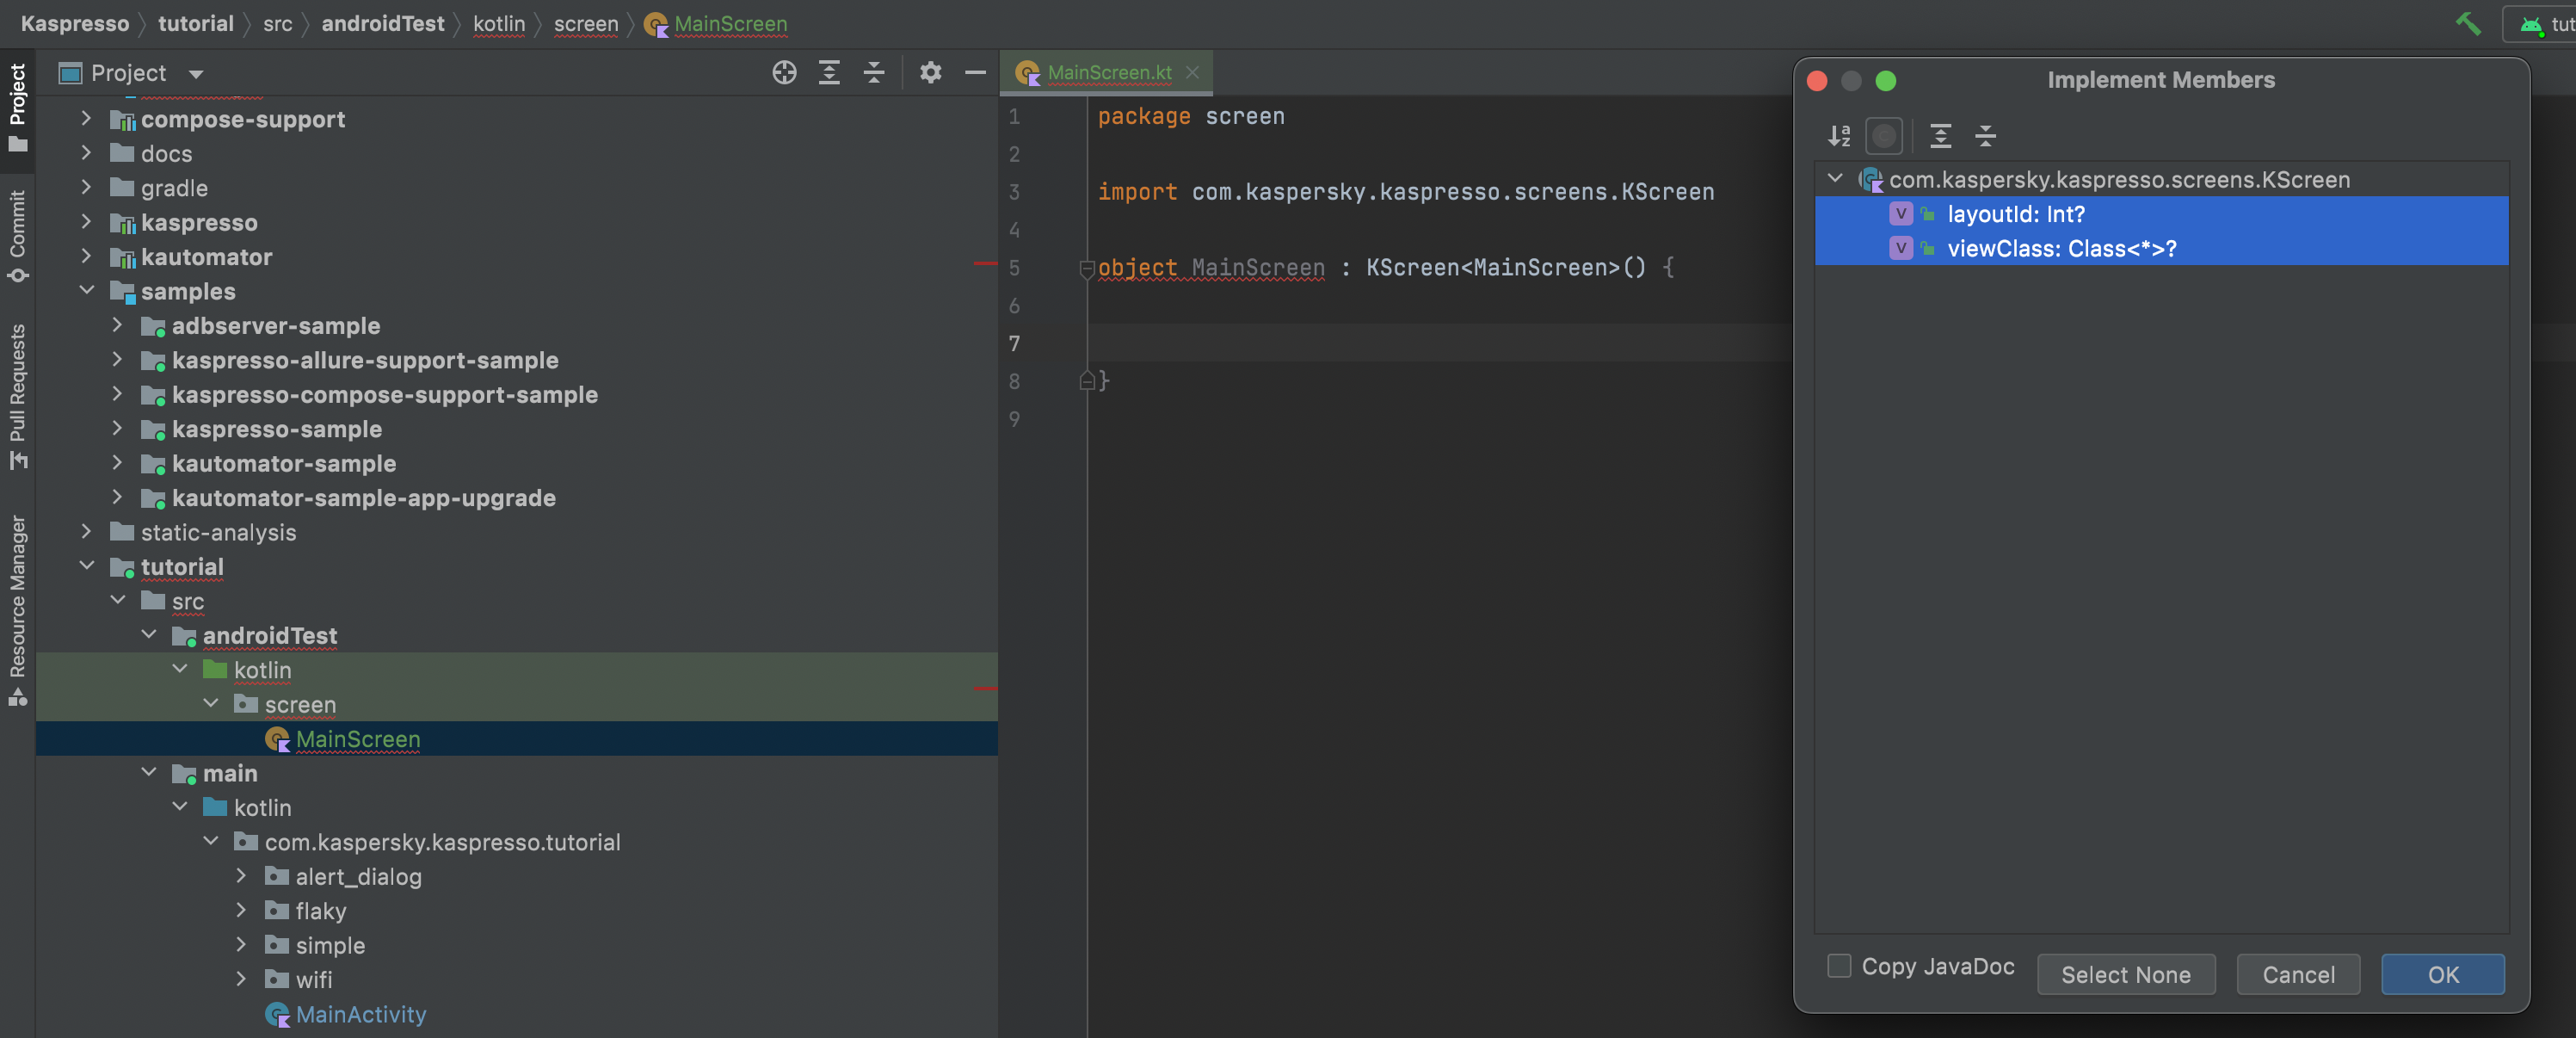
Holding ctrl, select all items and press OK.
package com.kaspersky.kaspresso.tutorial.screen

import com.kaspersky.kaspresso.screens.KScreen

object MainScreen : KScreen<MainScreen>() {

    override val layoutId: Int?
        get() = TODO("Not yet implemented")
    override val viewClass: Class<*>?
        get() = TODO("Not yet implemented")
}
New lines of code appeared in the file. Instead of TODO, you need to write the correct implementation: the id of the layout (layoutId) that is set on the screen, and the name of the class (viewClass). This is necessary to associate the test with a specific layout file and activity class. This binding will make further support and refinement of the test more convenient, but for now we are faced with the task of writing the first test, so we will leave the null value.
package com.kaspersky.kaspresso.tutorial.screen

import com.kaspersky.kaspresso.screens.KScreen

object MainScreen : KScreen<MainScreen>() {

    override val layoutId: Int? = null
    override val viewClass: Class<*>? = null
}
Now inside the MainScreen class we will declare all the user interface elements with which the test will interact. In our case, we are only interested in the SimpleTest button on the main screen.
In order for the test to interact with it, you need to know the id by which this button can be found on the screen. These identifiers are assigned by a developer when writing the application.
To find out what id has been assigned to some interface element, you can use the LayoutInspector tool built into Android Studio.
- Launch the application
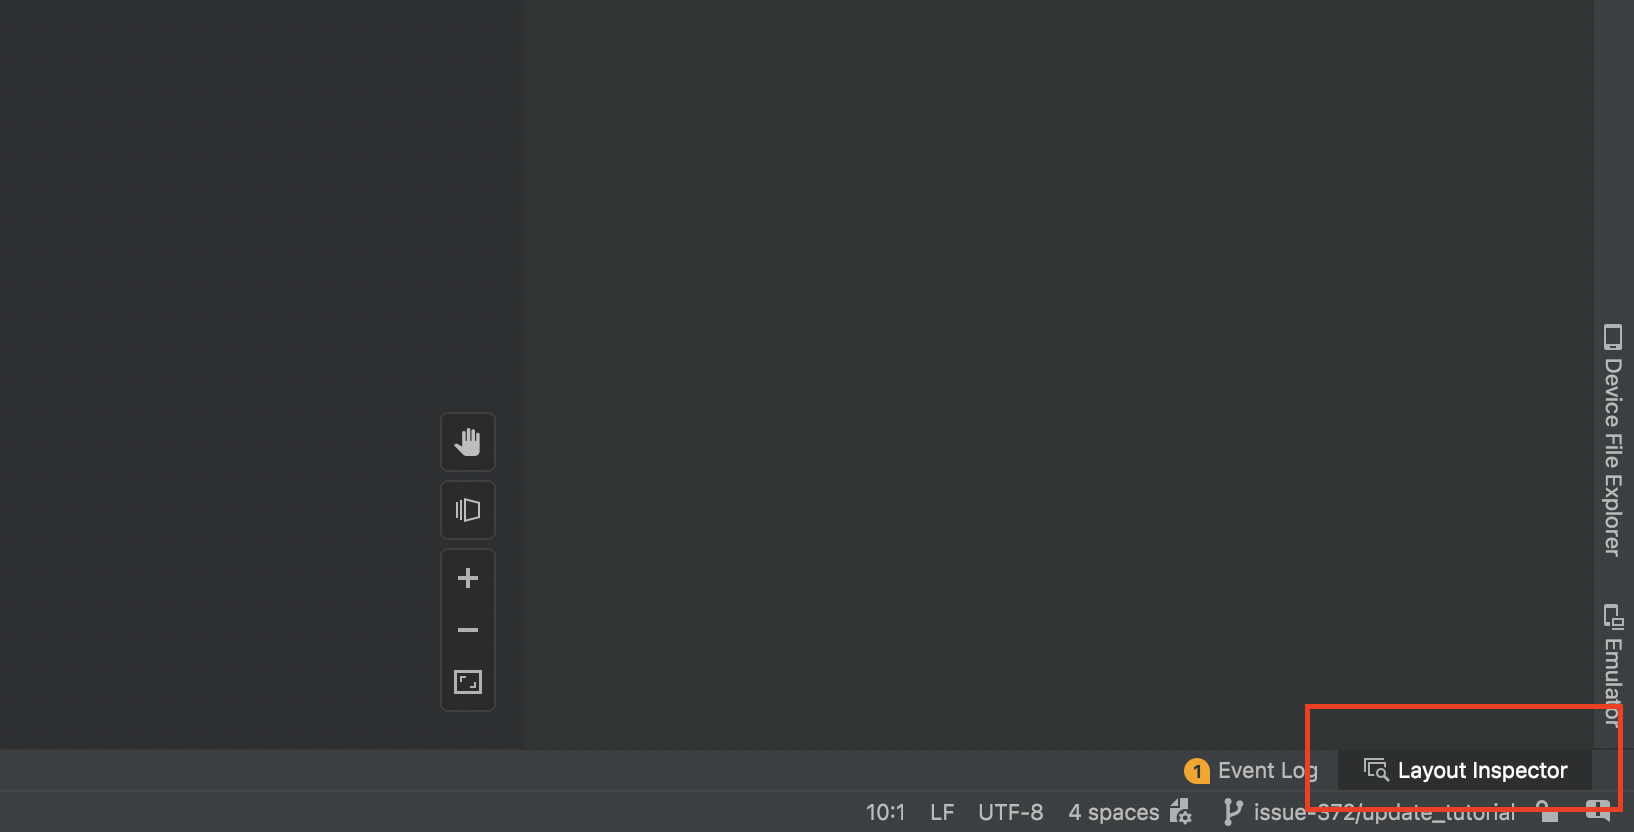
- In the bottom right corner of Android Studio select Layout Inspector
- Wait for the screen to load
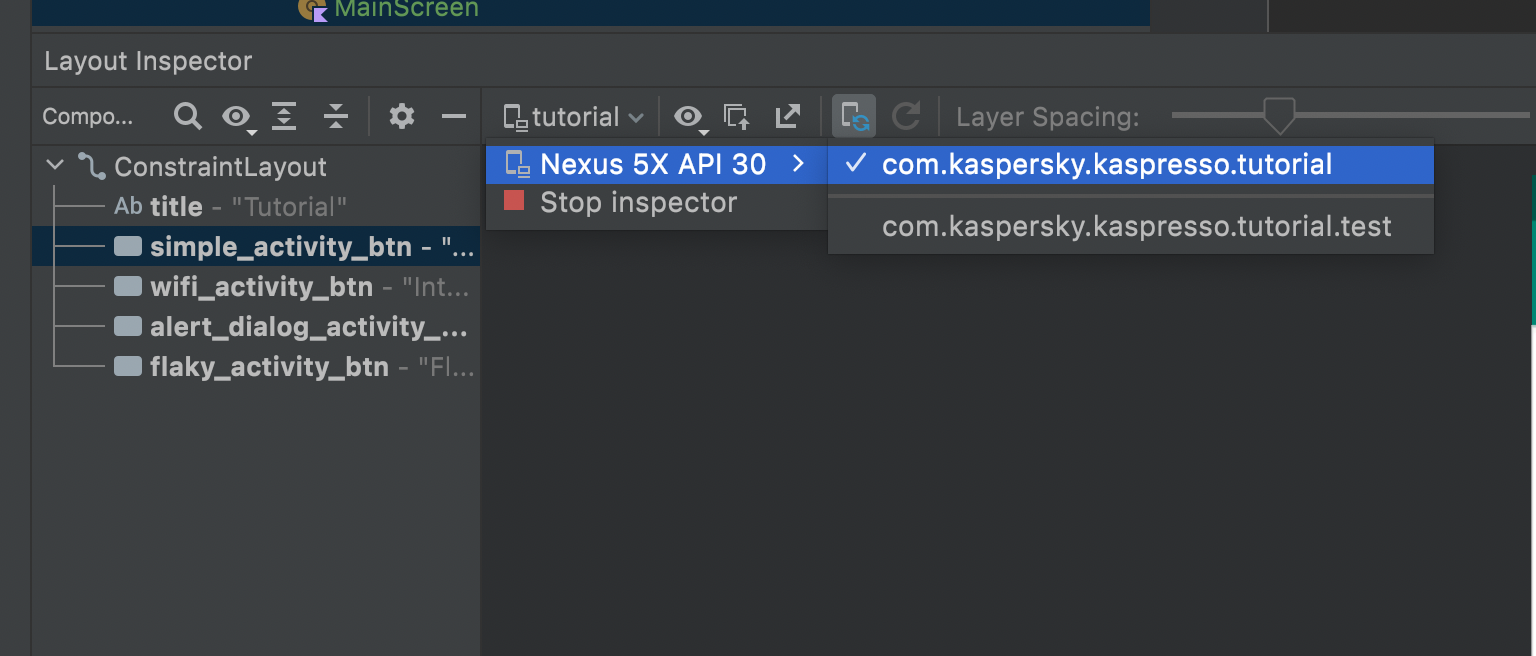
- If the screen does not load, then check that you have the desired process selected
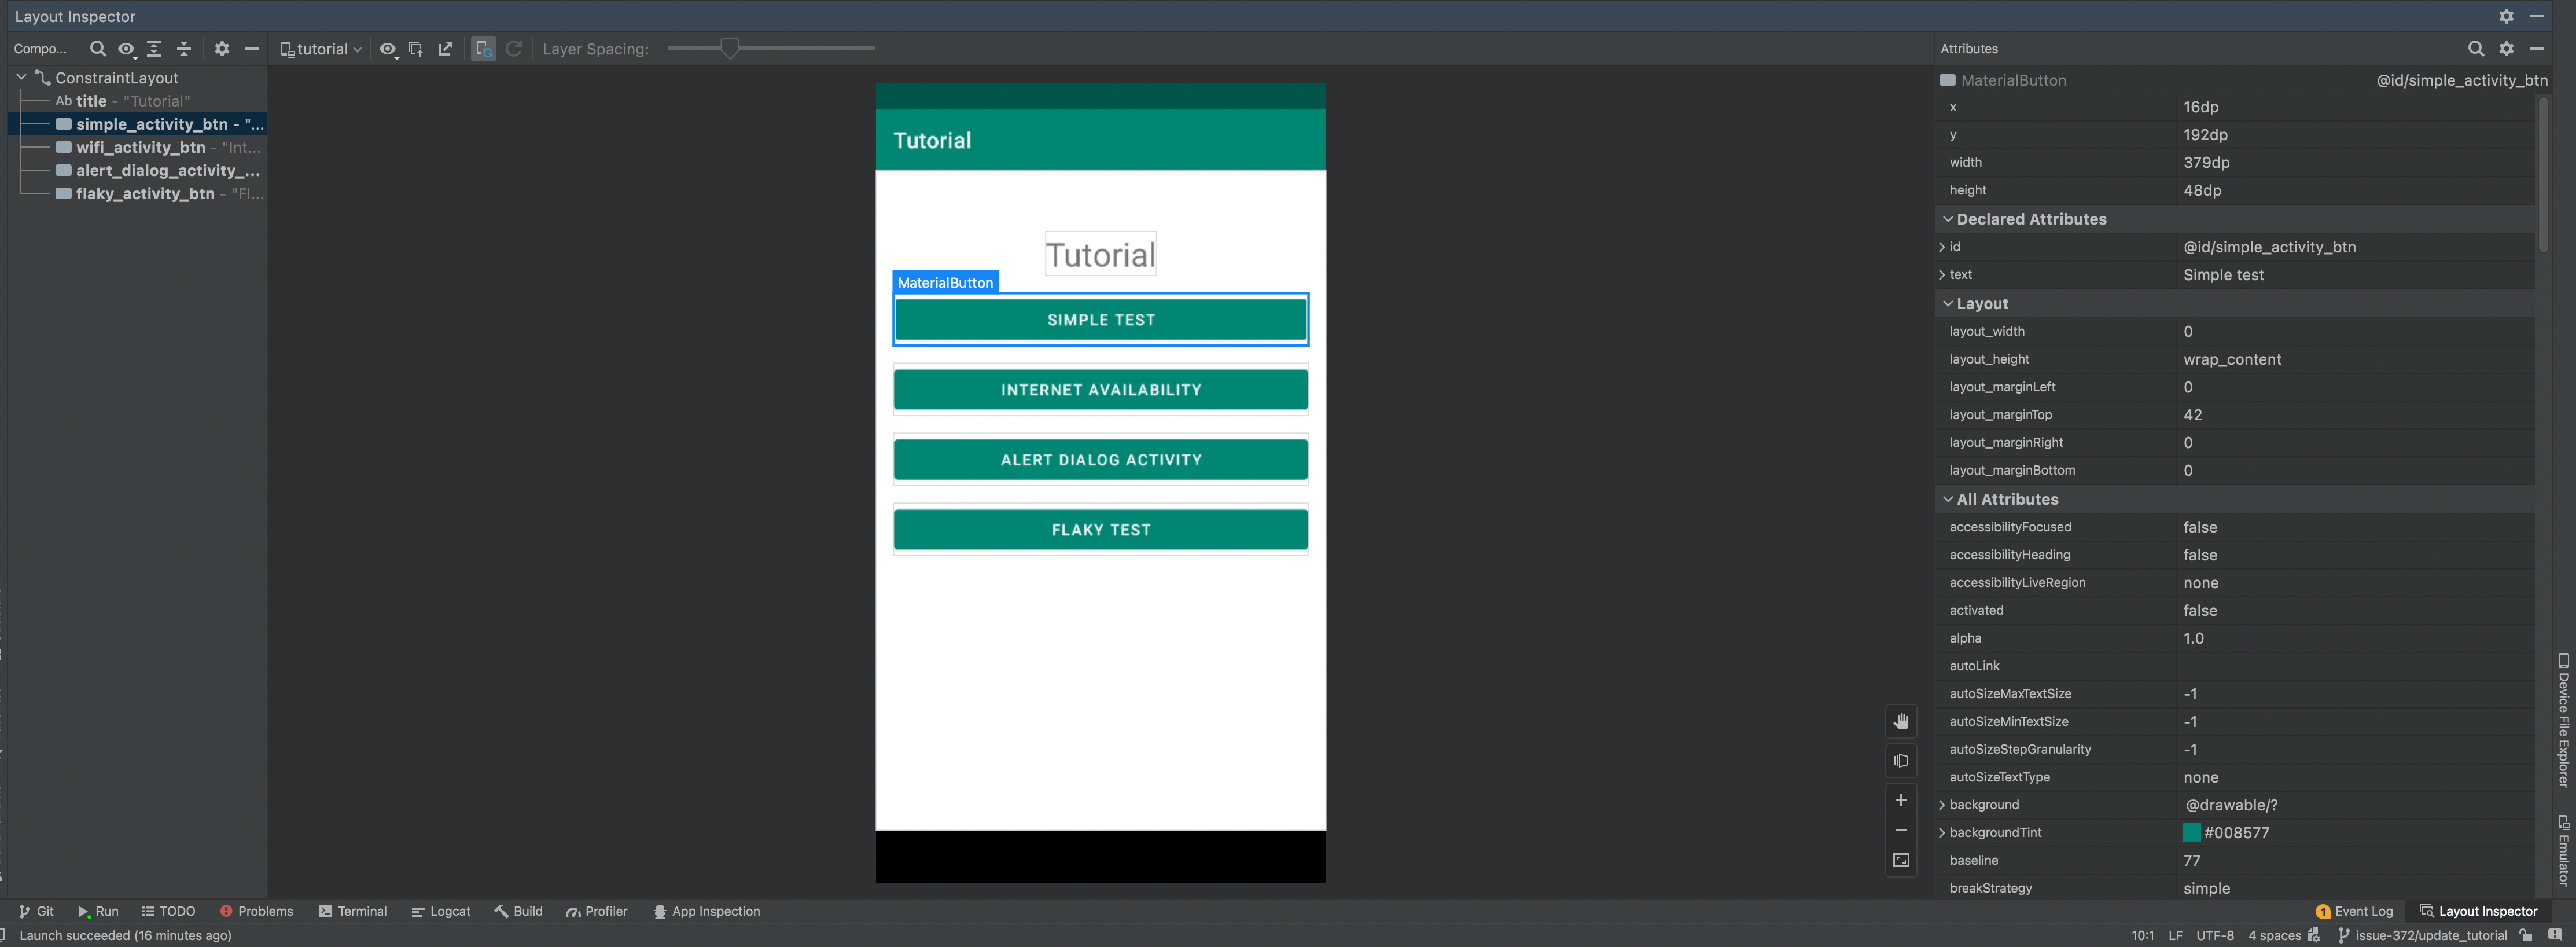
Select an item on the screen and look for its id. This is the identifier that interests us.
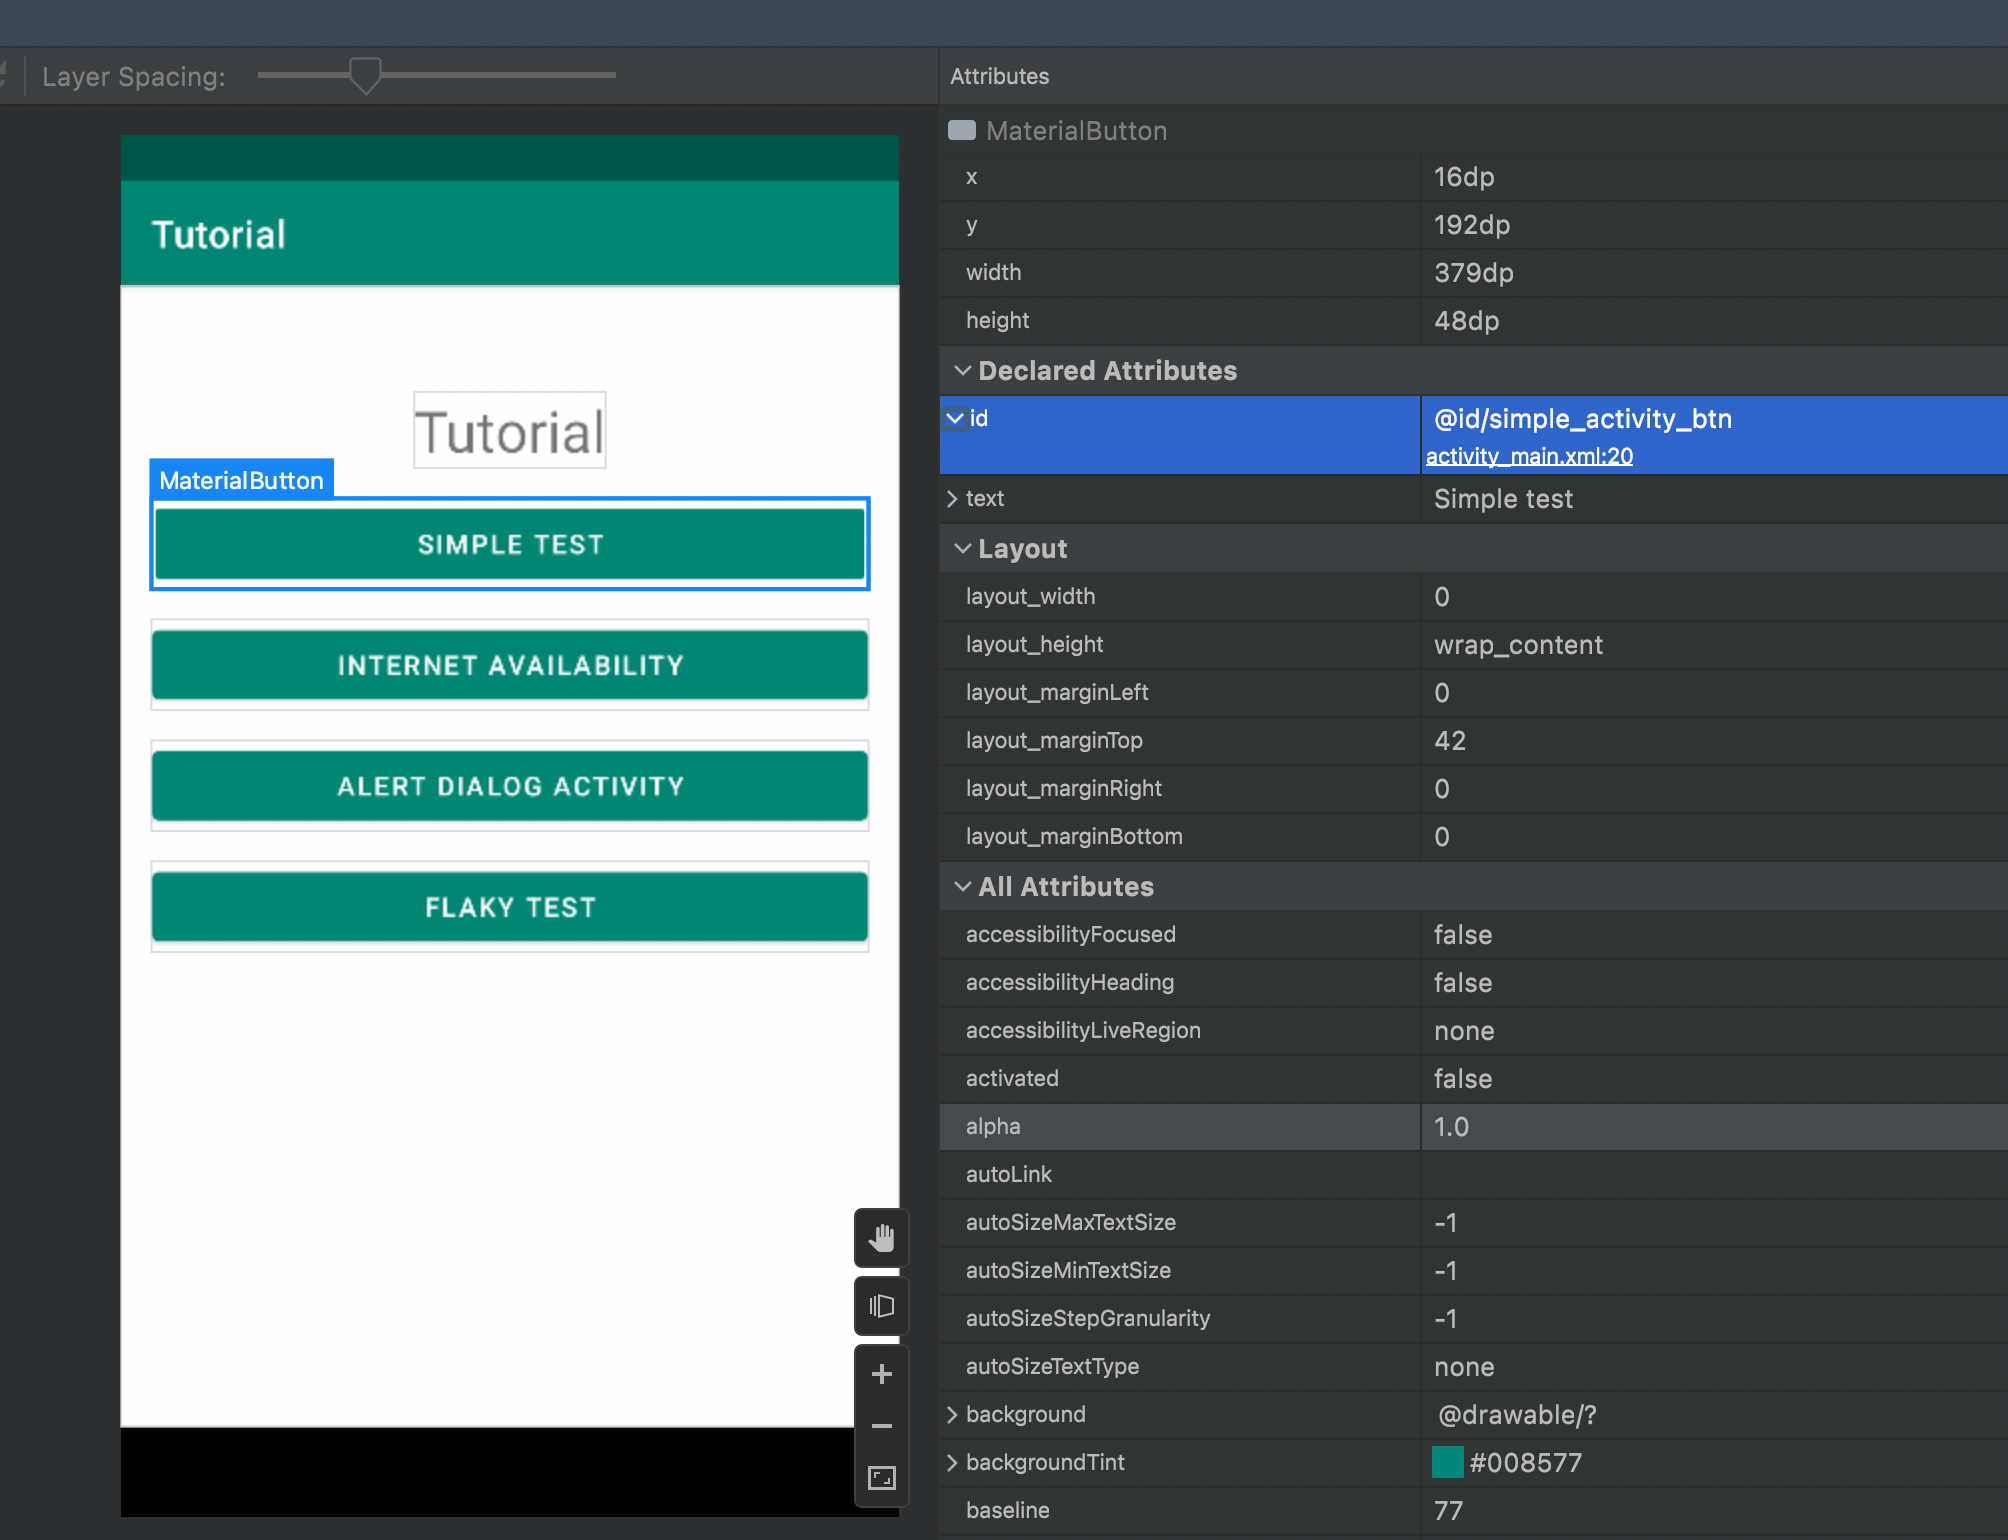
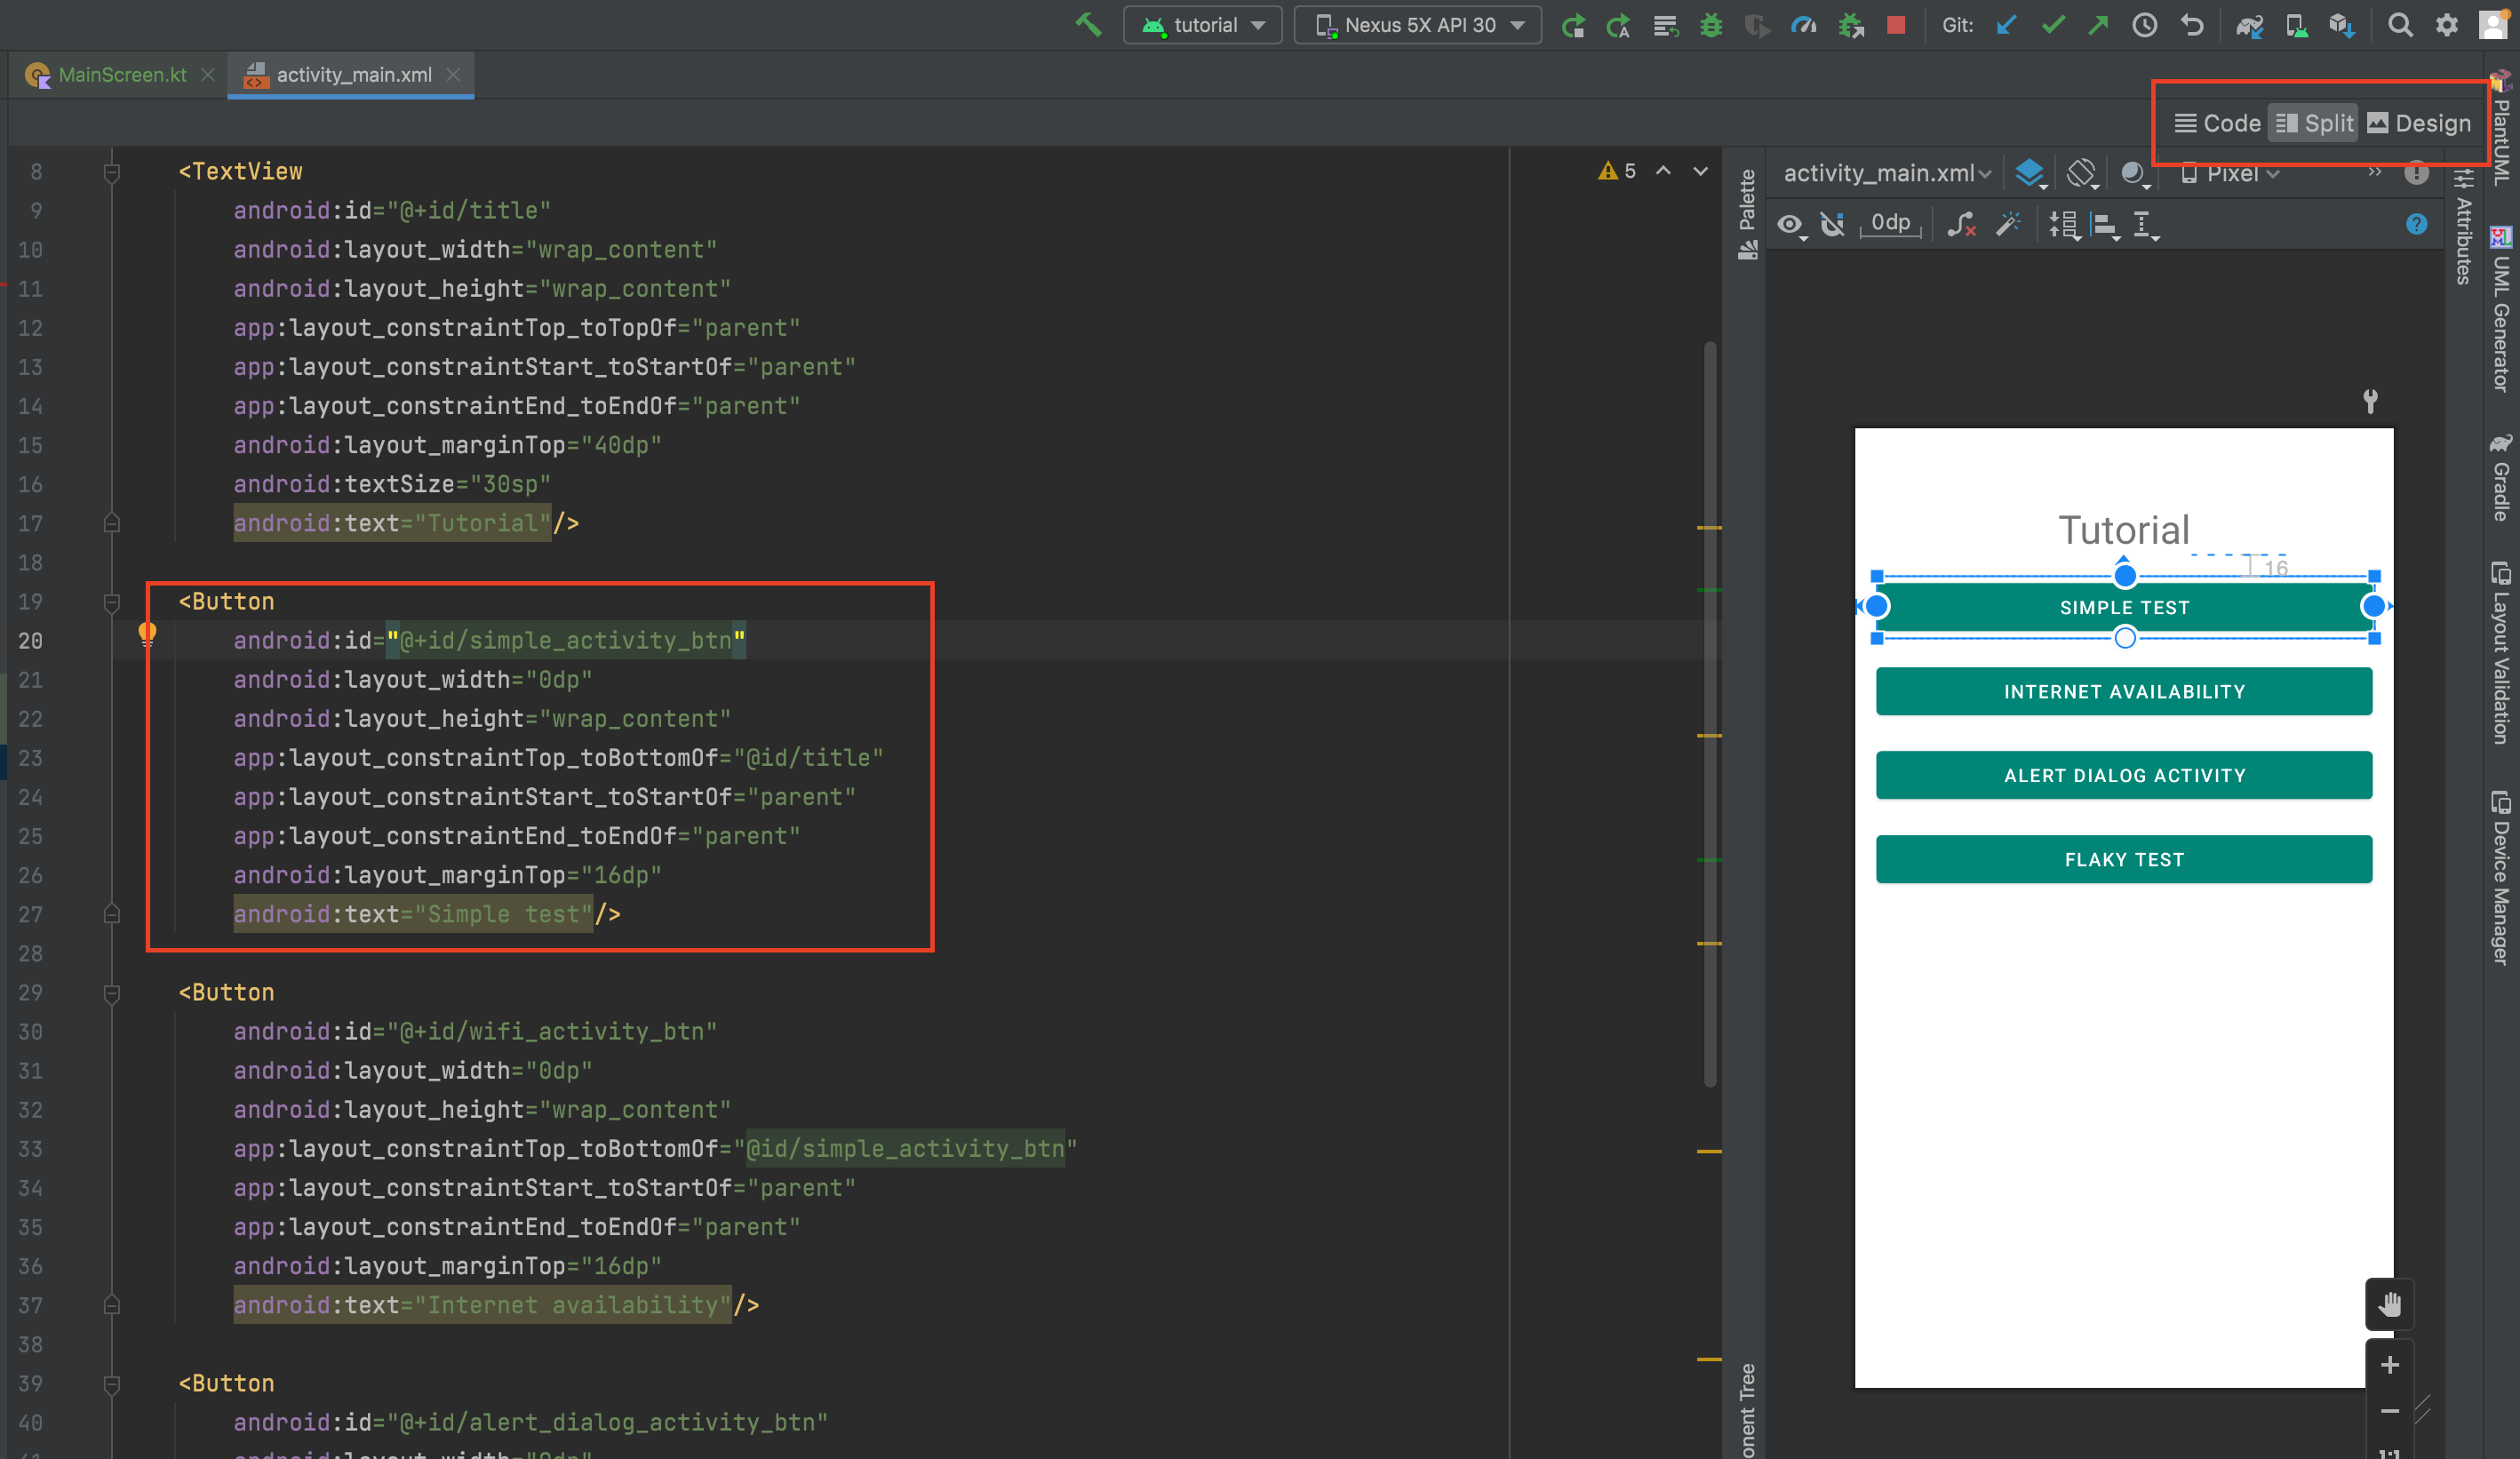
It is also important to understand what UI element we are working with. To do this, you can go to the layout where the element was declared and see all the information about it.
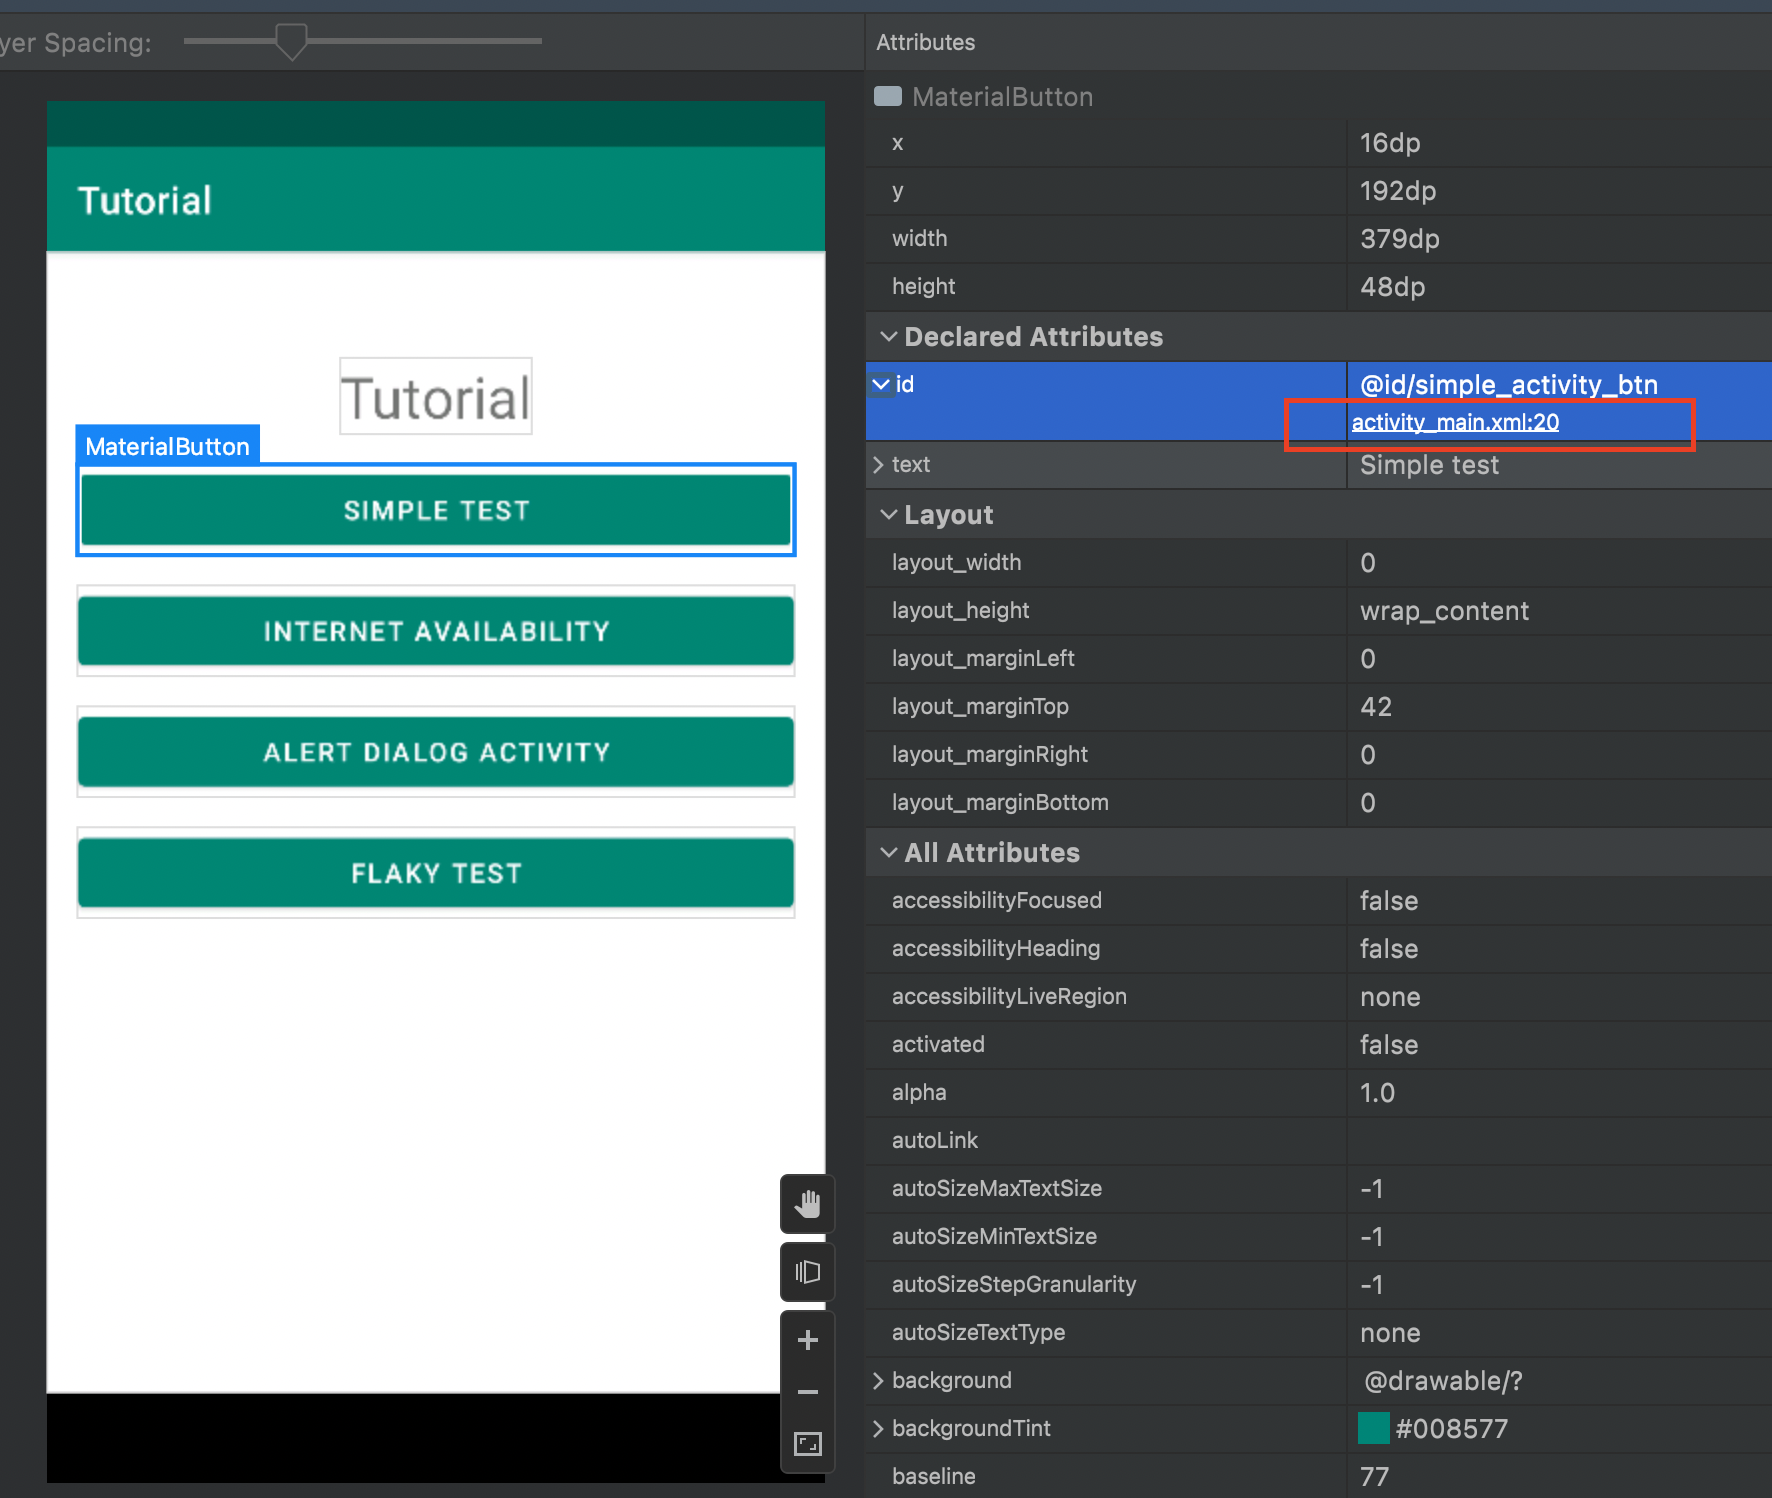
In this case, it's a Button element with id simple_activity_btn
We can add this button to the MainScreen. Usually the name of the variable matches the element's id, but is written without underscores and each word except the first one is capitalized (this is called camelCase)
package com.kaspersky.kaspresso.tutorial.screen

import com.kaspersky.kaspresso.screens.KScreen

object MainScreen : KScreen<MainScreen>() {

    override val layoutId: Int? = null
    override val viewClass: Class<*>? = null

    val simpleActivityButton =
}
The simpleActivityButton variable needs to be assigned a value. It represents a button that can be tested, and the class KButton is responsible for this. This is how setting the value to this variable will look like, now we will analyze in detail what this code does.
package com.kaspersky.kaspresso.tutorial.screen

import com.kaspersky.kaspresso.screens.KScreen
import com.kaspersky.kaspresso.tutorial.R
import io.github.kakaocup.kakao.text.KButton

object MainScreen : KScreen<MainScreen>() {

    override val layoutId: Int? = null
    override val viewClass: Class<*>? = null

    val simpleActivityButton = KButton { withId(R.id.simple_activity_btn) }
}
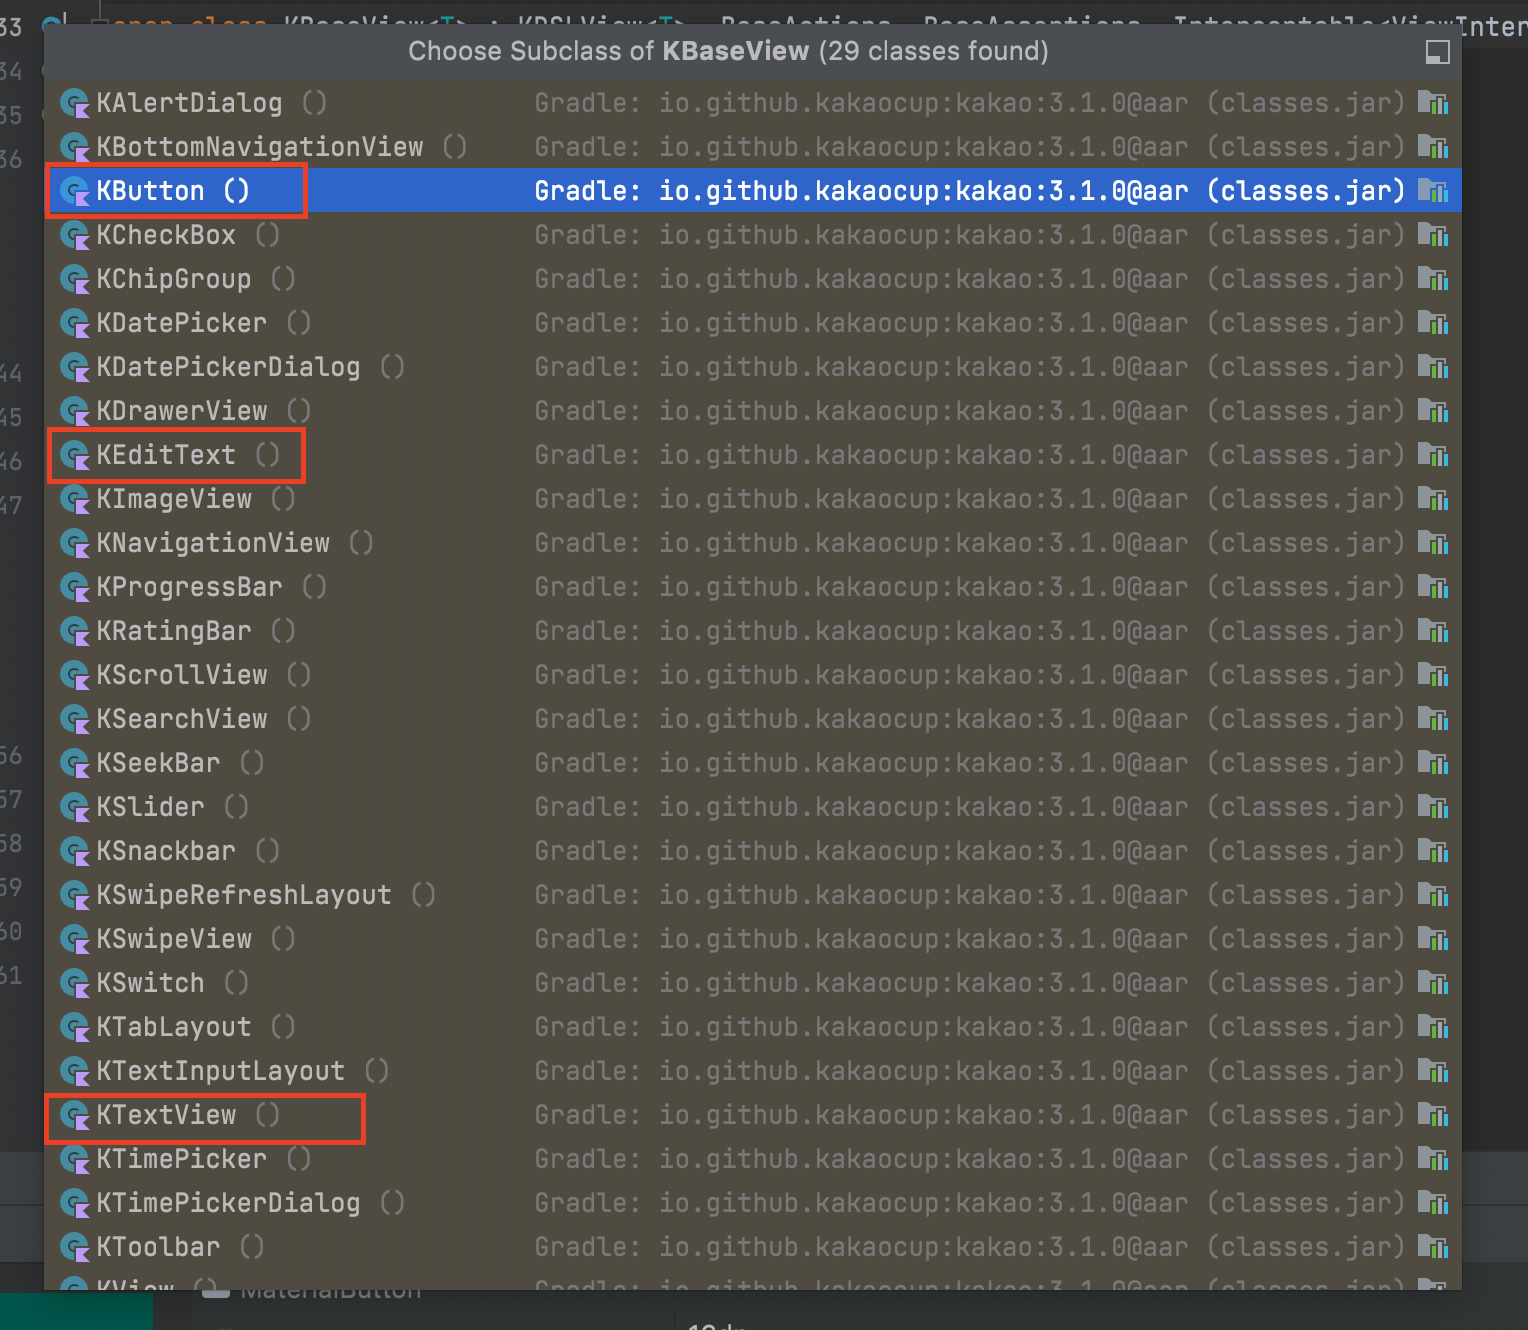
First, let's jump into the definition of KButton and see what it is. To do this, holding ctrl, click on the name of the KButton class with the left mouse button.
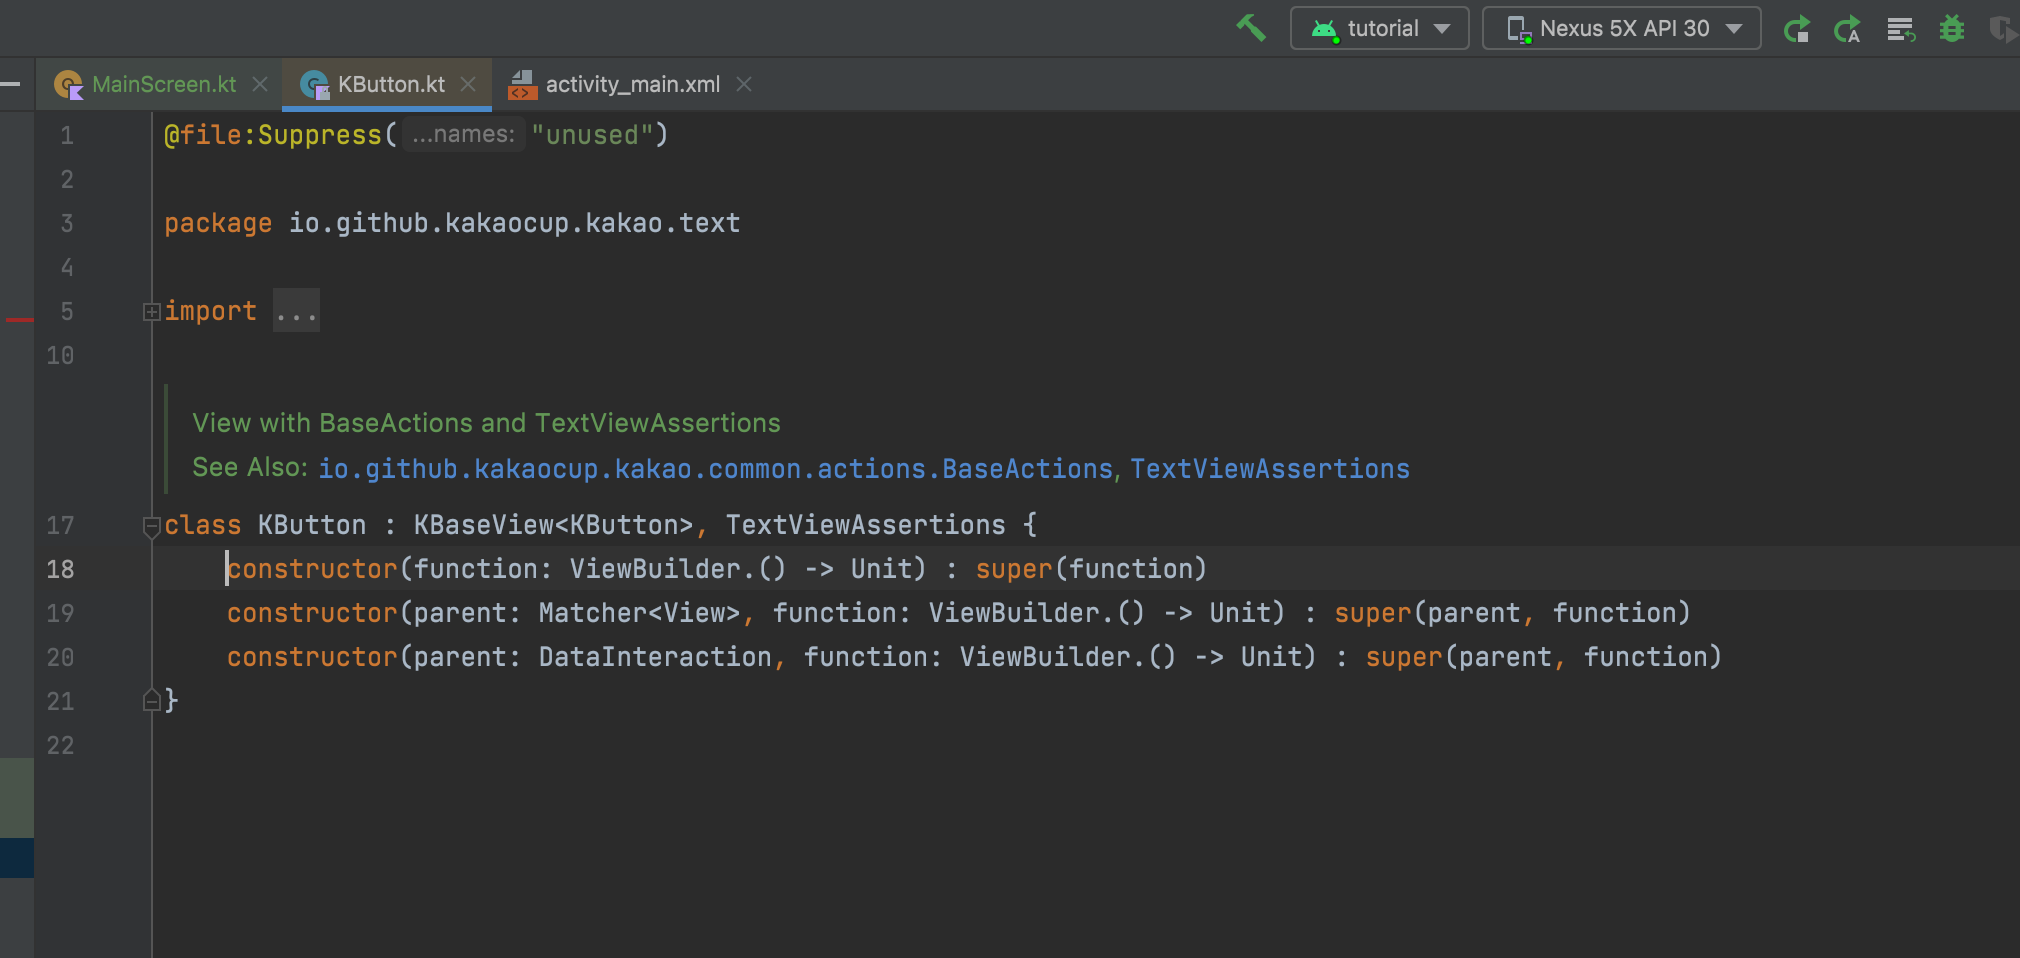
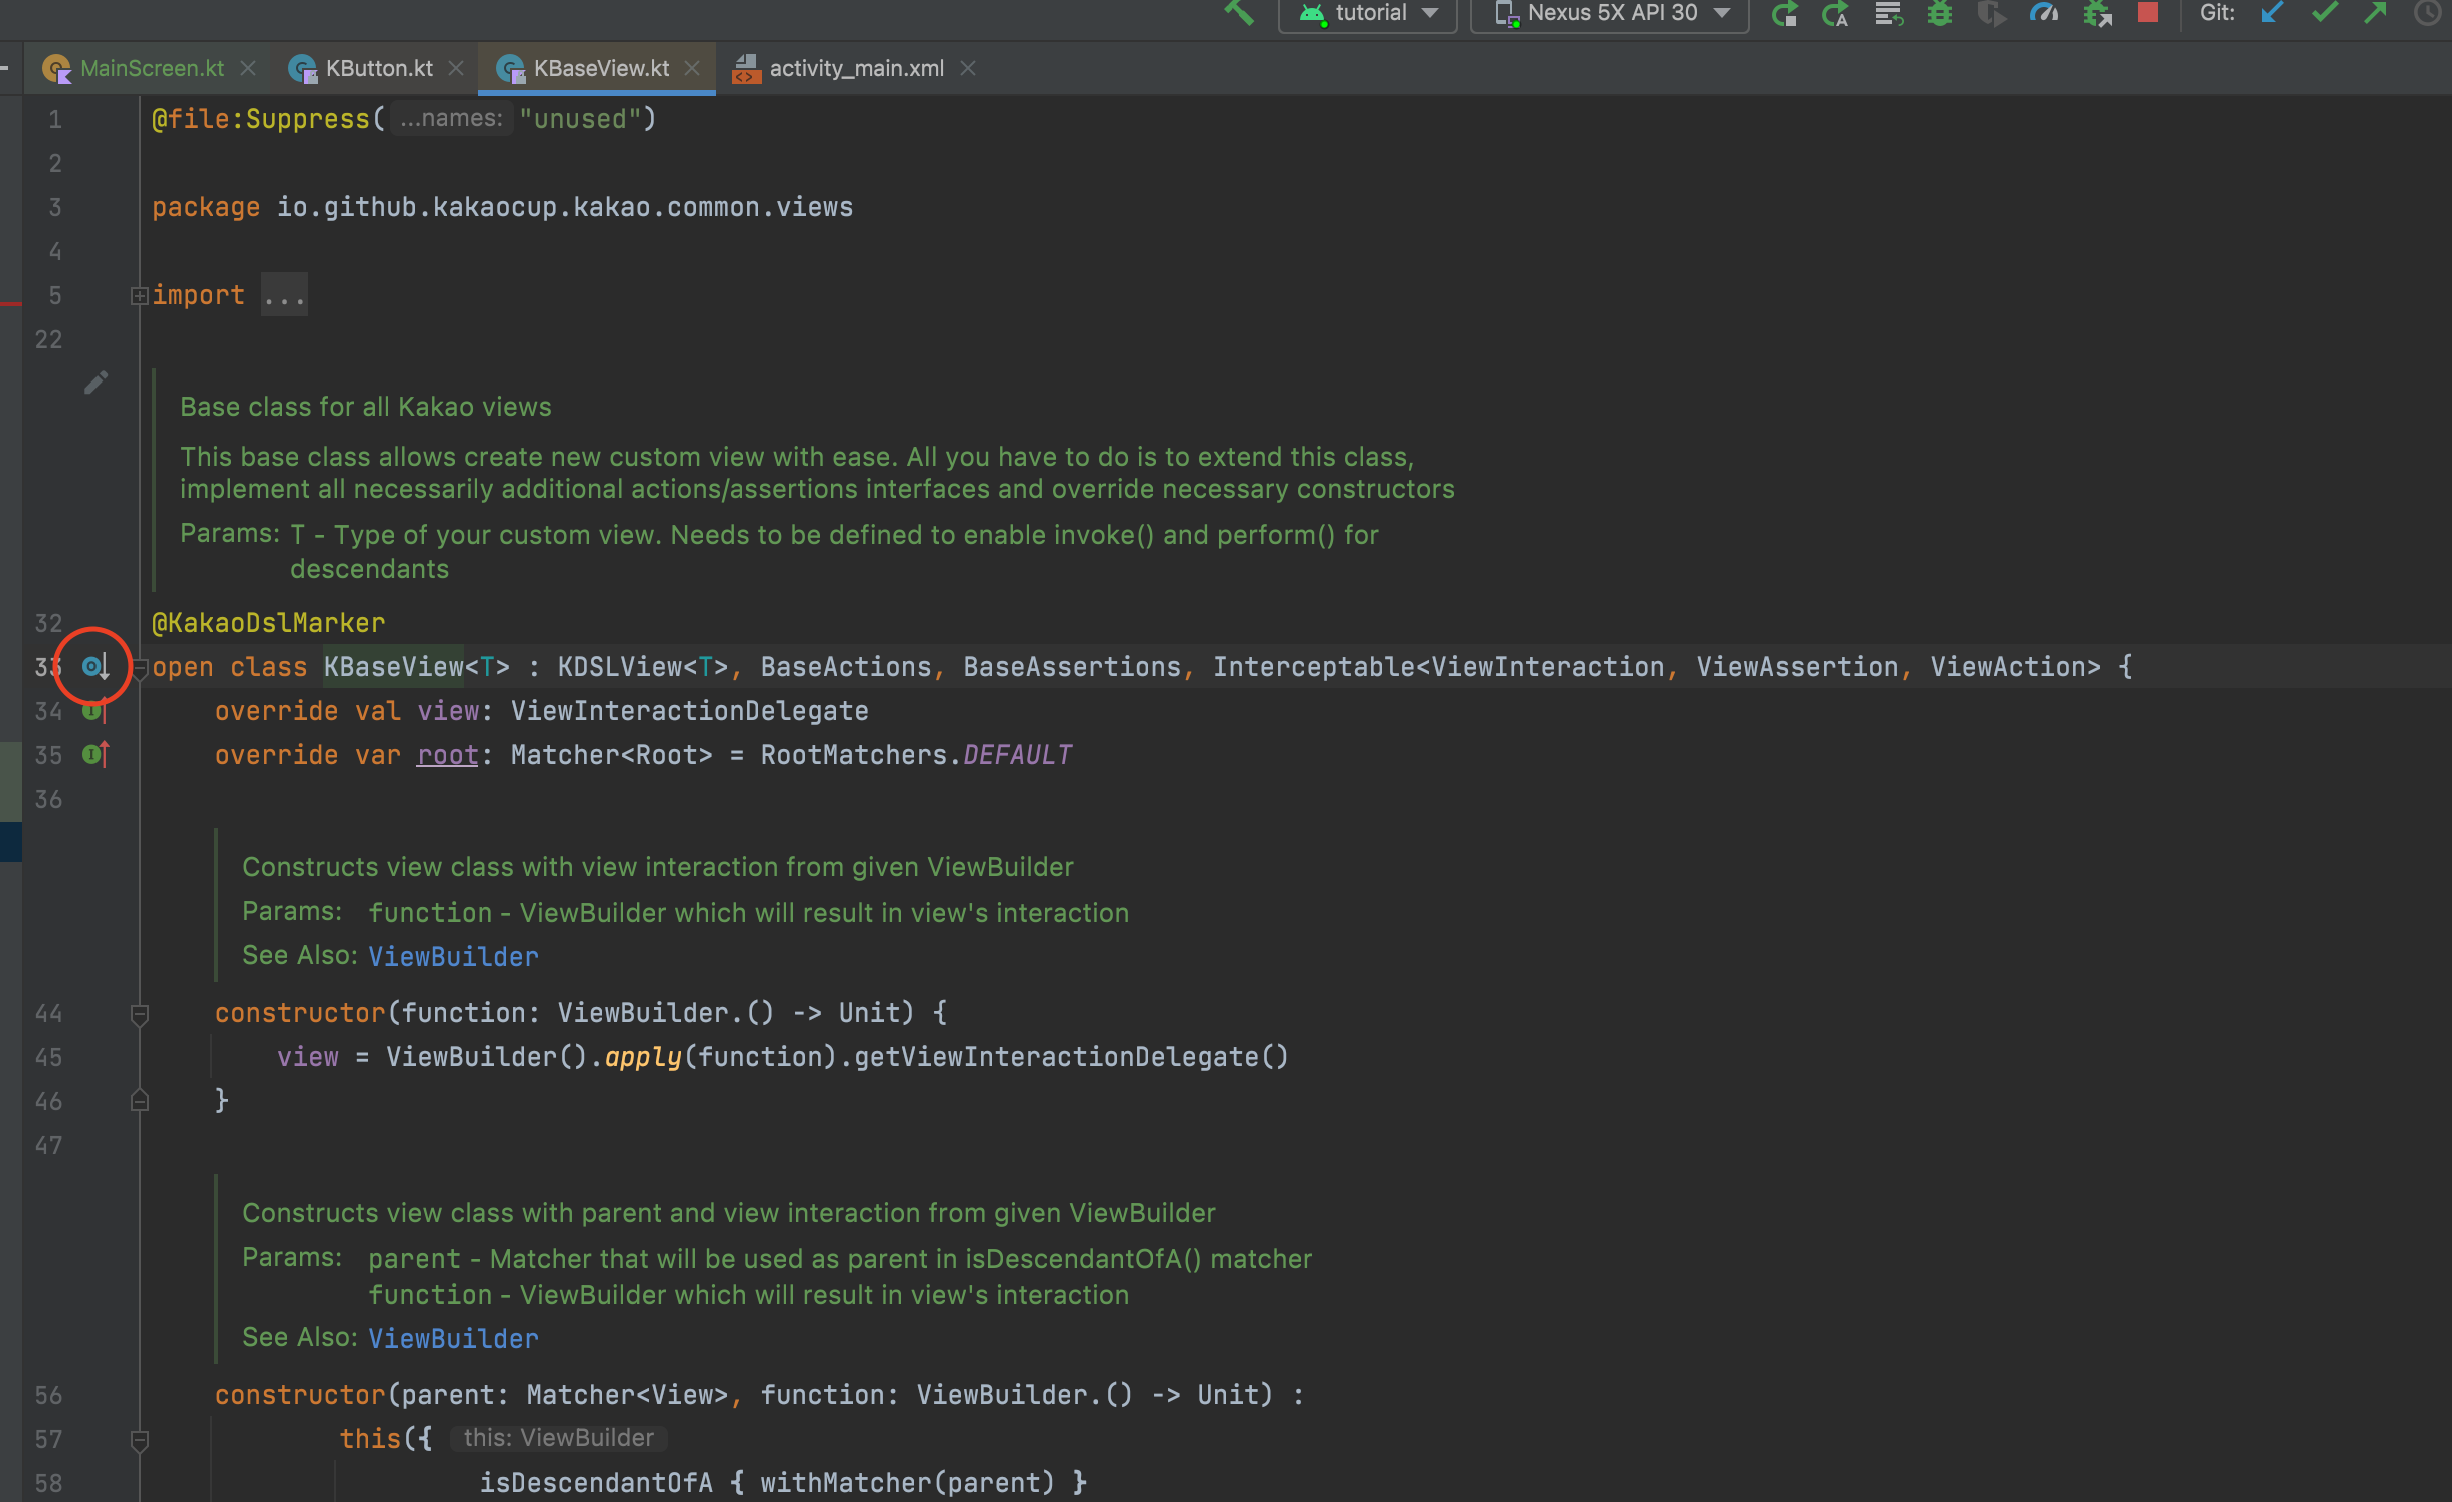
We see that this is a class that inherits from KBaseView and implements the TextViewAssertions interface. We can go to the definition of KBaseView and see all the inheritors of this class, there are quite a lot of them.
Why are they all needed?
The reason is that each element of the user interface can be tested in different ways. For example, in a TextView we can check what text is currently set in it, we can set a new text, while the ProgressBar does not contain any text and it makes no sense to check what text is set in it.
Therefore, depending on which interface element we are testing, we need to choose the correct implementation of KBaseView. Now we are testing a button, so we chose KButton. On the next screen, we will test the title (TextView) and input field (EditText) and select the appropriate KBaseView implementations.
Next, the test should find this button on the screen according to some criterion. In this case, we will search for an element by id, so we use the withId matcher, where we pass the button ID as a parameter, which we found thanks to the Layout Inpector.
In order to specify this id, we used the R.id... syntax, where R is the class with all the resources of the application. Thanks to it, you can find the id of interface elements, lines that are in the project, pictures, etc. When you enter the name of this class, Android Studio should import it automatically, but sometimes this does not happen, then you need to enter this import manually.
import com.kaspersky.kaspresso.tutorial.R
That's it, now we have a model of the main screen and this model contains a button that can be tested. We can start writing the test itself.
Add SimpleActivityTest
In the folder androidTest -> kotlin, in the package we created, add the class SimpleActivityTest.
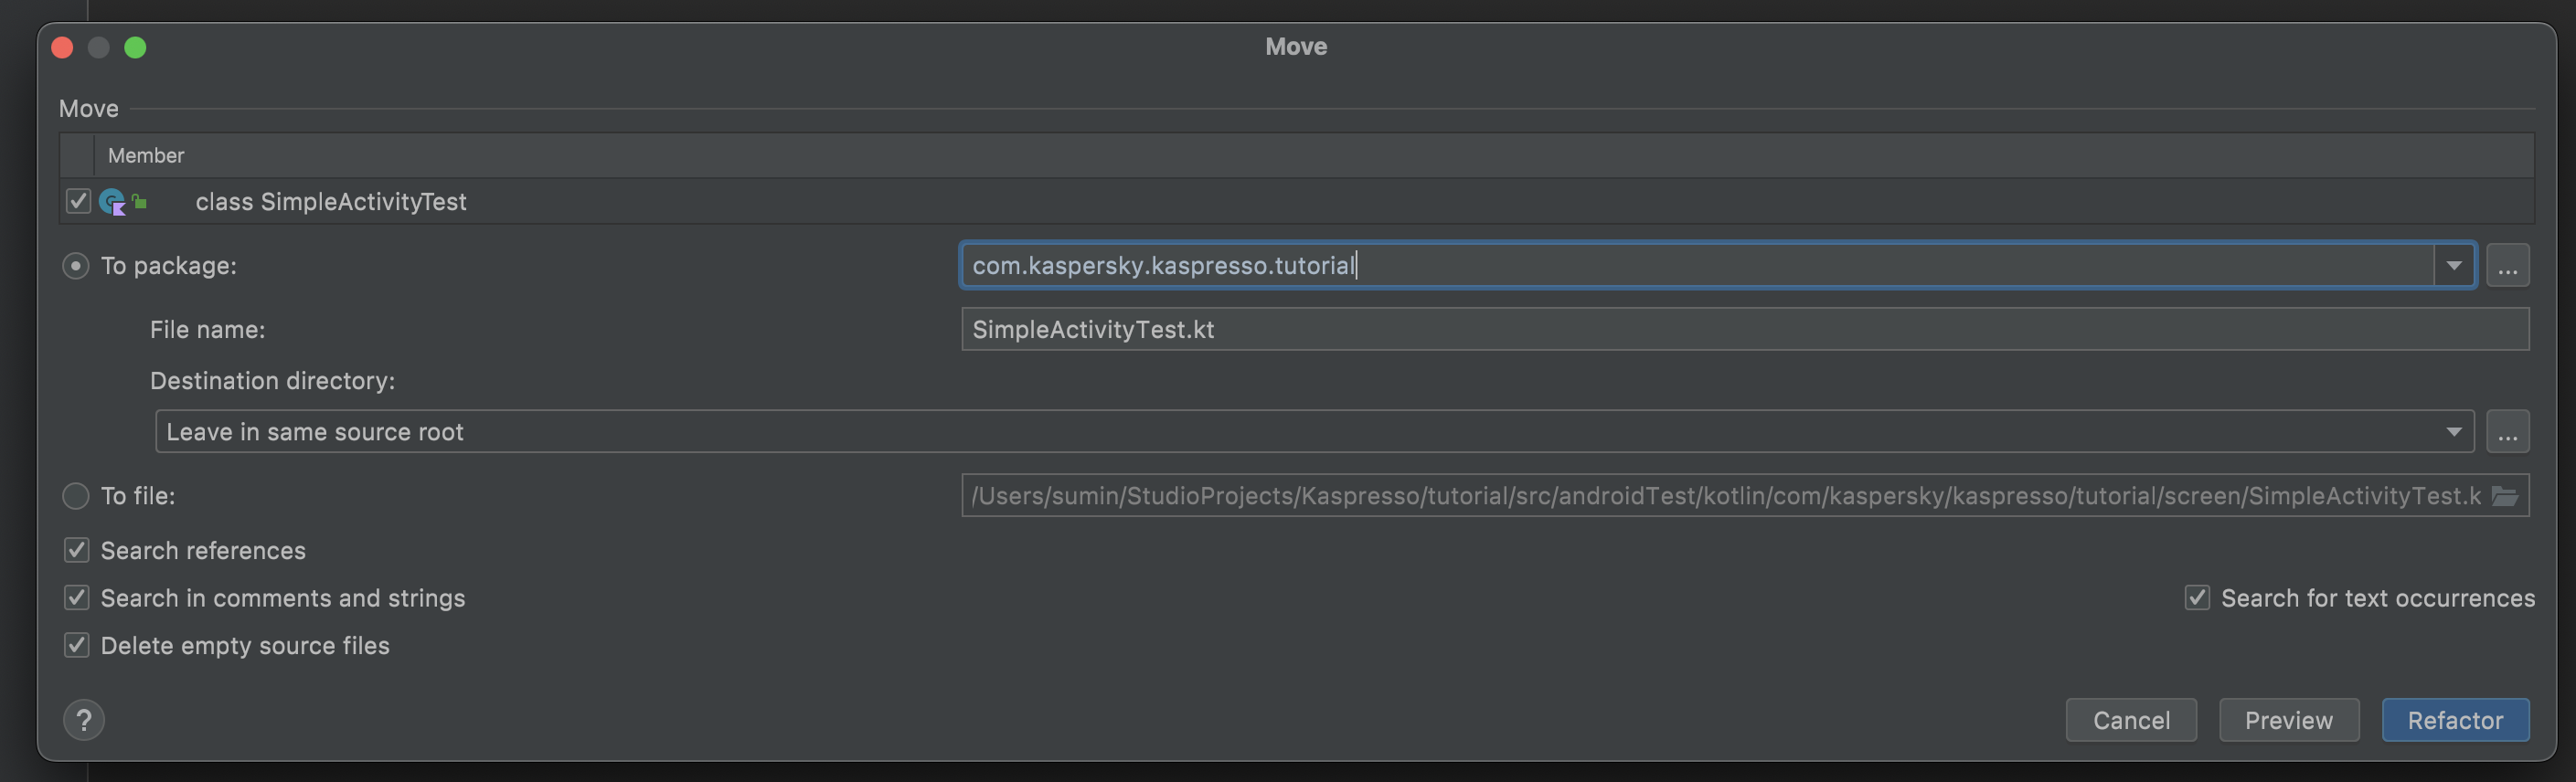
The new class was placed in the screen package, but we would like it to contain only screen models, so we will move the created test to the root of the com.kaspersky.kaspresso.tutorial package. In order to do this, right-click on the class name and select Refactor -> Move
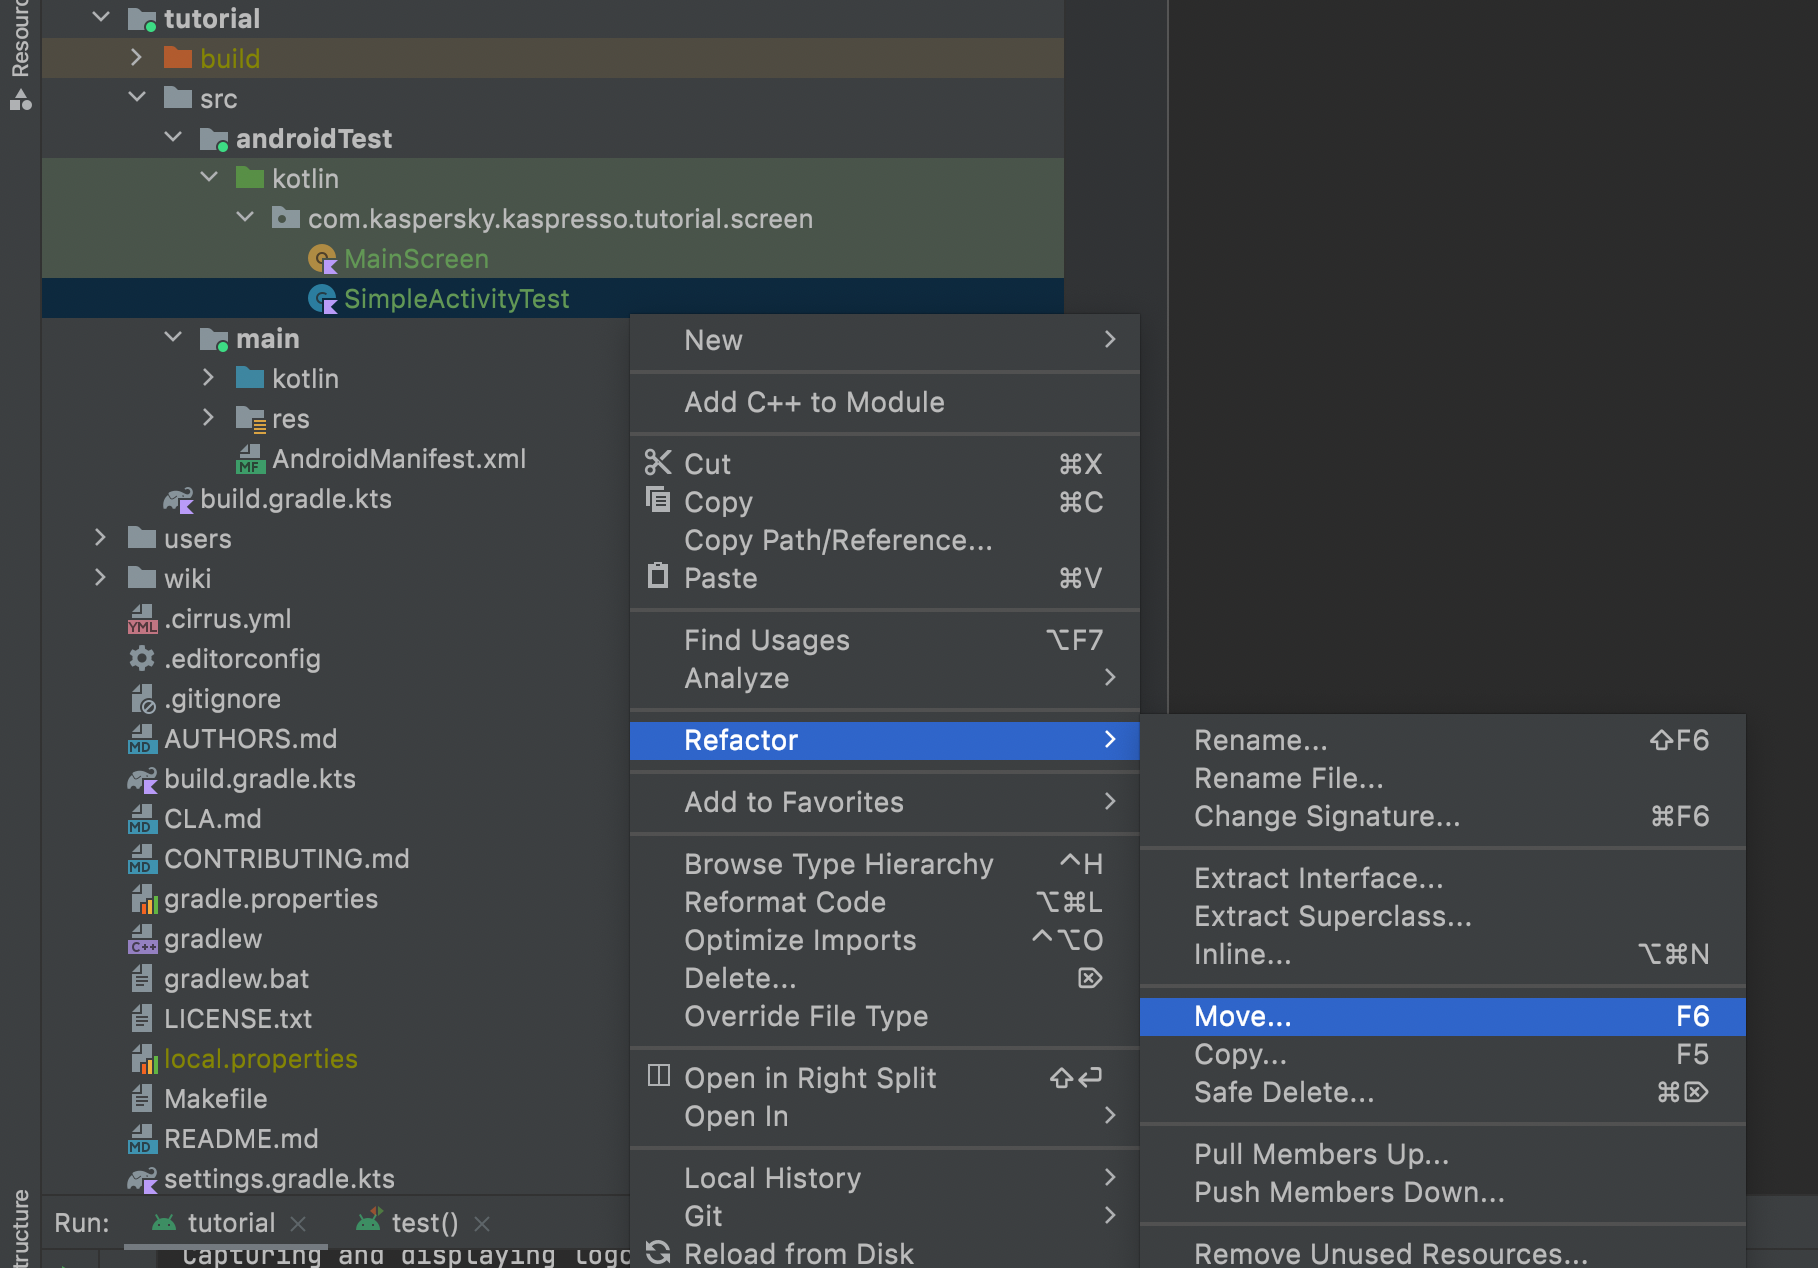
And remove the last part .screen from the package name.
The test class must be inherited from the TestCase class. Pay attention to imports, the TestCase class must be imported from the import com.kaspersky.kaspresso.testcases.api.testcase.TestCase package.
package com.kaspersky.kaspresso.tutorial

import com.kaspersky.kaspresso.testcases.api.testcase.TestCase

class SimpleActivityTest: TestCase() {
}
Then we add the test() method, in which we will check the operation of the application. It can have any name, not necessarily "test", but it needs to be annotated with @Test (import org.junit.Test).
package com.kaspersky.kaspresso.tutorial

import com.kaspersky.kaspresso.testcases.api.testcase.TestCase
import org.junit.Test

class SimpleActivityTest : TestCase() {

    @Test
    fun test() {

    }
}
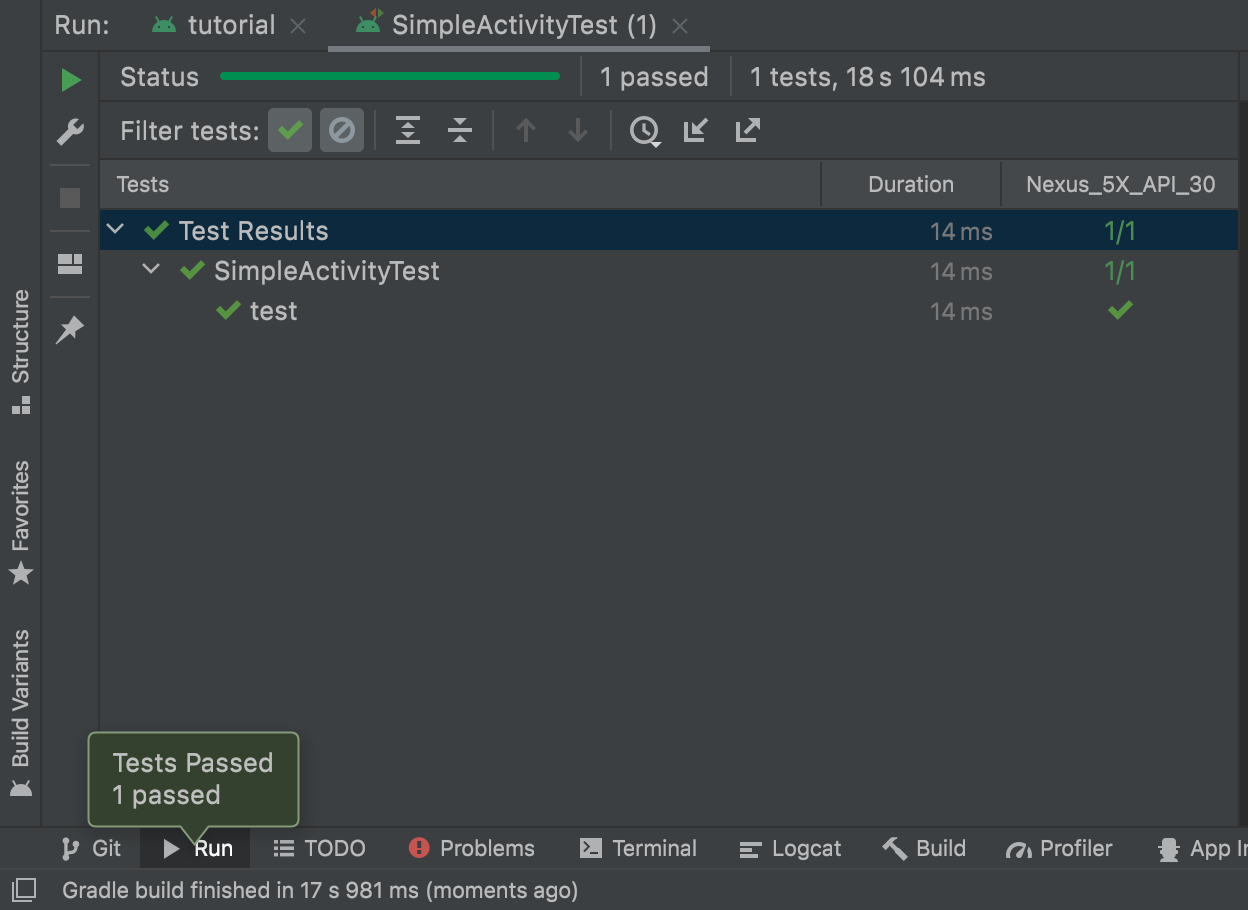
The SimpleActivityTest test can be run. Information on how to run tests in Android Studio can be found in the previous tutorial.
For now this test does nothing, so it succeeds. Let's add logic to it and test the MainScreen.
package com.kaspersky.kaspresso.tutorial

import com.kaspersky.kaspresso.testcases.api.testcase.TestCase
import org.junit.Test
import com.kaspersky.kaspresso.tutorial.screen.MainScreen

class SimpleActivityTest : TestCase() {

    @Test
    fun test() {
        MainScreen {
            simpleActivityButton {
                isVisible()
                isClickable()
            }
        }
    }
}
Inside the test method, we get the MainScreen object, open the curly brackets and refer to the button that we will test, then open the curly brackets again and write all the checks here. Now, thanks to the isVisible() and isClickable() methods, we check that the button is visible and clickable. Let's launch the test. It falls.
The probleem is that Page Object MainScreen refers to MainActivity (this is the activity that the user sees when he launches the application) and, in order for the elements to be displayed on the screen, this activity must be launched before the test is executed. In order for some kind of activity to be launched before the test, you can add the following lines:
    @get:Rule
    val activityRule = activityScenarioRule<MainActivity>()
This test will launch the specified MainActivity activity before running the test and close it after the test runs.
You can read more about activityScenarioRule here.
Then the entire test code will look like this:
package com.kaspersky.kaspresso.tutorial

import androidx.test.ext.junit.rules.activityScenarioRule
import com.kaspersky.kaspresso.testcases.api.testcase.TestCase
import com.kaspersky.kaspresso.tutorial.MainActivity
import org.junit.Rule
import org.junit.Test
import com.kaspersky.kaspresso.tutorial.screen.MainScreen

class SimpleActivityTest : TestCase() {

    @get:Rule
    val activityRule = activityScenarioRule<MainActivity>()

    @Test
    fun test() {
        MainScreen {
            simpleActivityButton {
                isVisible()
                isClickable()
            }
        }
    }
}
Launch it. Everything is fine, our test is successful, and you can see on the device that during the test the activity we need opens and closes after the run.
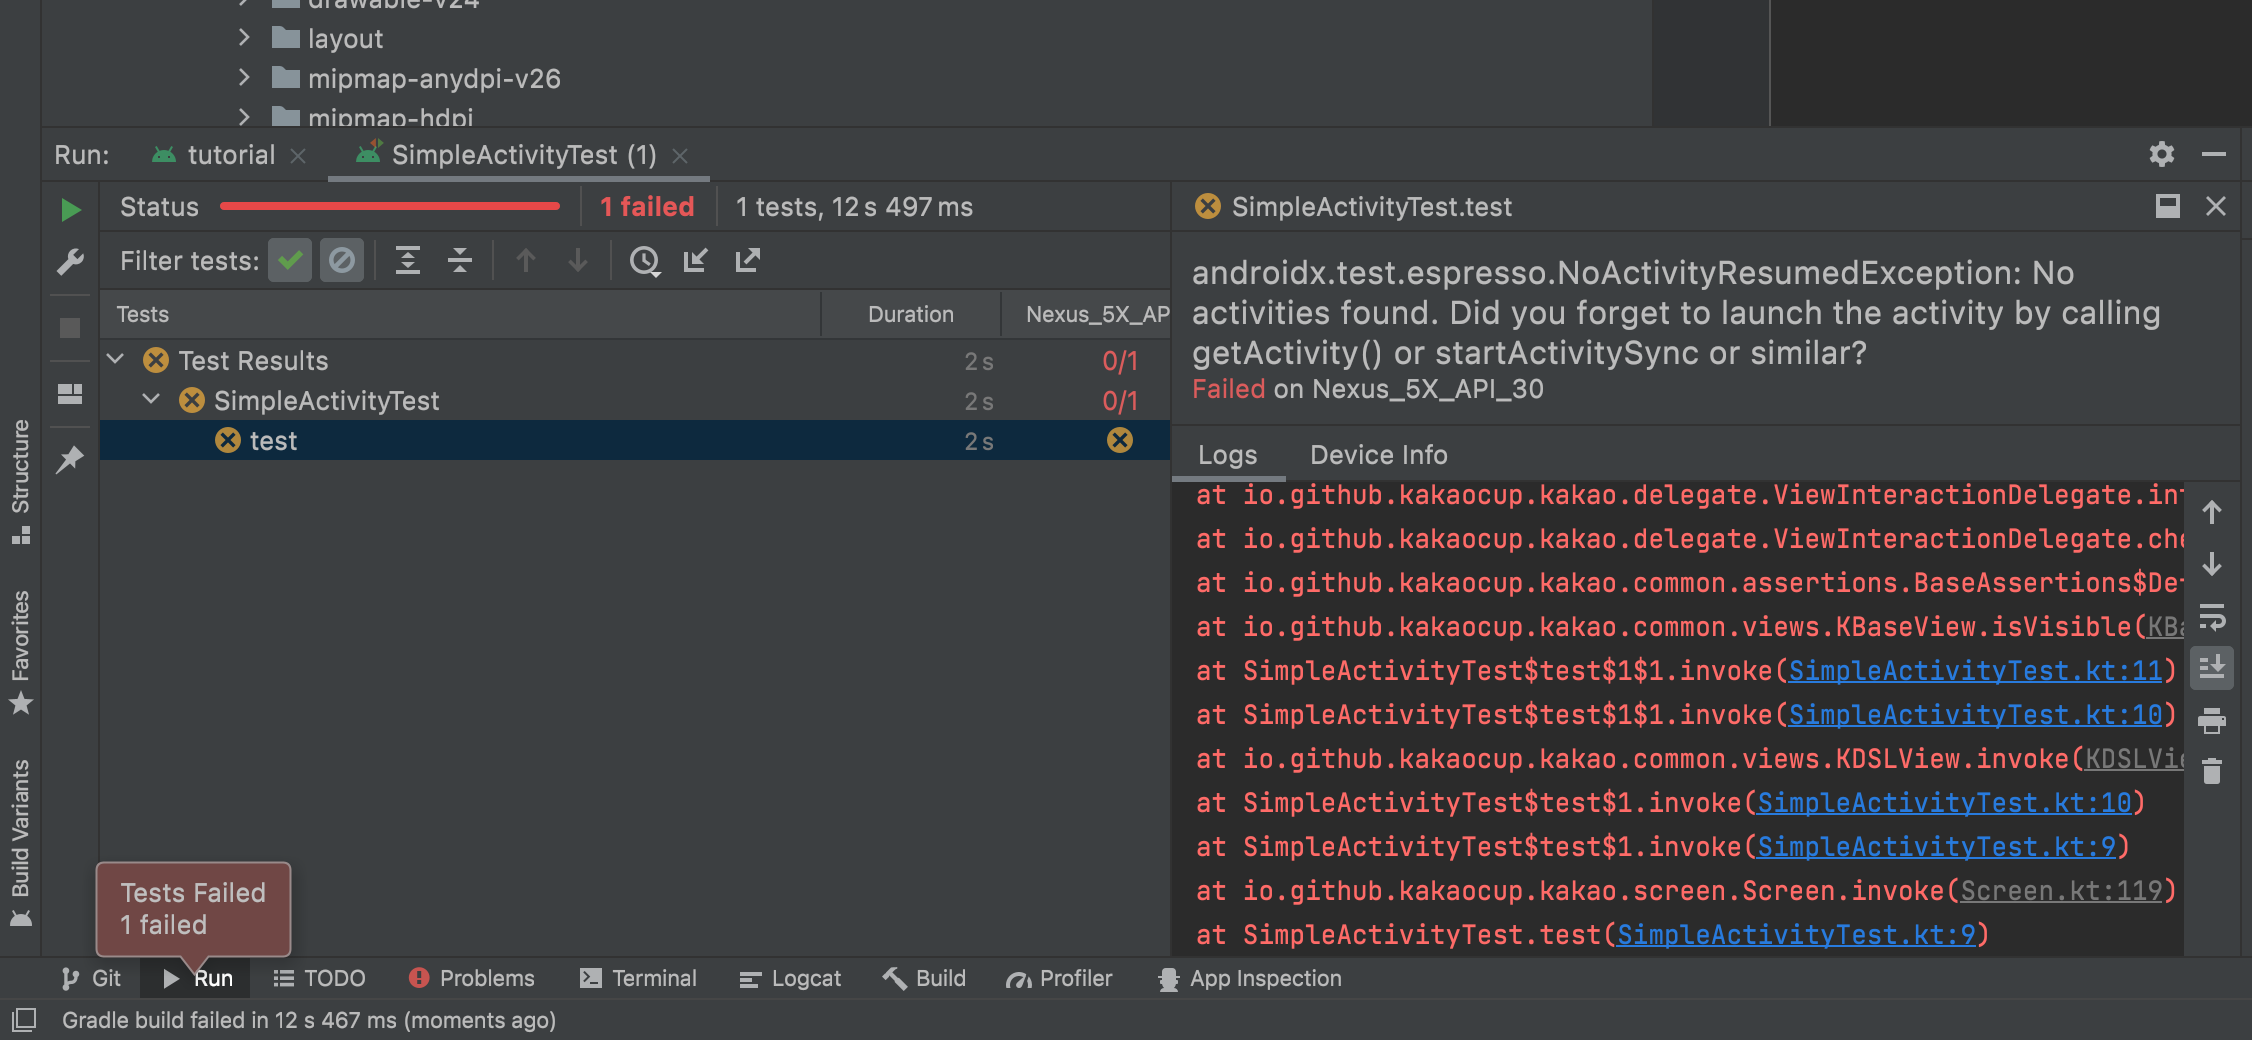
It's good practice when writing tests to make sure that the test not only passes, but also fails if the condition is not met. This way you eliminate the situation when the tests are "green", but in reality, due to some error in the code, the tests were not performed at all. Let's do this by checking that the button contains incorrect text.
class SimpleActivityTest : TestCase() {

    @get:Rule
    val activityRule = activityScenarioRule<MainActivity>()

    @Test
    fun test() {
        MainScreen {
            simpleActivityButton {
                isVisible()
                isClickable()
                containsText("Incorrect text")
            }
        }
    }
}
The test fails, let's change the text to the correct one.
class SimpleActivityTest : TestCase() {

    @get:Rule
    val activityRule = activityScenarioRule<MainActivity>()

    @Test
    fun test() {
        MainScreen {
            simpleActivityButton {
                isVisible()
                isClickable()
                containsText("Simple test")
            }
        }
    }
}
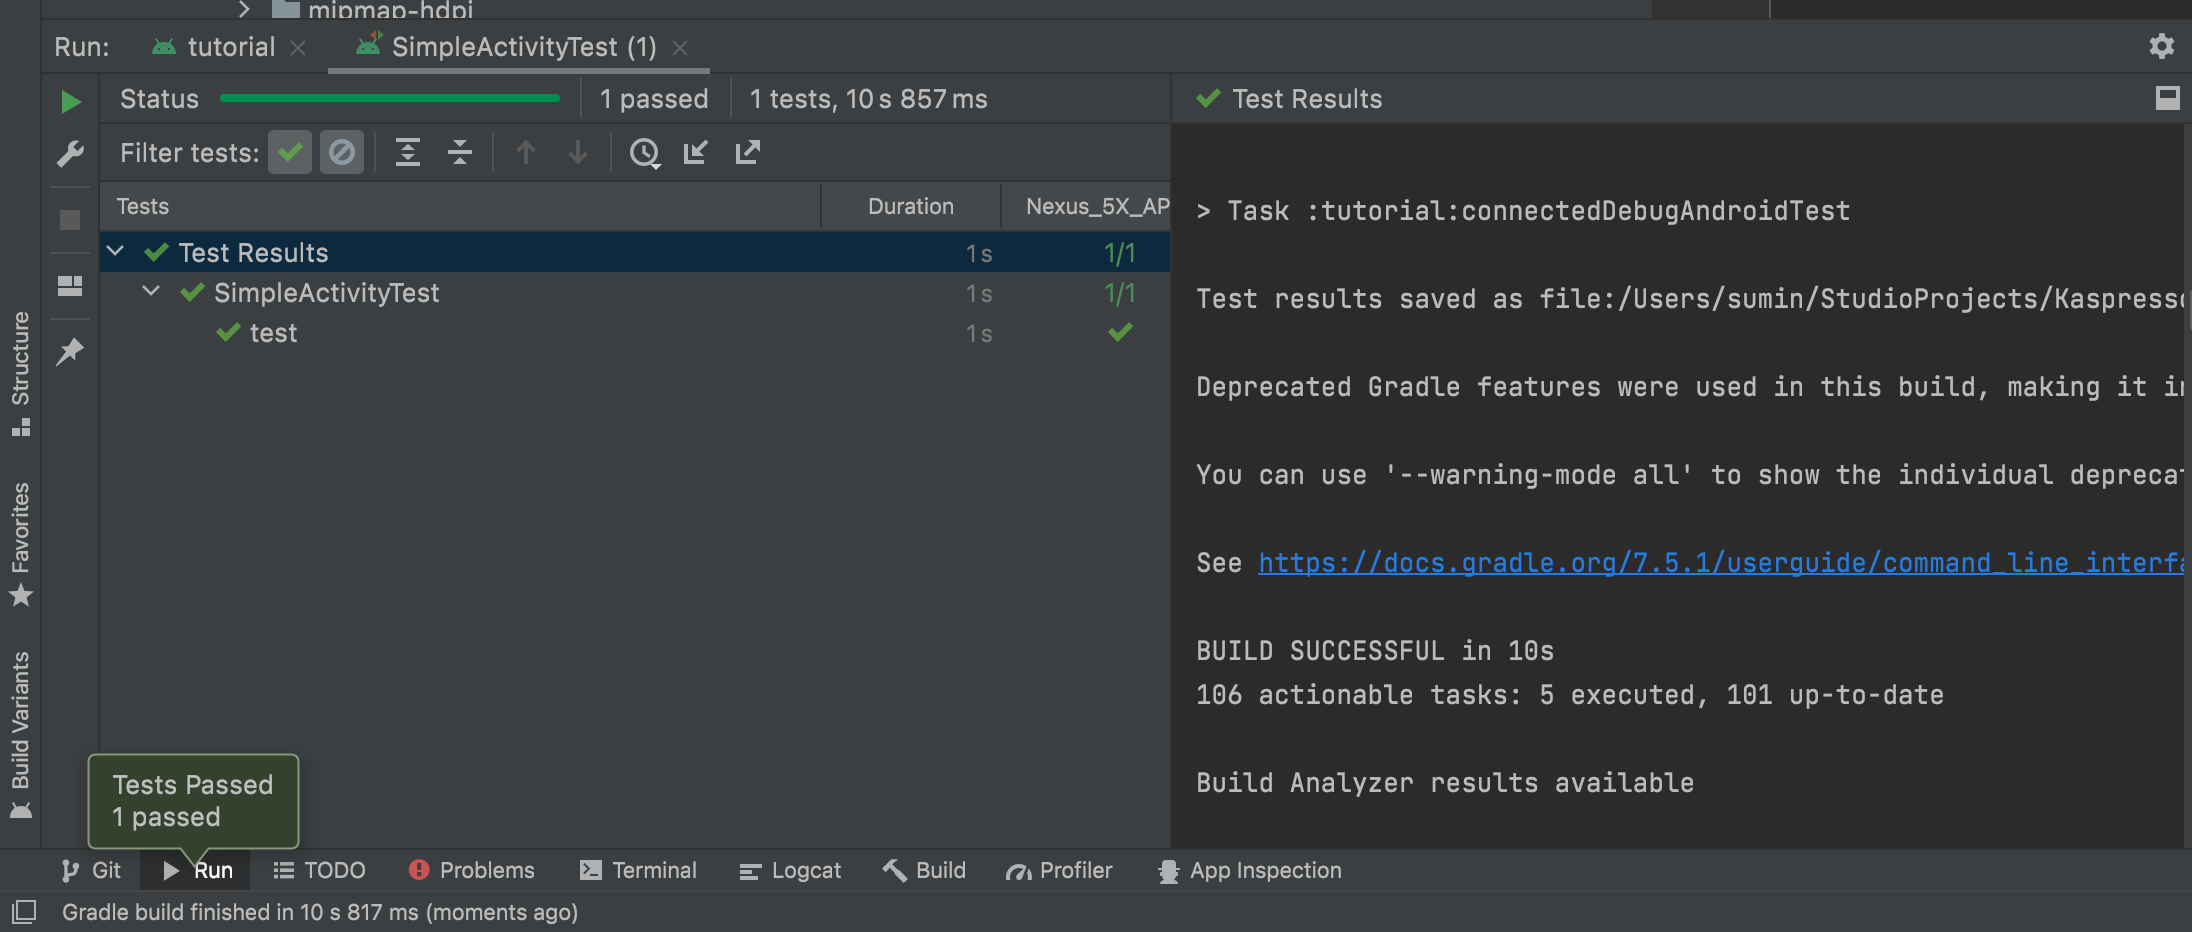
The test is successful.
Now we need to test the SimpleActivity. We do it the same way as MainScreen: first, create a Page Object.
object SimpleActivityScreen : KScreen<SimpleActivityScreen>() {

    override val layoutId: Int? = null
    override val viewClass: Class<*>? = null
}
Then look for id elements through the Layout Inspector:
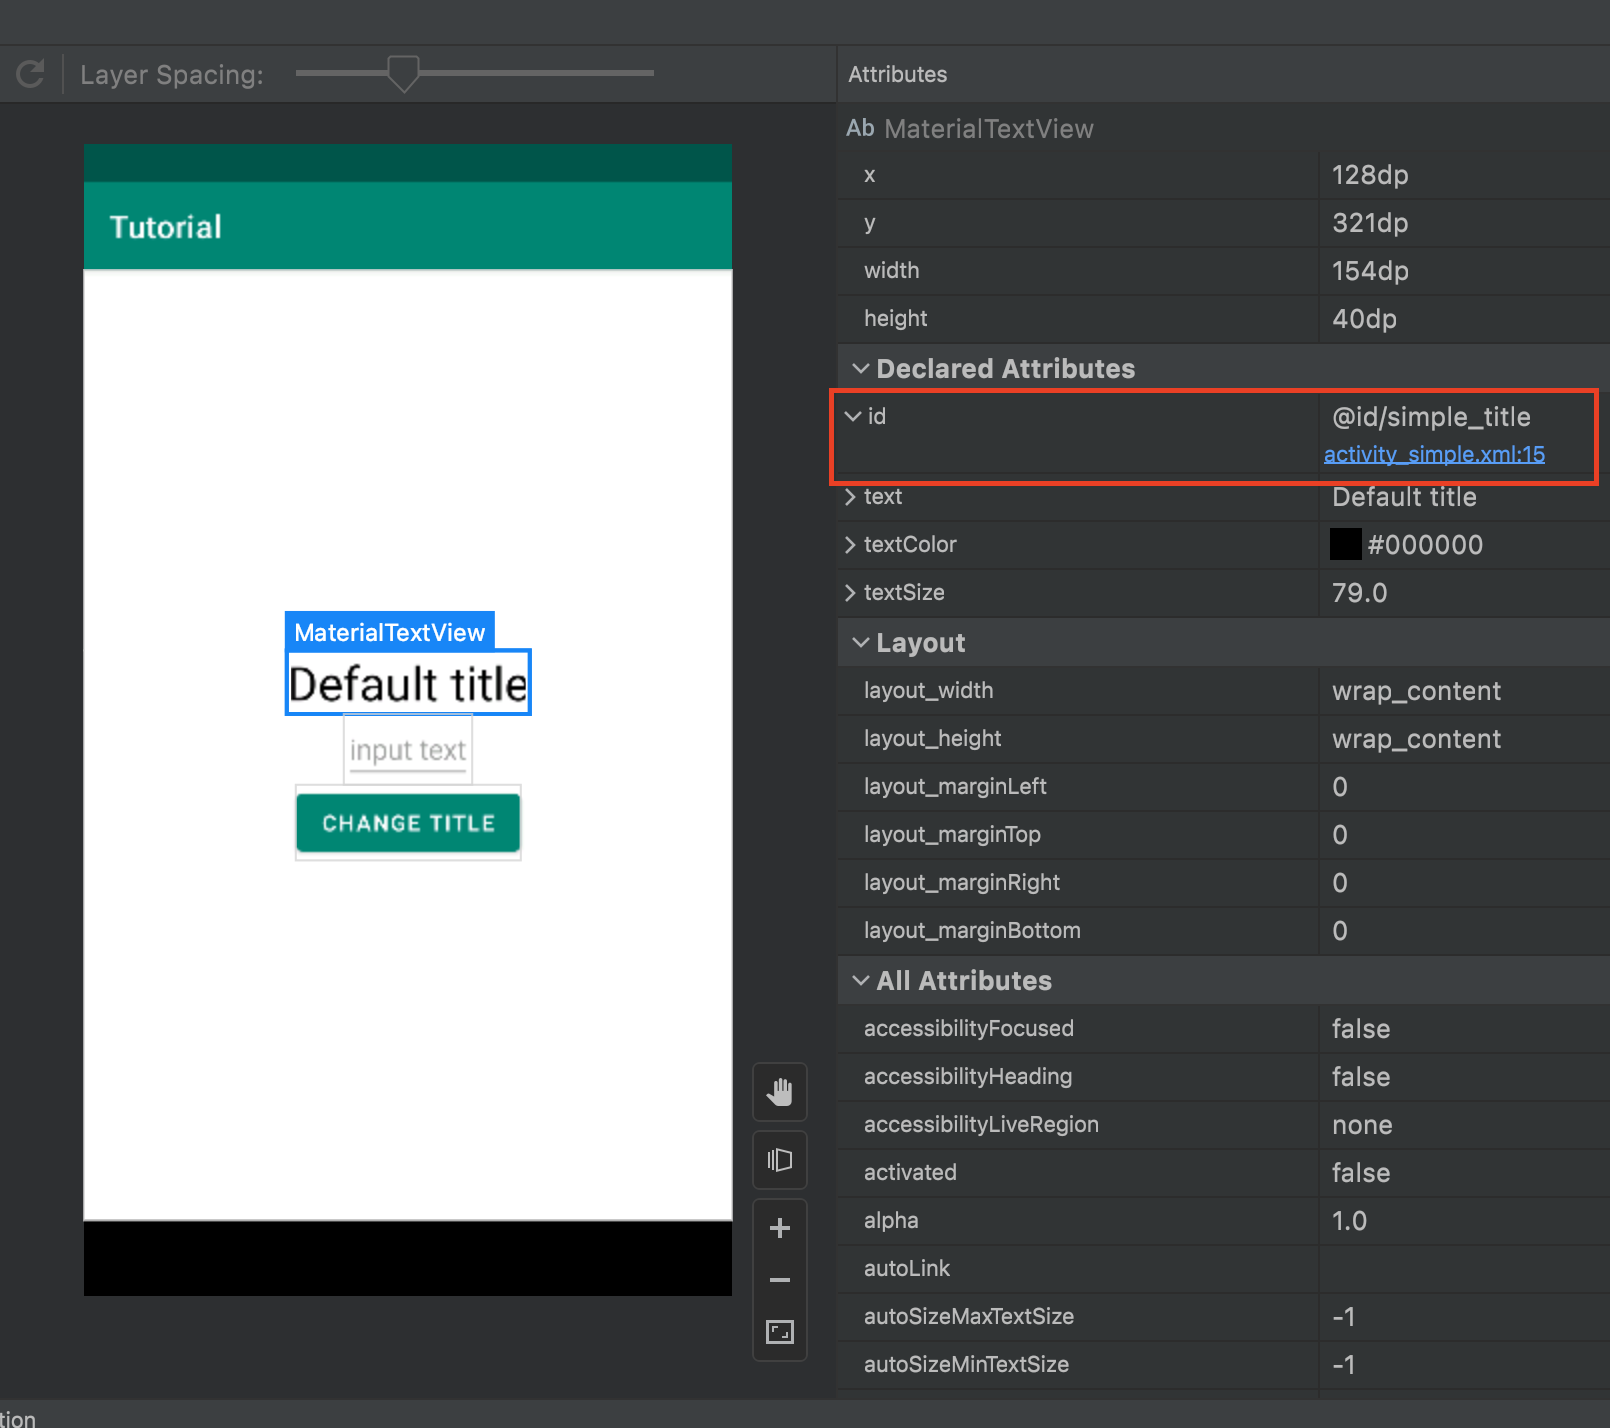
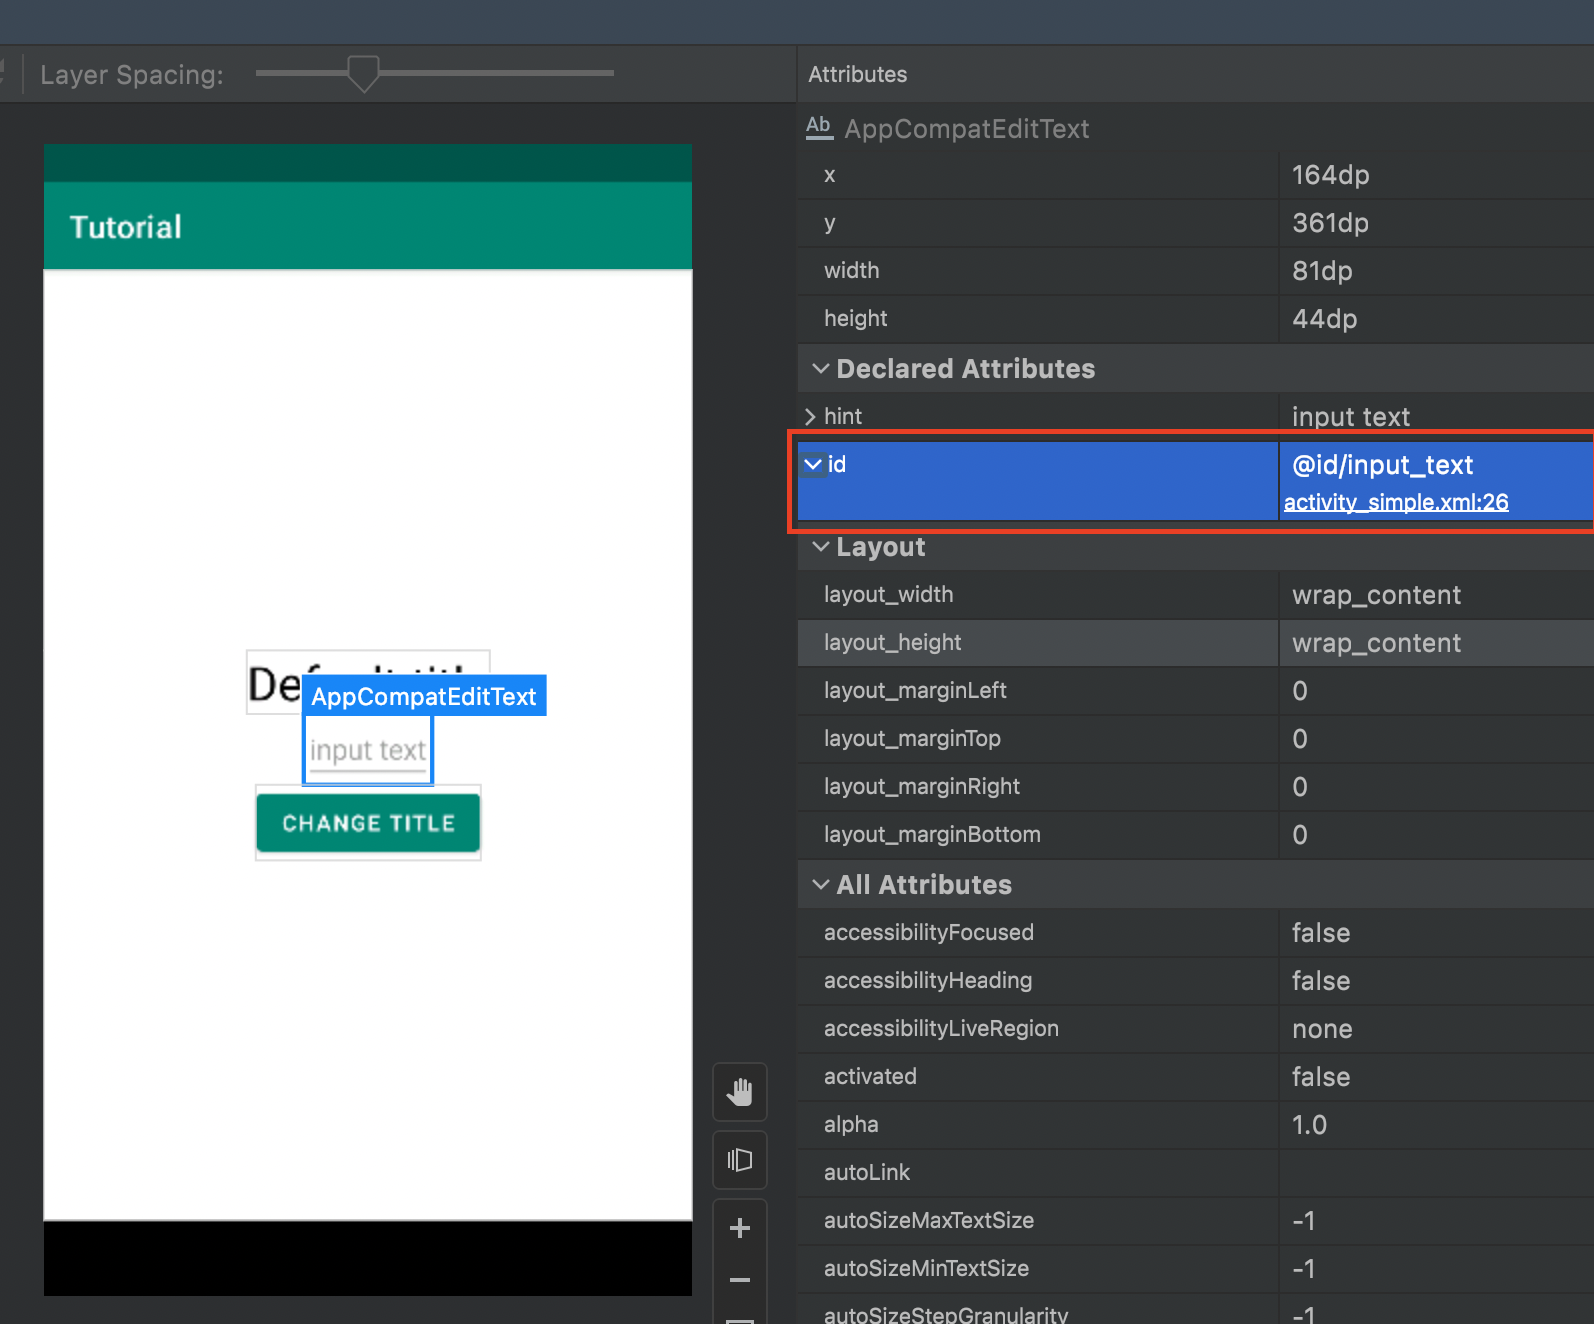
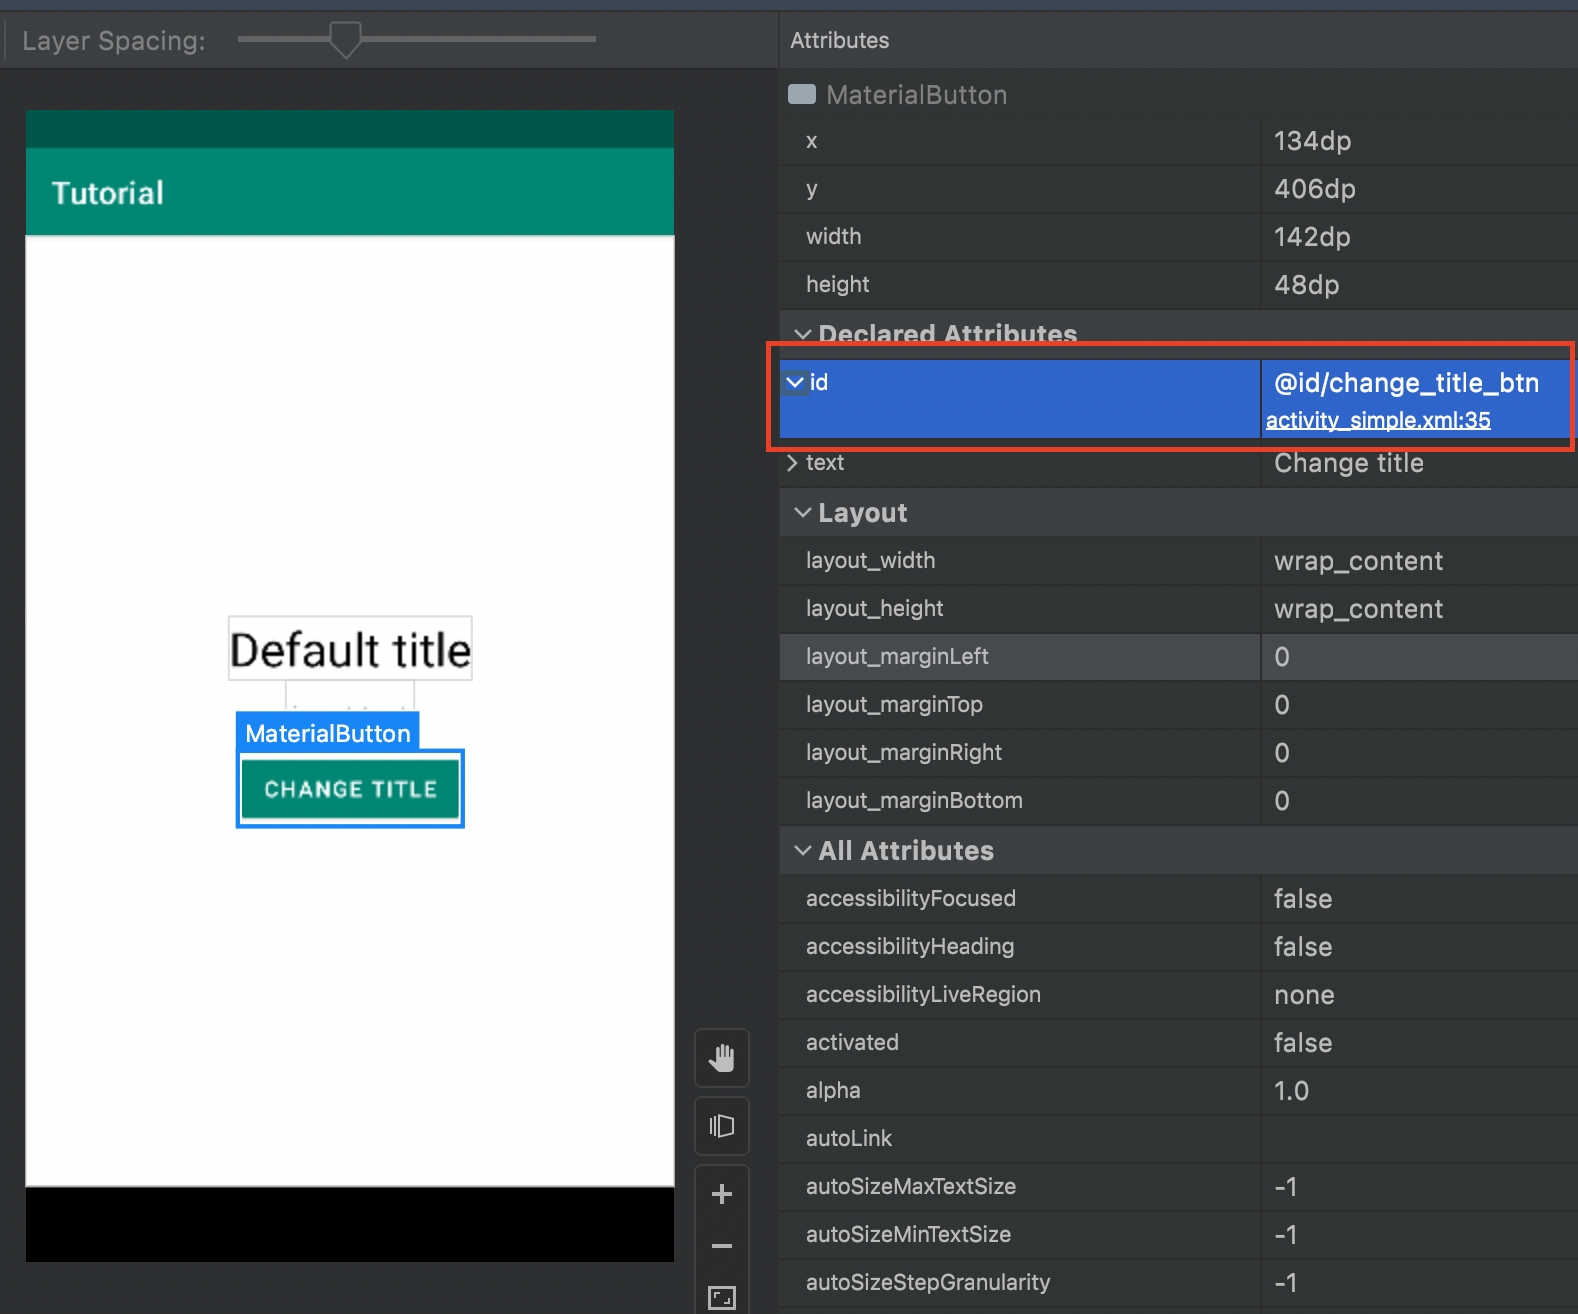
Do not forget to specify correct View types: KTextView for the title, KEditText for the input field, and KButton for the button.
object SimpleActivityScreen : KScreen<SimpleActivityScreen>() {

    override val layoutId: Int? = null
    override val viewClass: Class<*>? = null

    val simpleTitle = KTextView { withId(R.id.simple_title) }
    val inputText = KEditText { withId(R.id.input_text) }
    val changeTitleButton = KButton { withId(R.id.change_title_btn) }
}
And now we can test this screen. In order to go to it, on the main screen you need to click on the "Simple Test" button, so we call click() in the code.
Add checks for this screen:
package com.kaspersky.kaspresso.tutorial

import androidx.test.ext.junit.rules.activityScenarioRule
import com.kaspersky.kaspresso.testcases.api.testcase.TestCase
import com.kaspersky.kaspresso.tutorial.MainActivity
import org.junit.Rule
import org.junit.Test
import com.kaspersky.kaspresso.tutorial.screen.MainScreen
import com.kaspersky.kaspresso.tutorial.screen.SimpleActivityScreen

class SimpleActivityTest : TestCase() {

    @get:Rule
    val activityRule = activityScenarioRule<MainActivity>()

    @Test
    fun test() {
        MainScreen {
            simpleActivityButton {
                isVisible()
                isClickable()
                click()
            }
        }
        SimpleActivityScreen {
            simpleTitle.isVisible()
            changeTitleButton.isClickable()
            simpleTitle.hasText("Default title")
            inputText.replaceText("new title")
            changeTitleButton.click()
            simpleTitle.hasText("new title")

        }
    }
}
Our first test is almost ready. The only change worth making is that we're using the hardcoded "Default title" text here. For now, the test passes successfully, but if the application is suddenly localized into different languages, then when the test is launched with the English locale, the test can pass successfully, but if we run it on a device with the Russian locale, the test will fail.
So instead of hardcoding the string, we'll take it from the application's resources. In the activity's layout, we can see which line was used in this TextView.
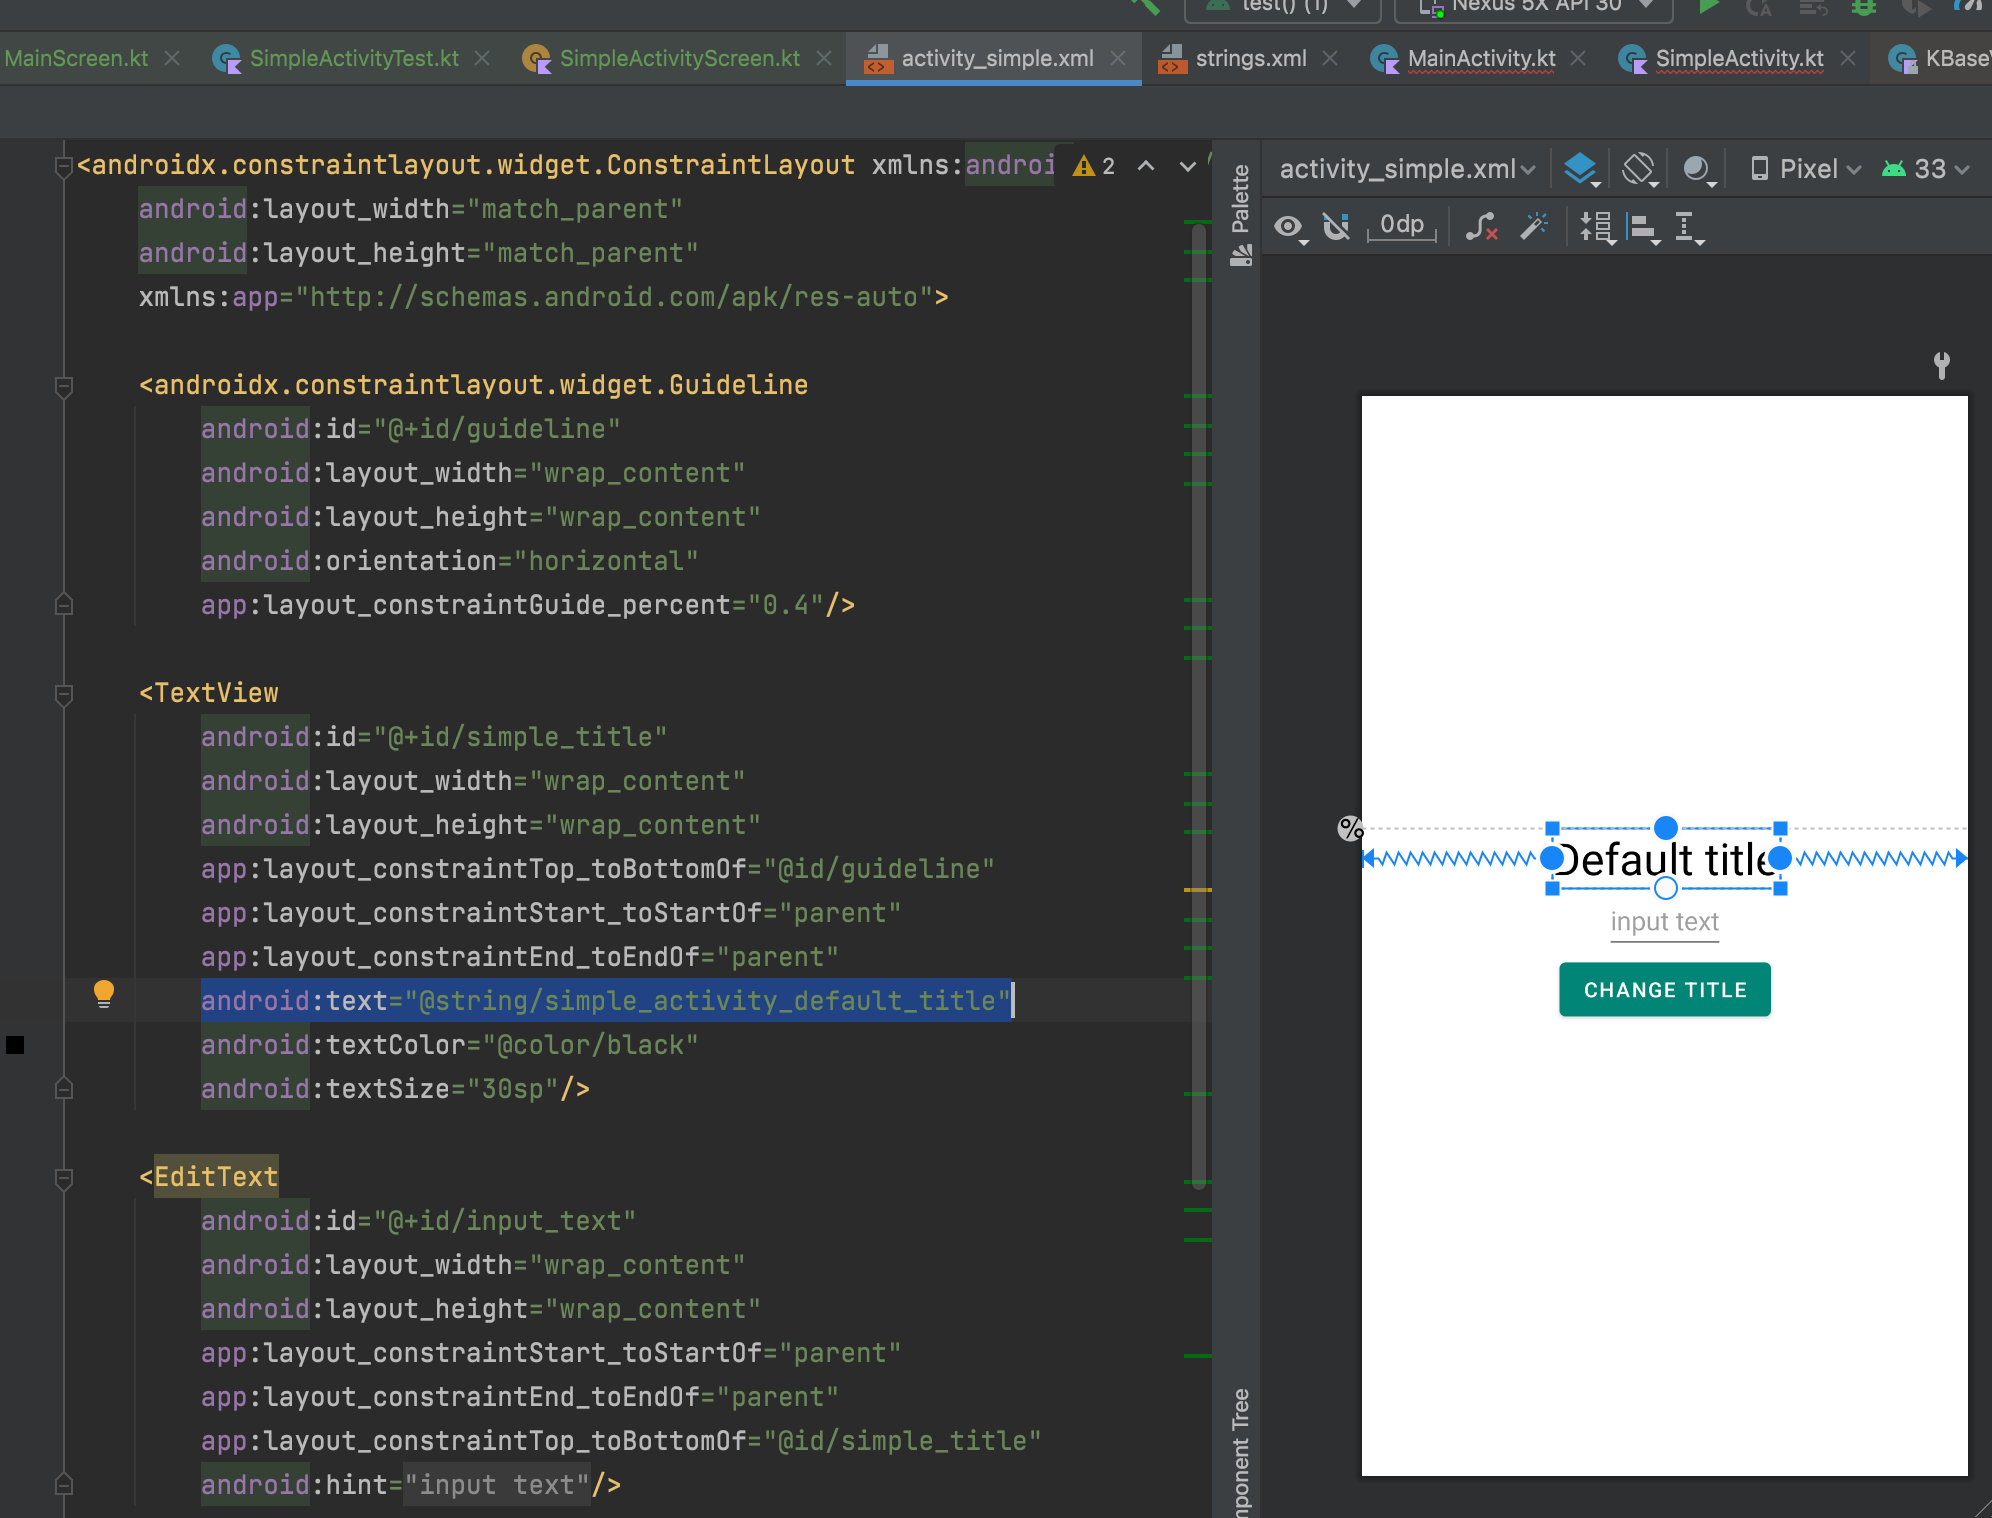
Go to string resources (file values/strings.xml) and copy the string id.
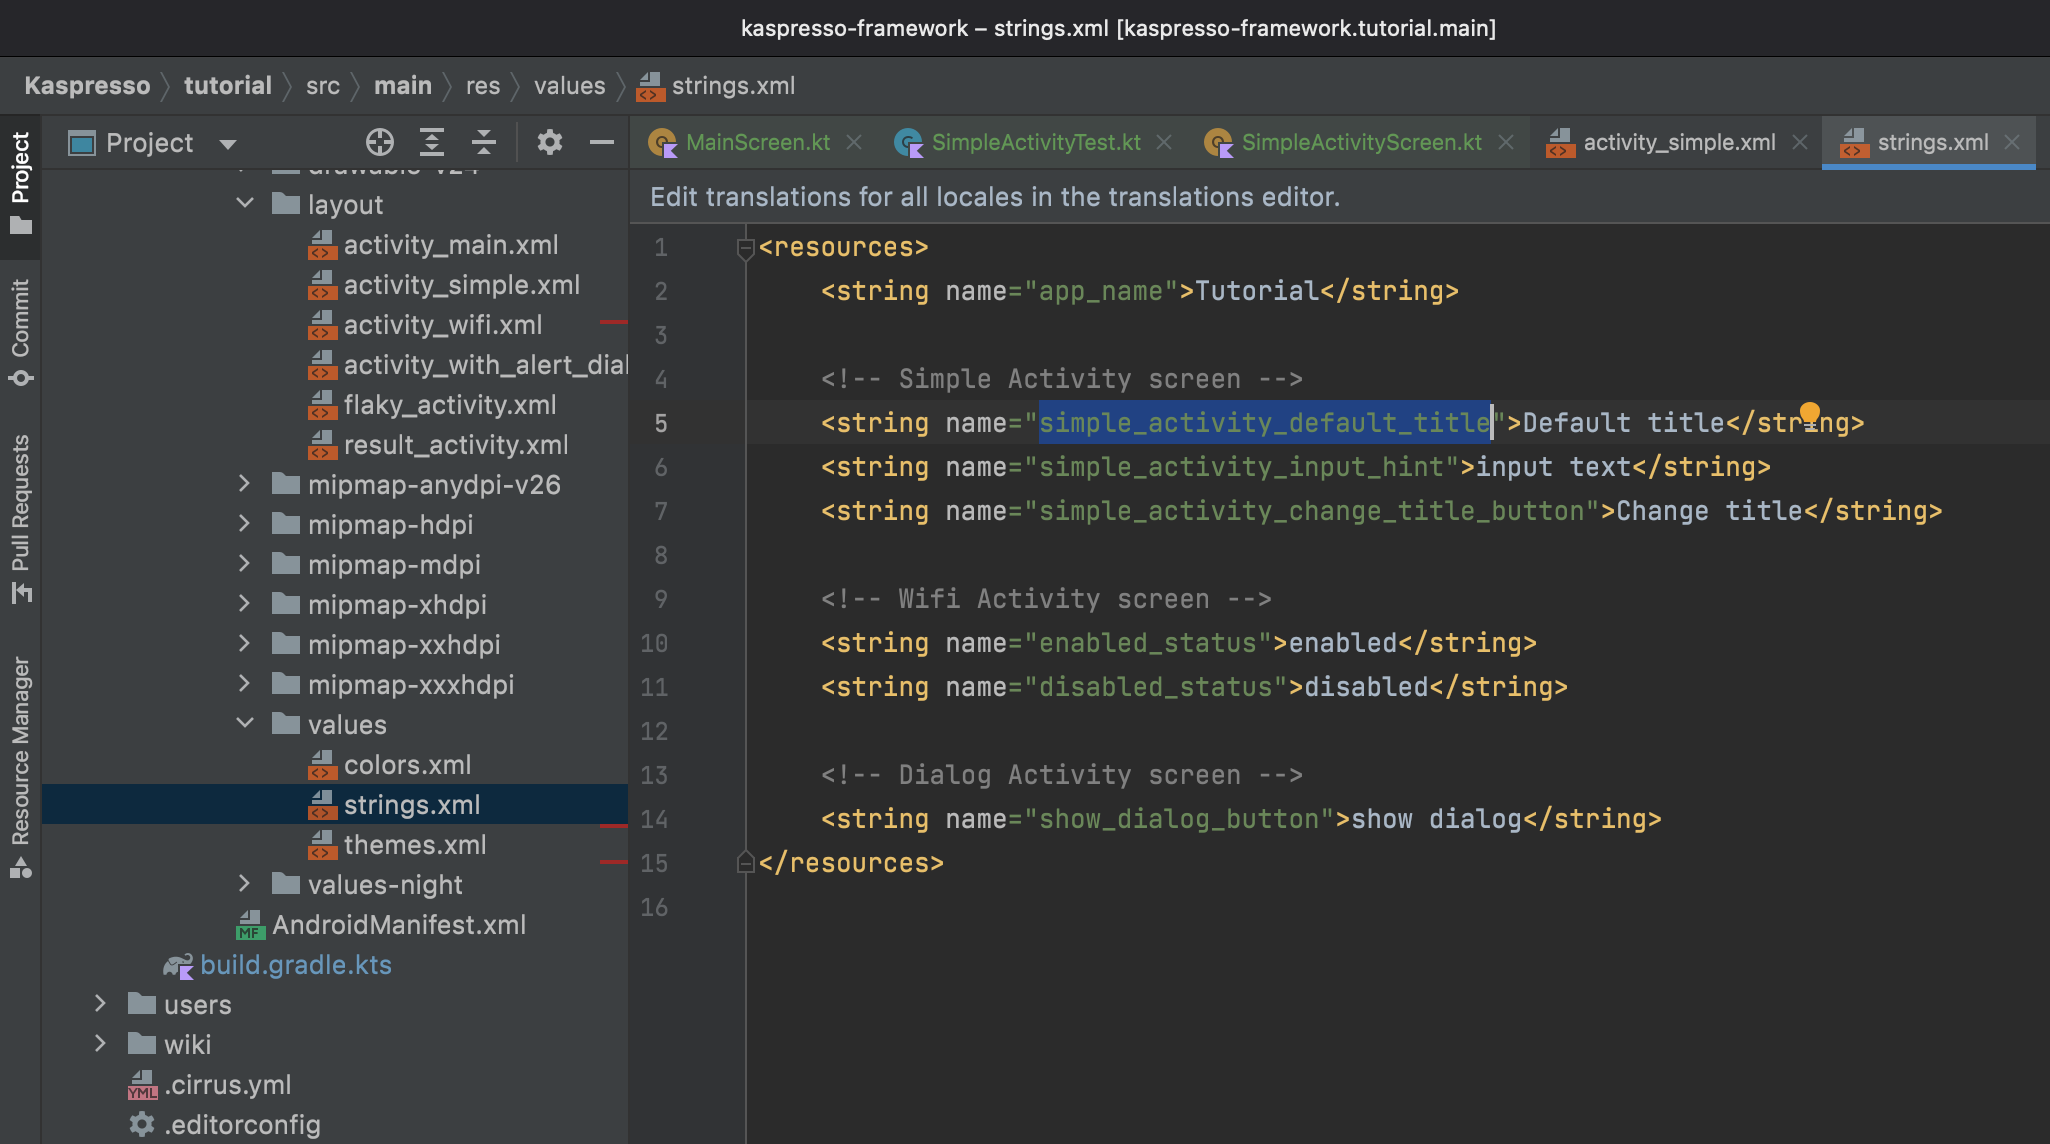
Now in the hasText method, instead of using the "Default title" string, we use its id R.string.simple_activity_default_title.
Don't forget to import the R resource class import com.kaspersky.kaspresso.tutorial.R.
The final test code looks like this:
package com.kaspersky.kaspresso.tutorial

import androidx.test.ext.junit.rules.activityScenarioRule
import com.kaspersky.kaspresso.testcases.api.testcase.TestCase
import com.kaspersky.kaspresso.tutorial.MainActivity
import com.kaspersky.kaspresso.tutorial.R
import org.junit.Rule
import org.junit.Test
import com.kaspersky.kaspresso.tutorial.screen.MainScreen
import com.kaspersky.kaspresso.tutorial.screen.SimpleActivityScreen

class SimpleActivityTest : TestCase() {

    @get:Rule
    val activityRule = activityScenarioRule<MainActivity>()

    @Test
    fun test() {
        MainScreen {
            simpleActivityButton {
                isVisible()
                isClickable()
                click()
            }
        }
        SimpleActivityScreen {
            simpleTitle.isVisible()
            changeTitleButton.isClickable()
            simpleTitle.hasText(R.string.simple_activity_default_title)
            inputText.replaceText("new title")
            changeTitleButton.click()
            simpleTitle.hasText("new title")

        }
    }
}
Summary
In this tutorial, we have written our first Kaspresso test. In practice, we got acquainted with the PageObject approach. We learned how to get interface element IDs using the Layout inspector.